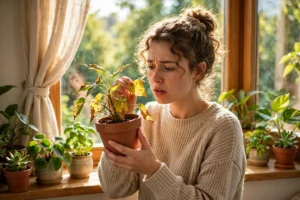
How to revive a dying plant is a diagnostic rescue process that matches each symptom to its cause before any fix begins. Check the roots and stems first, correct water, light, and pests next, then trim dead growth and wait for new leaves. A plant with firm roots or green stem tissue still has a strong chance of recovery.
Key Takeaways
- A plant is still alive if any stem shows moist green tissue under the bark or any roots feel firm and look white or tan.
- Root rot from overwatering is a leading cause of houseplant decline, so check the roots before adding more water.
- Yellow, soft growth on a plant in wet soil needs less water, while crispy, curled growth on a plant in dry soil needs more.
- Orchids, roses, and palms need their own rescue steps because their roots, light needs, and growing points differ.
- A struggling plant needs no fertilizer until it produces new growth.
- A local Cooperative Extension office can diagnose plant problems that home fixes fail to solve.
Can You Bring a Dead Plant Back to Life?
No, a plant with dead roots and no living stem tissue cannot come back, but many plants that look dead are still alive below the surface. Dormant, drought-stressed, or frost-damaged plants often hold green cambium or firm roots that regrow once growing conditions improve.
Anyone asking “can you bring a plant back to life” needs two quick tests before spending money on soil, pots, or sprays. The scratch test checks stems. The root check covers soft-stemmed houseplants.
Cambium is the thin layer of living tissue directly under the bark that carries water and nutrients through the stem. Green, moist cambium means that part of the plant is alive.
The Scratch Test for Stems and Woody Plants
The scratch test reveals living tissue by scraping a small strip of bark to expose the cambium underneath. Moist, bright green tissue means that section of the stem is alive. Dry, brown, or tan tissue means that section is dead, so repeat the test lower on the same stem.
- Pick a stem or cane about halfway up the plant.
- Scrape a strip about 1/2 inch (1.3 cm) long with a fingernail or a clean pocketknife.
- Look for moist green tissue directly under the bark.
- Move down 2 to 3 inches (5 to 8 cm) and repeat if the tissue is brown.
- Test near the soil line last, because roots and lower stems often survive after the top dies.
Green tissue at the base means the plant can regrow from that point. Cut the dead upper growth back to just above the living section.
A bend test confirms the result on thin twigs. A live twig bends without breaking, while a dead twig snaps cleanly and shows a dry center.
The Root Check for Houseplants
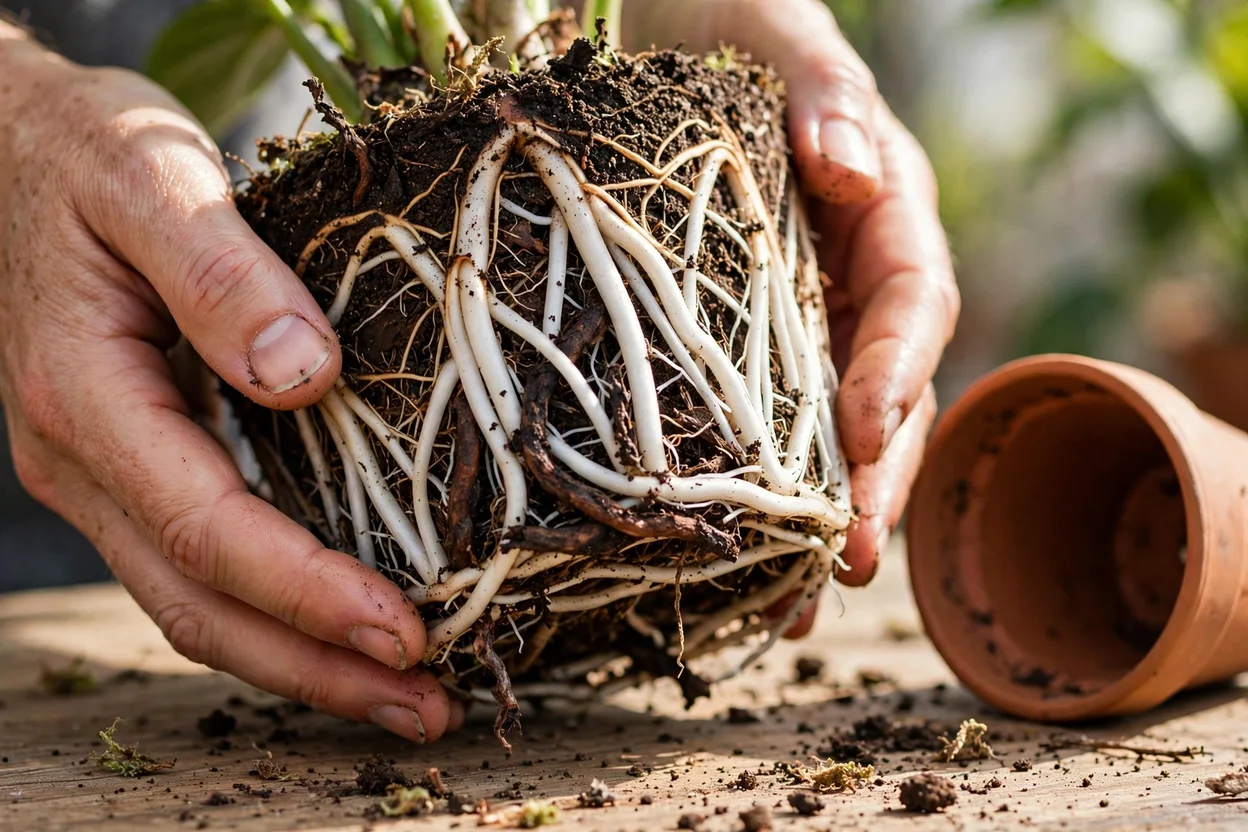
The root check shows whether a soft-stemmed houseplant can recover by revealing root color and texture directly. Firm white, tan, or light-colored roots mean the plant is alive. Black or brown, mushy roots that smell sour signal root rot, and roots that slide apart under light pressure are dead.
- Tip the pot sideways and support the base of the stems with one hand.
- Slide the root ball out, tapping the pot rim if it sticks.
- Loosen the outer soil to expose the roots.
- Squeeze a few roots gently between two fingers.
- Sniff the soil for a sour or rotten smell.
This table compares healthy roots with damaged roots so each condition can be identified on sight.
| Root Condition | Color | Texture | Next Step |
|---|---|---|---|
| Healthy | White, tan, or light green | Firm and springy | Return to pot |
| Root rot | Brown or black | Mushy or slimy | Trim and repot |
| Dried out | Tan or gray | Brittle and wiry | Soak and monitor |
| Root bound | White or tan | Circling and packed tight | Repot one size up |
How to Tell If a Plant Is Dead or Dormant
A dormant plant keeps living cambium, firm roots, and plump buds, while a dead plant fails all three checks. Dormancy is a seasonal rest period, usually in fall and winter for temperate plants, when growth stops and some species drop leaves or die back to the soil.
This table compares the signs of a dormant plant with the signs of a dead plant.
| Sign | Dormant Plant | Dead Plant |
|---|---|---|
| Scratch test | Green, moist tissue | Brown, dry tissue |
| Buds | Plump and firm | Shriveled or absent |
| Roots | Firm and light-colored | Mushy or brittle |
| Twigs | Bend without snapping | Snap cleanly |
| Timing | Matches a seasonal rest | Any season |
Some plants rest in summer instead. Spring bulbs such as tulips and daffodils die back after blooming and return the next spring.
Wait until late spring before judging an outdoor shrub after a hard winter. Many cold-damaged shrubs leaf out late from lower stems or roots.
Signs of a Dying Plant and What Causes Them
The most common signs of a dying plant are yellowing leaves, drooping leaves, brown leaf tips, mushy stems, and sudden leaf drop, and each symptom points to a specific cause. Yellow, soft growth usually means too much water, while crispy, curled growth usually means too little.
The first answer to “how do you revive a dying plant” is a correct diagnosis, because the wrong fix speeds up decline. Watering a plant with root rot drowns it faster.
Check soil moisture before reading any symptom. Push a finger 1 to 2 inches (2.5 to 5 cm) into the potting mix to feel whether it is wet, damp, or dry.
This table compares common symptoms with their likely causes and the first fix for each.
| Symptom | Likely Cause | First Fix |
|---|---|---|
| Yellowing lower leaves, wet soil | Overwatering or root rot | Stop watering and check roots |
| Yellow new leaves, green veins | Chlorosis from iron or pH problems | Test soil and adjust feeding |
| Drooping leaves, dry soil | Underwatering | Bottom water thoroughly |
| Drooping leaves, wet soil | Root rot | Trim rotten roots and repot |
| Brown, crispy leaf tips | Low humidity or salt buildup | Raise humidity and flush soil |
| Mushy stem at soil line | Stem or crown rot | Root healthy cuttings |
| Pale, leggy growth | Too little light | Move to brighter indirect light |
| Bleached or scorched patches | Too much direct sun | Shield from harsh afternoon sun |
| Fine webbing, speckled leaves | Spider mites | Isolate, rinse, apply insecticidal soap |
| Tiny flies over soil | Fungus gnats from soggy soil | Let soil dry between waterings |
| Sudden leaf drop | Drafts, heat, or a recent move | Stabilize temperature and location |
| White crust on soil | Fertilizer salt buildup | Flush soil with plain water |
How to Revive a Dying Plant in 7 Steps
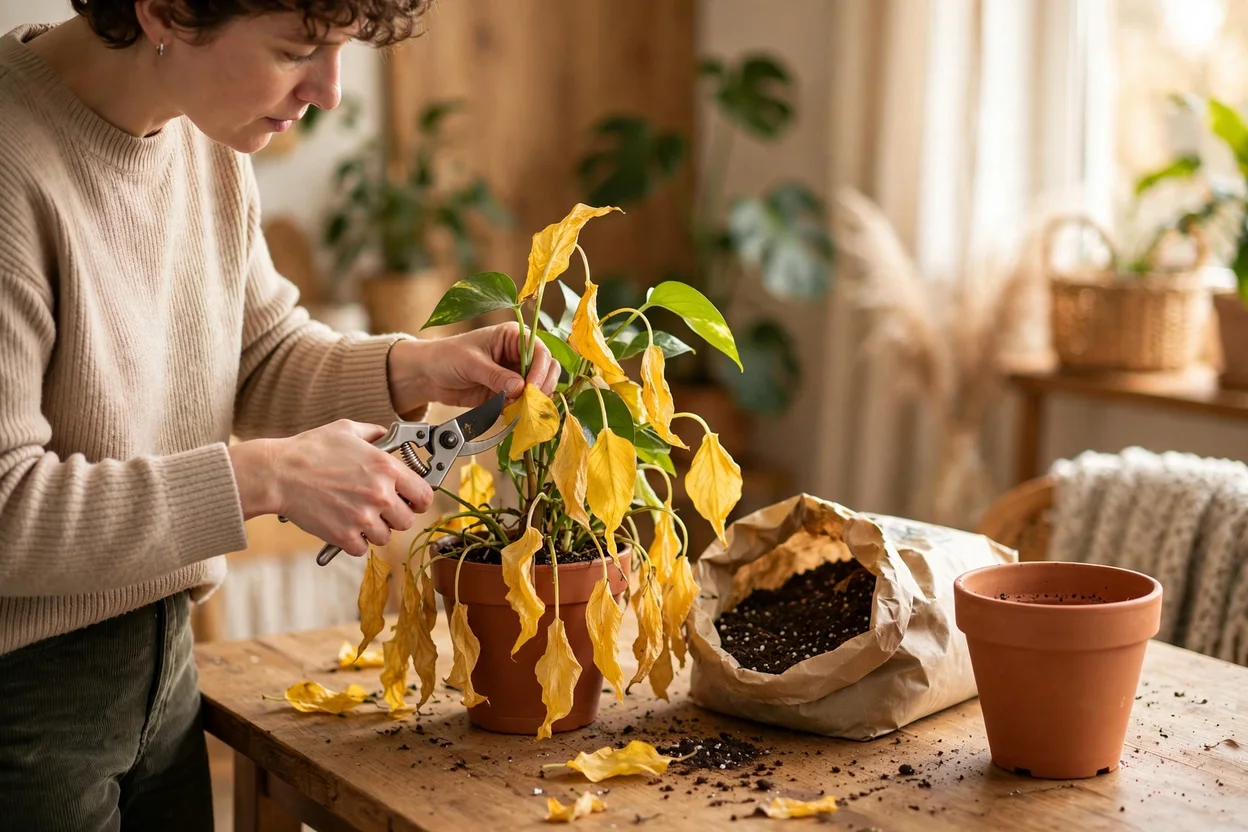
The fastest way to revive a dying plant is to check the roots, fix the water problem, trim dead growth, and move the plant to steady, bright, indirect light. Thirsty plants often perk up within hours of a thorough soak, while plants with root rot need weeks to regrow roots.
These steps fit most houseplants and potted outdoor plants. Orchids, roses, and palms need the plant-specific protocols in their own sections.
- Isolate the plant from other houseplants until pests are ruled out.
- Check the soil moisture 1 to 2 inches (2.5 to 5 cm) below the surface.
- Remove the plant from its pot and inspect the roots.
- Cut away rotten roots and dead stems with pruning shears sanitized in rubbing alcohol.
- Repot in fresh potting mix, in a container with drainage holes, if the roots were rotten or tightly circling.
- Water correctly: soak a dry plant thoroughly, or hold off on a wet plant until the top 1 inch (2.5 cm) dries.
- Place the plant in bright, indirect light away from heat vents and cold drafts, and skip fertilizer until new growth appears.
Choose a new pot only 1 to 2 inches (2.5 to 5 cm) wider than the old one. An oversized pot holds extra wet soil around a small root system and invites rot.
Prune dead leaves that are fully brown or yellow, because they never turn green again. Keep partly green leaves, since they still feed the plant through photosynthesis.
Limit pruning to one-third of the foliage at a time. Removing more leaves the plant too little leaf area to fuel new roots.
Expect transplant shock after repotting. Transplant shock is temporary wilting or leaf drop caused by root disturbance, and it fades once new roots grow into the fresh mix.
Watering Fixes for Overwatered and Underwatered Plants
Watering fixes depend on soil moisture: an overwatered plant needs drying time and drainage, while an underwatered plant needs a slow, deep soak. Both problems cause drooping leaves. Wet soil plus wilting points to root damage, and dry soil plus wilting points to thirst.
How Do You Fix an Overwatered Plant?
An overwatered plant recovers when the soil dries, rotten roots are removed, and the plant goes into fresh, fast-draining potting mix. Mild cases with firm roots only need a pause in watering. Severe cases with mushy roots need trimming and repotting the same day.
- Stop watering immediately.
- Empty any saucer or decorative pot holding standing water.
- Slide the plant out and inspect the roots.
- Trim brown, mushy roots back to firm tissue with sanitized shears.
- Repot in fresh potting soil blended with perlite for drainage.
- Water lightly once, then wait until the top 1 inch (2.5 cm) is dry before watering again.
Skip repotting if every root is firm and white. Set the plant in bright, indirect light and let the existing mix dry out instead.
Some growers rinse trimmed roots in diluted 3% hydrogen peroxide. Treat that rinse as optional, because cutting away rot and replacing the soil do the real work.
How to Revive an Underwatered Plant
An underwatered plant revives fastest with bottom watering, which lets dry, shrunken potting mix absorb water evenly from below. Bone-dry soil pulls away from the pot edges and sheds water poured from the top, so a soak from underneath rehydrates the full root ball.
- Fill a sink or basin with 2 to 3 inches (5 to 8 cm) of room-temperature water.
- Set the pot in the water with the drainage holes submerged.
- Leave the pot in place for 30 to 45 minutes, until the soil surface feels damp.
- Lift the pot and let excess water drain completely.
- Trim any leaves that stay fully crispy the next day.
Light, Temperature, and Humidity Fixes
Most struggling houseplants recover best in bright, indirect sunlight, steady temperatures of 65 to 75°F (18 to 24°C), and protection from very dry indoor air. Sudden changes in light, heat, or humidity trigger leaf drop, so make one change at a time and hold it steady.
This table compares environmental problems with their symptoms and fixes.
| Problem | Symptom | Fix |
|---|---|---|
| Too little light | Leggy growth leaning toward windows | Move near an east-facing window |
| Too much direct sun | Bleached or scorched patches | Filter light with a sheer curtain |
| Cold drafts | Sudden leaf drop, dark spots | Move away from doors and air vents |
| Heat sources | Crispy edges, fast-drying soil | Move away from radiators and heaters |
| Dry air | Brown tips, curled edges | Group plants or run a humidifier |
Winter heating across much of the US dries indoor air sharply. A small humidifier near tropical plants such as palms, ferns, and orchids raises humidity levels around their leaves.
Rotate the pot a quarter turn each week once the plant recovers. Even light exposure keeps new growth upright and balanced.
How to Treat Pests on a Struggling Plant
Treat pests on a struggling plant by isolating it, rinsing the foliage, and applying insecticidal soap or neem oil exactly as the product label directs. Stressed plants attract spider mites, mealybugs, scale, aphids, and fungus gnats, and each pest leaves a distinct sign on leaves, stems, or soil.
This table compares common houseplant pests by their signs and the standard treatment for each.
| Pest | Signs | Treatment |
|---|---|---|
| Spider mites | Fine webbing, speckled yellow leaves | Rinse leaves, apply insecticidal soap |
| Mealybugs | White cottony clusters in leaf joints | Dab with alcohol-soaked cotton swab |
| Scale | Brown bumps on stems and leaf undersides | Scrape off, apply neem oil |
| Fungus gnats | Tiny dark flies over damp soil | Let soil dry, add yellow sticky traps |
| Aphids | Clusters of soft green or black insects | Spray with water, apply insecticidal soap |
Read the full product label before applying any pesticide. In the US, the Environmental Protection Agency (EPA) registers pesticides, and the label carries legally binding directions for use.
Test any spray on one leaf and wait 24 hours before treating the whole plant. Some species react badly to oils and soaps.
Apply sprays out of direct sun. Oil and soap residue on leaves in hot sun causes leaf burn.
The Simple Trick That Rescues Thirsty Plants
The simple trick for reviving a thirsty plant is a full bottom-water soak, because it rehydrates a dried root ball that top watering cannot reach. This trick works only on underwatered plants with dry soil. A plant sitting in wet soil needs drying time instead of more water.
People searching “how to revive a dying plant with this simple trick” usually have a wilted plant and want one fast fix. The soak is that fix, as long as the soil is truly dry.
Dry potting mix, especially peat-based mix, repels water. Water poured on top runs down the gap between the soil and the pot and out the drainage holes, leaving the roots dry.
A 30 to 45 minute soak from below forces the mix to absorb water again. Most wilted plants firm up the same day.
A second simple trick fixes leggy growth. Prune long stems back by up to one-third, just above a leaf node, to push bushier new shoots.
Learning how to bring a plant back to life rarely requires special products. Water, light, clean shears, and fresh potting mix solve most rescues.
How Do You Revive a Dying Orchid?
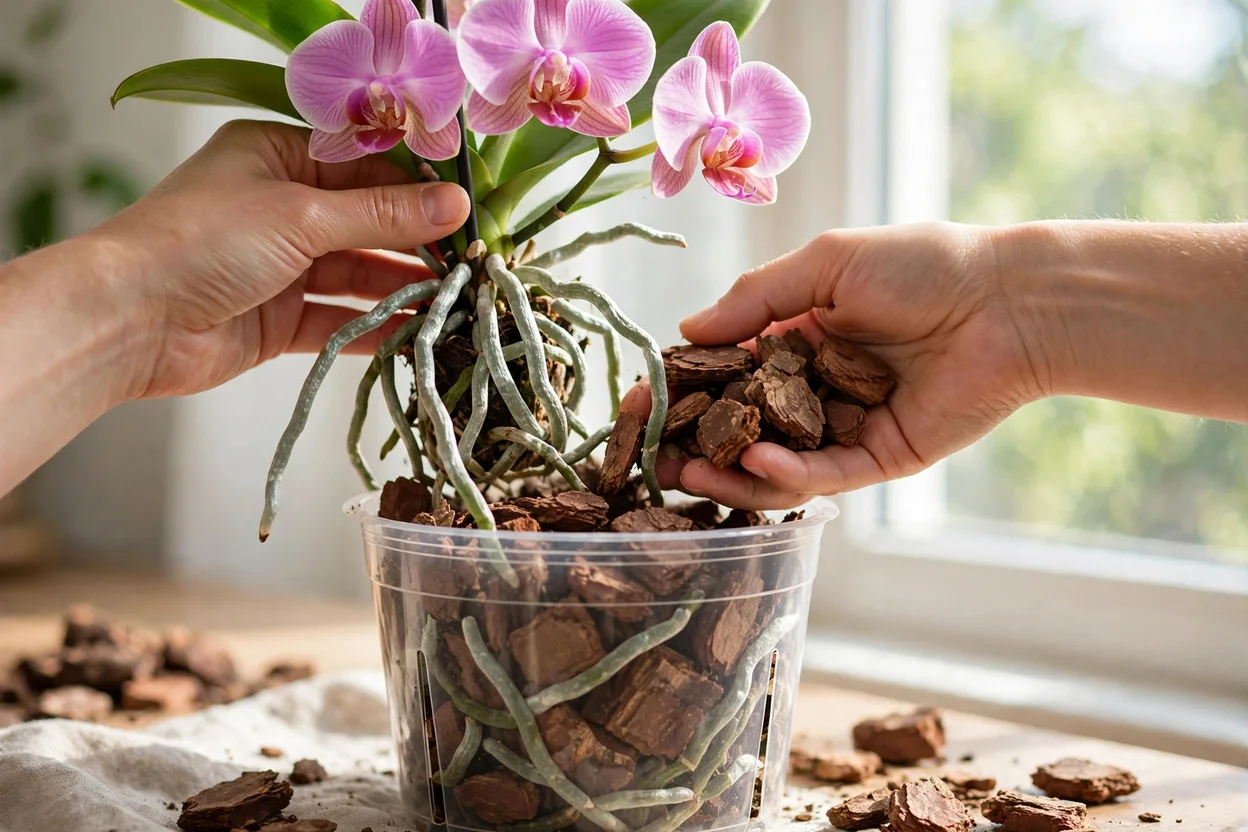
Revive a dying orchid by checking its roots, cutting away mushy or hollow roots, and repotting it in fresh orchid bark with bright, indirect light. The moth orchid, or Phalaenopsis, is the most common orchid in US homes, and it usually declines from overwatering or old, broken-down bark.
Anyone searching “how to revive a dying orchid plant” should start with the roots. Limp, wrinkled leaves can mean either root rot or dehydration, and both problems stop water from reaching the leaves.
This table compares healthy orchid roots with damaged orchid roots.
| Root Type | Appearance | Action |
|---|---|---|
| Healthy, dry | Silvery green and firm | Keep |
| Healthy, wet | Bright green and firm | Keep |
| Rotten | Brown, mushy, or slimy | Cut off |
| Dead | Papery, hollow, or flattened | Cut off |
- Remove the orchid from its pot and pull away the old bark or moss.
- Squeeze each root and cut off any mushy, hollow, or papery roots with sanitized shears.
- Repot in a clear orchid pot with fresh, medium-grade orchid bark.
- Run room-temperature water through the bark until it flows freely from the drainage holes, then drain completely.
- Water again only when the roots turn silvery and the bark feels nearly dry.
- Place the orchid near an east-facing window or behind a sheer curtain at a south- or west-facing window.
- Keep daytime temperatures between 65 and 80°F (18 to 27°C) and humidity levels above 40%.
Sphagnum moss holds more water than bark and suits orchids with very few roots left. Kept soggy, sphagnum rots roots quickly, so let the surface dry slightly between waterings.
An orchid with no healthy roots can still regrow if the crown, the center where leaves meet, stays firm. Set it in a small pot of lightly damp sphagnum moss in high humidity and wait for new root tips.
How Do You Save a Dying Rose Bush?
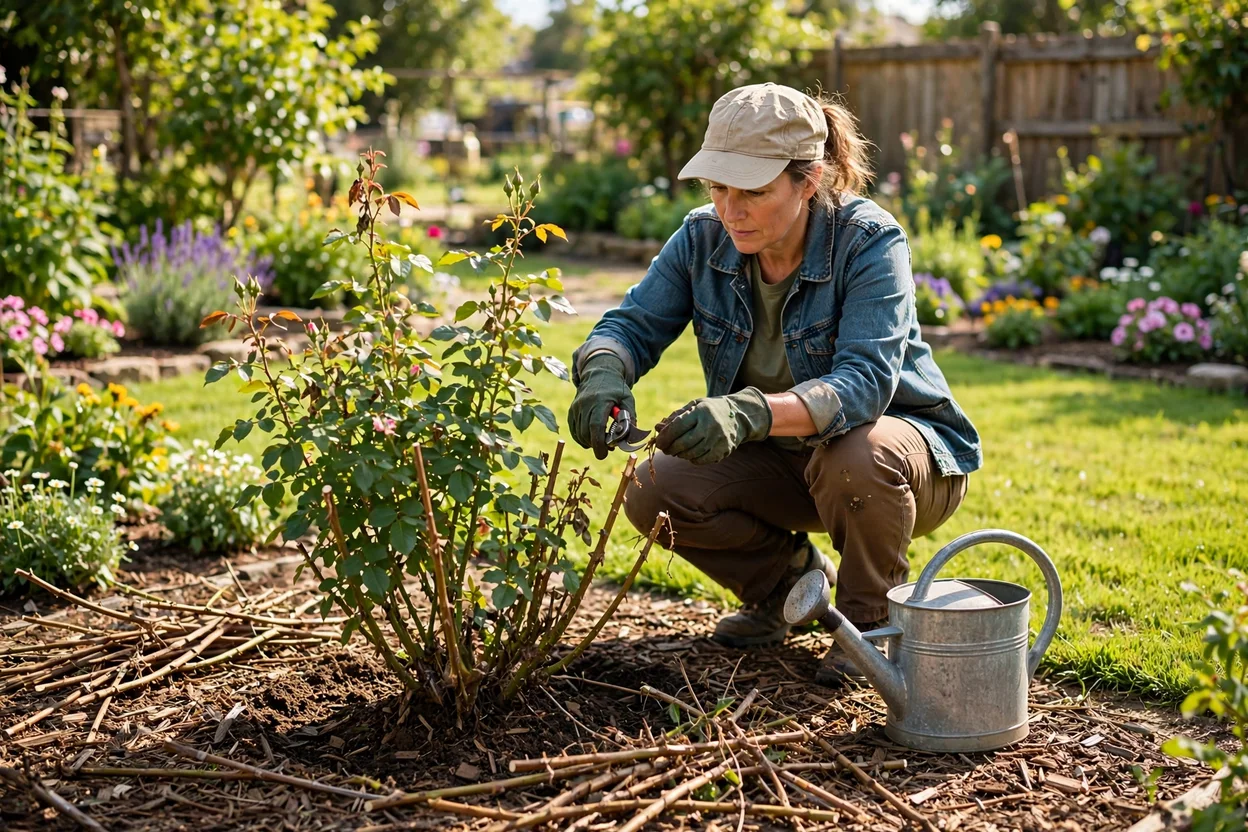
Save a dying rose bush by cutting dead canes back to healthy green tissue, removing diseased leaves, and fixing water, sun, and drainage. Roses need at least 6 hours of direct sun daily, deep weekly watering, and a variety rated for the local United States Department of Agriculture (USDA) Plant Hardiness Zone.
Gardeners searching “how to revive a dying rose plant” usually face cane dieback, black spot, or winter damage rather than a dead root system. A rose with one living cane and healthy roots can rebuild a full bush.
This table compares common rose problems by their signs and fixes.
| Problem | Signs | Fix |
|---|---|---|
| Black spot | Black leaf spots with yellow halos | Remove infected leaves, water at the base |
| Cane dieback | Canes brown or black from the tip down | Prune to green tissue with white pith |
| Winter damage | Blackened canes after a hard freeze | Wait for spring growth, then prune |
| Underwatering | Wilting, crispy leaves, small blooms | Water deeply at the base weekly |
| Poor drainage | Yellow leaves, soggy soil | Amend the soil or relocate |
| Too little sun | Few blooms, leggy canes | Move to a 6-hour sun spot |
- Run the scratch test on every cane to find living tissue.
- Prune dead canes back to green wood with white pith, cutting 1/4 inch (6 mm) above an outward-facing bud at a 45-degree angle.
- Remove fallen and spotted leaves and put them in the trash, not the compost pile.
- Water deeply at the soil line in the morning, about 1 inch (2.5 cm) per week.
- Spread 2 to 3 inches (5 to 8 cm) of mulch around the base, keeping it off the canes.
- Feed with rose fertilizer only after new leaves appear, and stop feeding 6 to 8 weeks before the first fall frost.
Prune a struggling rose in late winter or early spring, as buds begin to swell. Dead or diseased canes can come off any time of year.
Check the USDA Plant Hardiness Zone Map before replacing a rose that died over winter. A variety rated for a colder zone survives freezes that kill tender roses.
Why Are My Palm Leaves Turning Brown?
Palm leaves turn brown from dry indoor air, underwatering, salt or fluoride buildup from tap water, cold damage, or too much direct sun. Browning on only the oldest, lowest fronds is normal aging, while browning on new fronds or the central spear signals a care problem that needs fast correction.
The answer to “how to revive a dying palm plant” depends on where the damage appears. Indoor palms such as the Areca palm, Majesty palm, and Parlor palm each tolerate different light and water levels.
This table compares three popular indoor palms by their light and water needs.
| Palm | Light Needs | Watering |
|---|---|---|
| Areca palm | Bright, indirect light | Water when the surface feels dry |
| Majesty palm | Bright, indirect light | Keep evenly moist, never soggy |
| Parlor palm | Low to medium indirect light | Let the surface dry between waterings |
- Check the soil 1 to 2 inches (2.5 to 5 cm) down and correct watering first.
- Switch to distilled water or rainwater if leaf tips keep browning despite correct watering.
- Flush the pot with plain water every few months to wash out built-up salts.
- Run a humidifier during the winter heating season.
- Cut off only fully brown fronds at the base, and snip brown tips following the leaf’s natural shape.
- Move the palm out of hot afternoon sun and away from cold drafts.
Leave partly green fronds in place. The green tissue still feeds the palm.
Check the spear, the newest unopened frond at the center. A spear that pulls out easily and smells rotten signals bud rot, and a single-trunk palm with a dead growing point cannot grow a new top.
Outdoor palms along the Gulf Coast and in Florida, Arizona, and Southern California sometimes brown after a cold snap. Wait until warm weather returns before removing damaged fronds, because they still shield the growing point.
How Long Does It Take a Plant to Recover?
Recovery time depends on the cause: a thirsty plant can perk up within hours, while a plant recovering from root rot or transplant shock needs several weeks to regrow roots. New leaves are the clearest sign of recovery. Outdoor shrubs damaged by winter may need a full growing season.
This table compares typical recovery windows by problem. The ranges are general expectations, not measured figures, and no verified figure is available for exact timelines.
| Problem | Recovery Window | First Sign of Recovery |
|---|---|---|
| Underwatering | Hours to a few days | Leaves firm up |
| Overwatering, firm roots | A few weeks | Wilting stops as soil dries |
| Root rot after trimming | Several weeks to months | New white root tips |
| Transplant shock | A few weeks | Leaves stop drooping |
| Pest damage | Several weeks | Clean new leaves |
| Winter-damaged shrub | One growing season | Buds break on lower stems |
When to Stop Trying to Save a Plant
Stop trying to save a plant when no stem passes the scratch test down to the soil line, every root is mushy or brittle, or the crown has rotted. A plant that shows no new growth after a full growing season in good conditions is also unlikely to recover.
Take cuttings first. Pothos, philodendron, and snake plant all root from healthy cuttings, so one firm stem can start a new plant before the parent fails.
Knowing how to save a dying plant sometimes means saving only a piece of it. A rooted cutting carries the same genetics as the original plant.
When to Call Your Local Cooperative Extension Office
Call a local Cooperative Extension office when a plant keeps declining after watering, light, and pest fixes, or when an outdoor plant shows unfamiliar spots, cankers, or sudden wilting. Extension offices operate through land-grant universities in every US state and give research-based answers, often through Master Gardener volunteers.
Bring a fresh sample sealed in a plastic bag, including both healthy and damaged tissue. Add clear photos of the whole plant, the soil surface, and the roots.
Many state extension systems run plant diagnostic labs that identify fungal, bacterial, and insect problems. Some labs charge a small fee, so ask the local office before mailing a sample.
Frequently Asked Questions
These five short answers cover the follow-up questions gardeners commonly ask after starting a plant rescue, from sugar water and fertilizer to orchid reblooming. Each answer stands alone, so jump straight to the question that matches the problem at hand.
Does Sugar Water Help Dying Plants?
No. Plants make their own sugar through photosynthesis, and added sugar feeds soil microbes and mold instead. Plain water and correct light restore the plant’s natural sugar production.
Should I Cut Off Dying Leaves?
Yes. Remove fully brown or yellow leaves with sanitized shears, since they never regain color. Leave partly green leaves attached, and remove no more than one-third of the foliage at once.
Should I Fertilize a Dying Plant?
No. Fertilizer salts stress damaged roots and can burn them. Wait until fresh leaves emerge, then feed at half the label rate for the first month.
Should I Repot an Overwatered Plant Right Away?
Yes, if the roots are mushy, brown, or sour-smelling. Trim the rot and repot that day. Firm, white roots need no repotting, only time for the current mix to dry.
Will My Orchid Rebloom After Recovery?
Yes. A Phalaenopsis typically reblooms once it grows healthy roots and new leaves. Cooler fall nights of 55 to 65°F (13 to 18°C) for several weeks help trigger a flower spike.
Conclusion
Keeping a revived plant thriving takes watering based on soil moisture, steady bright indirect light, and a quick root and leaf check every few weeks. Plants that recover once stay healthy longer when their care routine stops swinging between drought and flood.
Knowing how to revive a dying plant turns every yellow leaf into useful information. Each symptom now points to a cause and a fix.
Start a simple care log on a phone or a notecard. Record watering dates, light changes, and repotting so the next problem shows up as a pattern instead of a surprise.
Plan ahead for the seasons. Raise humidity before winter heating starts, check roses against the USDA zone map before spring planting, and repot crowded plants as growth resumes in spring.