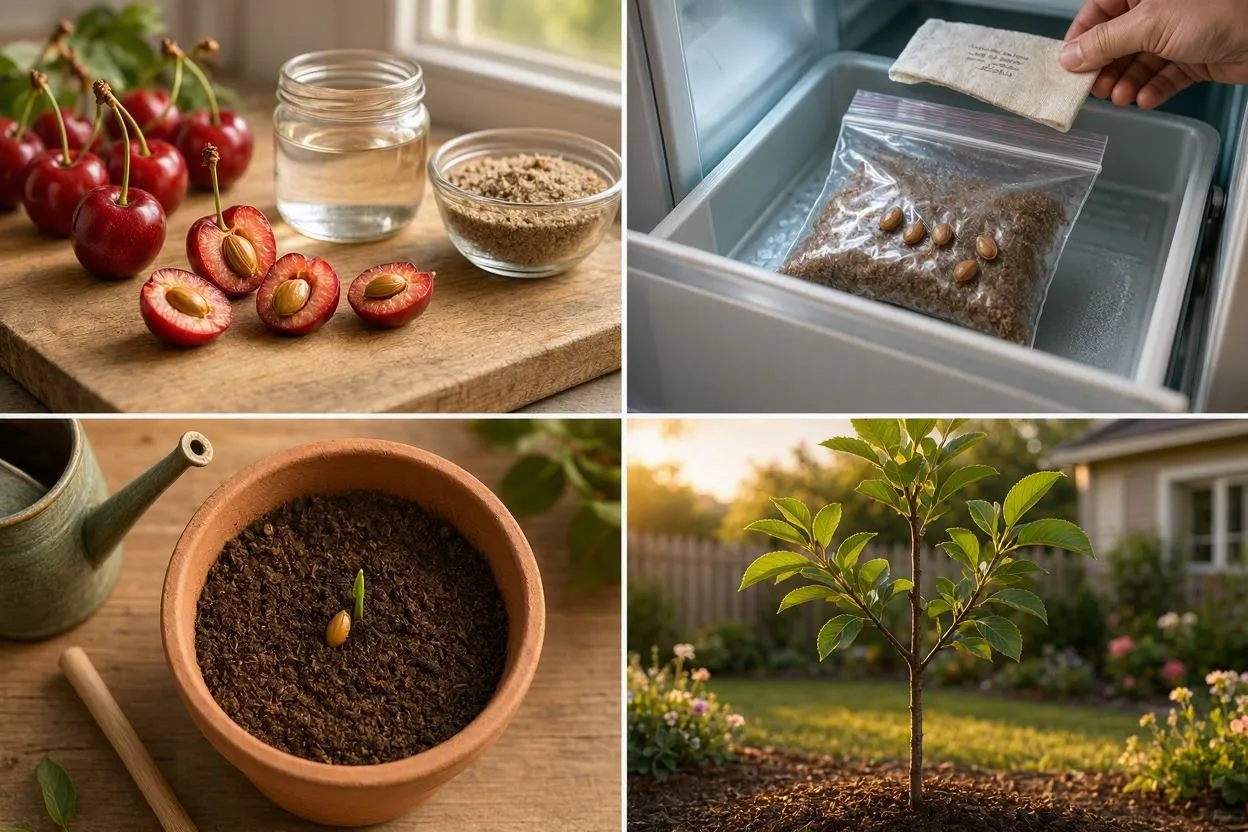
Growing a cherry tree from seed comes down to five stages: harvest a ripe pit, clean it, cold stratify it for 10 to 14 weeks, plant it in moist soil, then move the seedling outdoors once it’s hardened off. From pit to a foot-tall sapling usually takes six to nine months. After that, you’re waiting. Most seed-grown trees need three to seven years before they produce their first cherries, and there’s no guarantee the fruit will taste anything like the parent tree’s. That’s the trade-off: slower and less predictable than a grafted sapling, but it costs almost nothing and makes for a genuinely satisfying multi-year project if you’re gardening in the USA.
The rest of this guide walks through each stage in order, with the timelines, temperatures, and troubleshooting steps that separate a tray of moldy pits from a healthy young tree.
What You Need Before You Start
Four things, really: fresh cherry pits, a cold spot (fridge or outdoors), a moisture-holding medium, and a container with drainage. Skip any one of these and your germination odds drop fast.
Here’s the full list:
- Ripe cherries (store-bought or tree-picked) for fresh pits
- A sealable plastic bag or a small glass jar
- Moist sand, peat moss, or a folded paper towel
- A refrigerator set between 33°F and 41°F (0.5°C to 5°C)
- Small nursery pots, at least 4 inches (10 cm) deep
- A well-draining seed-starting mix
- Hardware cloth or wire mesh, if stratifying outdoors, to keep squirrels out
Skip pits from cherries picked underripe. Seeds inside unripe fruit are often immature and won’t germinate no matter how carefully you stratify them.
How to Harvest Cherry Seeds for Planting
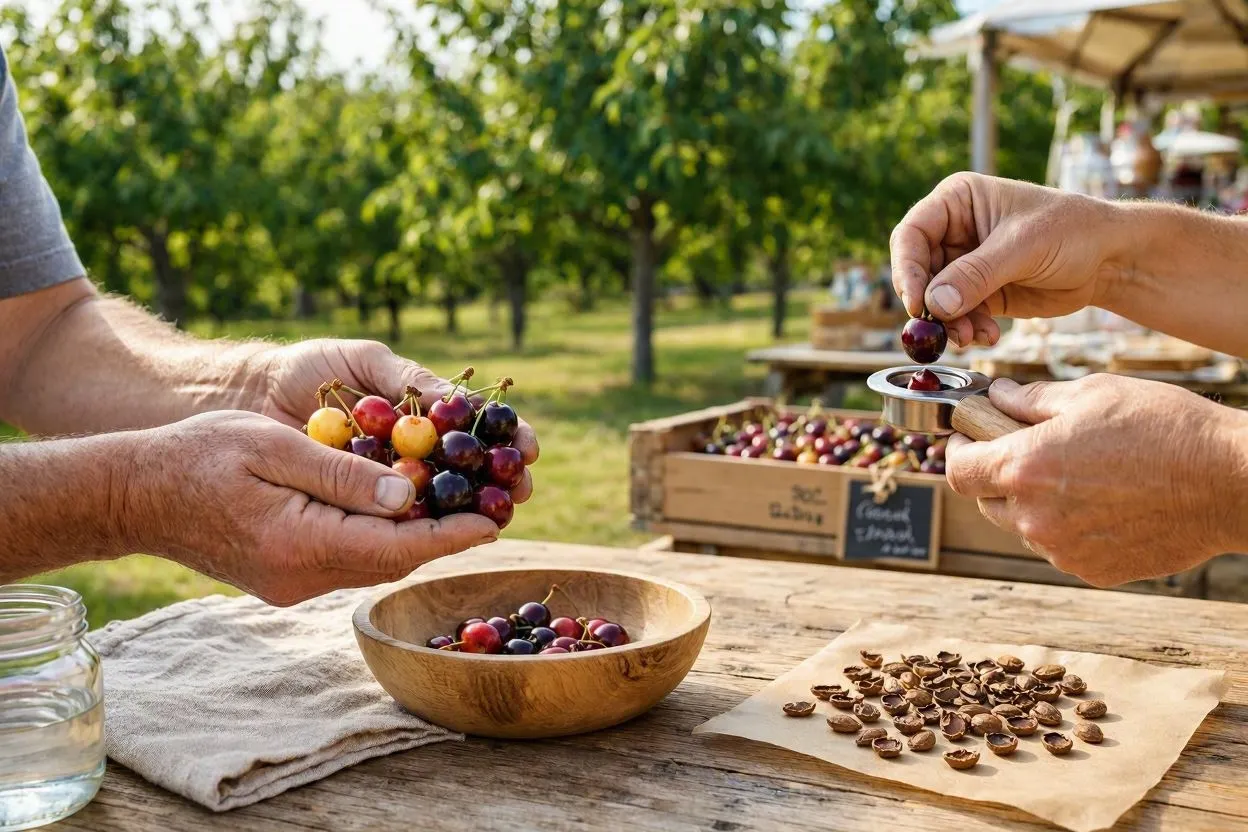
Pick fully ripe cherries and remove the pits by hand or with a cherry pitter. Ripe fruit gives slightly under gentle pressure and has reached its full, deep color, whether that’s dark red, near-black, or golden depending on the variety.
Sweet cherries (Prunus avium) ripen from late May through July across most of the USA, while sour cherries (Prunus cerasus) typically follow a few weeks later. Farmers market cherries work fine for seed collection. Tree-picked fruit from a known, healthy tree just gives you more certainty about the parent’s disease resistance and fruit quality.
One thing growers often miss: don’t let the pits sit out and dry completely before you start stratification. A dried-out pit can still germinate, but drying reduces the odds. Move from harvest to cleaning within a day or two.
How to Clean and Prepare Cherry Pits
Rinse off all fruit residue under running water and scrub gently with your fingers or a soft brush. Any leftover pulp invites mold once the pit goes into cold storage, and mold is the single most common reason home-stratified seeds fail.
Follow these steps in order:
- Squeeze or pit the cherries to separate the seed from the flesh.
- Rinse each pit under cool water until it feels completely clean.
- Soak the pits in a bowl of water for five minutes to loosen any remaining film.
- Pat the pits dry with a paper towel.
- Sort out pits that are cracked, discolored, or unusually light.
Some growers add an extra step here: a brief soak in a 10% bleach solution, then a clean-water rinse, to kill mold spores before stratification begins. It’s not mandatory, but it noticeably cuts losses in humid climates.
How to Cold Stratify Cherry Seeds
Cold stratification means storing cherry pits in a moist, cold environment for 10 to 14 weeks so the embryo inside can mature and break dormancy. Skip this step and the seeds simply won’t sprout, no matter how good your soil or sunlight is. Cherry pits are wired to expect a winter before they’ll grow.
There are two reliable methods, and both work.
| Method | Duration | Temperature | Best For |
| Refrigerator | 90 to 98 days | 33°F to 41°F (0.5°C to 5°C) | Small batches, precise moisture control |
| Outdoor winter sowing | One full winter season | Naturally cold, above freezing | Larger batches, low daily maintenance |
Refrigerator Method
Layer the clean pits between two damp paper towels, or mix them into a cup of moist sand, then seal everything inside a labeled zip-top bag. Store it in the refrigerator at 33°F to 41°F (0.5°C to 5°C) for 90 to 98 days. Check the bag every two weeks, add a few drops of water if the towel or sand starts drying out, and pull out any pit that’s gone soft or moldy.
Outdoor Winter Sowing Method
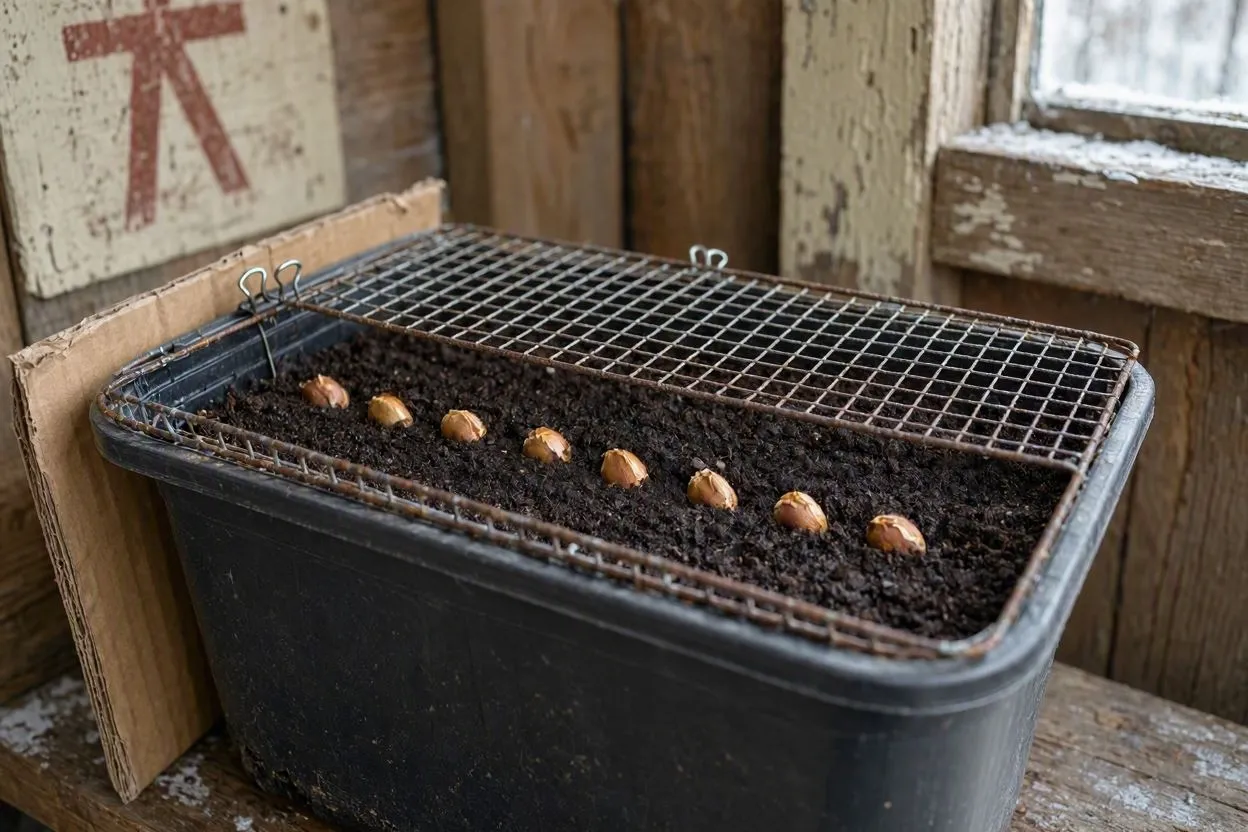
Fill a deep container with moist potting soil, press the pits about half an inch (1.3 cm) below the surface, then cover the pot with wire mesh to keep squirrels and chipmunks out. Leave it outdoors somewhere shielded from freezing wind, ideally against a north-facing wall or inside an unheated shed. This mimics natural stratification and needs almost no daily attention, though it does depend on your region actually getting cold enough.
Whichever method you pick, don’t let the pits freeze solid. A hard freeze can kill the embryo. A steady chill just above freezing keeps it alive and dormant, which is exactly what the seed needs.
How to Test Cherry Seed Viability
You can, using a simple float test. Drop the cleaned pits into a bowl of water and wait two minutes. Pits that sink are typically viable and worth stratifying. Pits that float usually have a hollow or underdeveloped center and rarely germinate.
The float test isn’t perfect (a small percentage of floaters do still sprout), but it’s a fast way to sort a large batch of pits and avoid wasting fridge space on duds. Growers who collect 50 or more pits at once find this step especially useful, since stratifying every single one just isn’t practical. If you’re planning something bigger, say a dozen trees for a small orchard, this step alone will save you weeks of fridge space.
How to Plant Cherry Seeds After Stratification
Sow each pit about half an inch (1.3 cm) deep in a small pot filled with moist, well-draining potting mix. If you’re using one larger container for multiple pits, space them at least 2 inches (5 cm) apart. Crowded roots make separating seedlings later a lot harder.
Water the soil until it’s evenly moist but not soggy, then set the pot somewhere warm, ideally 65°F to 75°F (18°C to 24°C), with bright, indirect light. A south-facing windowsill works well for most homes. Keep the soil consistently damp over the next few weeks. Let it dry out even once and you can stall or kill a germinating seed.
Plant as soon as stratification finishes. Waiting more than a week or two lowers germination rates, since the embryo is already primed to sprout and will keep drawing on stored energy whether it’s sitting in soil or still in the bag.
How Long Cherry Seeds Take to Germinate
Cherry seeds typically germinate within 2 to 6 weeks after planting, once stratification is complete. Sprouting speed depends on soil temperature, seed freshness, and how consistently the medium stayed moist during the cold period.
A few signs to watch for during this window:
- A small white root emerging from a crack in the pit
- The seed coat splitting near one end
- A pale shoot pushing up through the soil surface
If nothing has happened after 8 weeks, check the pit. A soft, mushy, or foul-smelling seed has failed and won’t sprout at this point. A firm pit, though, may just need more time or a slightly warmer spot.
How to Care for Cherry Seedlings
Give the seedling 6 or more hours of bright light daily, keep the soil evenly moist, and hold off on fertilizer for the first month. Young cherry roots are delicate, and heavy feeding this early tends to burn them rather than help them.
Once the seedling develops its second set of true leaves, usually 3 to 4 weeks after germination, start a light diluted fertilizer every two weeks. Rotate the pot occasionally too, since seedlings will lean hard toward a single light source if you don’t. Watch for damping-off, a fungal issue that causes the stem to collapse at the soil line; it spreads fast in overwatered, poorly ventilated containers.
By 8 to 10 weeks old, a healthy seedling should stand 4 to 6 inches (10 to 15 cm) tall with sturdy, upright growth and no yellowing leaves.
How to Transplant Cherry Seedlings Outdoors
Wait until the seedling is at least 12 inches (30 cm) tall and all frost danger has passed, then harden it off over 7 to 10 days before planting. Hardening off means gradually exposing the seedling to outdoor conditions, starting with an hour of filtered shade and building up to a full day in direct sun by the end of the week.
Choose a planting site with full sun and soil that drains well; cherry roots rot quickly in standing water. Dig a hole twice as wide as the root ball and just as deep, set the seedling so the root flare sits level with the surrounding soil, then backfill and water thoroughly. Add 2 to 3 inches (5 to 7.5 cm) of mulch around the base, keeping it a few inches from the trunk so it doesn’t rot.
Protect the young tree with a wire cage or tree shelter for its first 3 to 4 years. Deer and rabbits will strip bark and foliage from an unprotected sapling in a single season, undoing months of stratification work in one night.
Best USDA Zones for Growing Cherry Trees From Seed
Sweet cherries grow best in USDA zones 5 through 9, while sour cherries handle a narrower range of zones 4 through 6. Zone matters more for seed-grown trees than grafted ones, because seedlings lack a cold-hardy rootstock bred specifically for tough climates.
A few regional notes worth knowing before you commit years to a seedling:
- The Pacific Northwest offers close to ideal sweet cherry conditions, with mild winters and dry summers that limit fungal disease.
- Gardeners east of the Rocky Mountains face more humidity-driven problems, including brown rot and cracking, especially with sweet varieties.
- Sour cherries tolerate humid, continental climates far better and are the safer bet for zones 4 through 6 in the Midwest and Northeast.
- Southern gardeners in zones 8 and 9 should look for low-chill cultivars, since standard sweet cherries need 700 to 1,200 chill hours to bloom and fruit reliably.
| Cherry Type | USDA Zone Range | Chill Hours Needed |
| Sweet cherry (Prunus avium) | 5 to 9 | 700 to 1,200 hours |
| Sour cherry (Prunus cerasus) | 4 to 6 | 800 to 1,200 hours |
Check with a local Cooperative Extension office before planting. They can confirm your specific zone, chill-hour averages, and which cherry species actually does well in your county, not just your state.
Do Cherry Trees Grow True From Seed?
No. A seedling grown from a Bing cherry pit won’t produce Bing cherries. Cherries are cross-pollinated by bees, so the seed inside each fruit carries genetics from two different parent trees, not a clone of the one you ate it from.
The resulting tree is a bit of a gamble. Fruit size, sweetness, and disease resistance can land anywhere between the two parent varieties, and some seedlings produce fruit that’s smaller, more sour, or barely worth eating. Others surprise growers with fruit as good as, or better than, the parent. If a specific, guaranteed variety matters to you, buy a grafted sapling instead. If you’re growing for the experience, or planning to graft known scion wood onto your seedling’s rootstock later, seed-growing still makes plenty of sense.
How Long Until a Seed-Grown Cherry Tree Bears Fruit
A cherry tree grown from seed typically takes 3 to 7 years to bear its first fruit, compared with 2 to 4 years for a grafted sapling. Sweet cherry seedlings tend toward the longer end of that range, while sour cherry seedlings often fruit a year or two sooner.
Several factors shift that timeline: soil fertility, consistent watering during the first three growing seasons, adequate sunlight, and whether a compatible pollinator tree grows nearby. A single, isolated sweet cherry seedling can bloom for years without ever setting fruit, simply because there’s no second tree around to cross-pollinate it.
Common Problems When Growing Cherry Trees From Seed
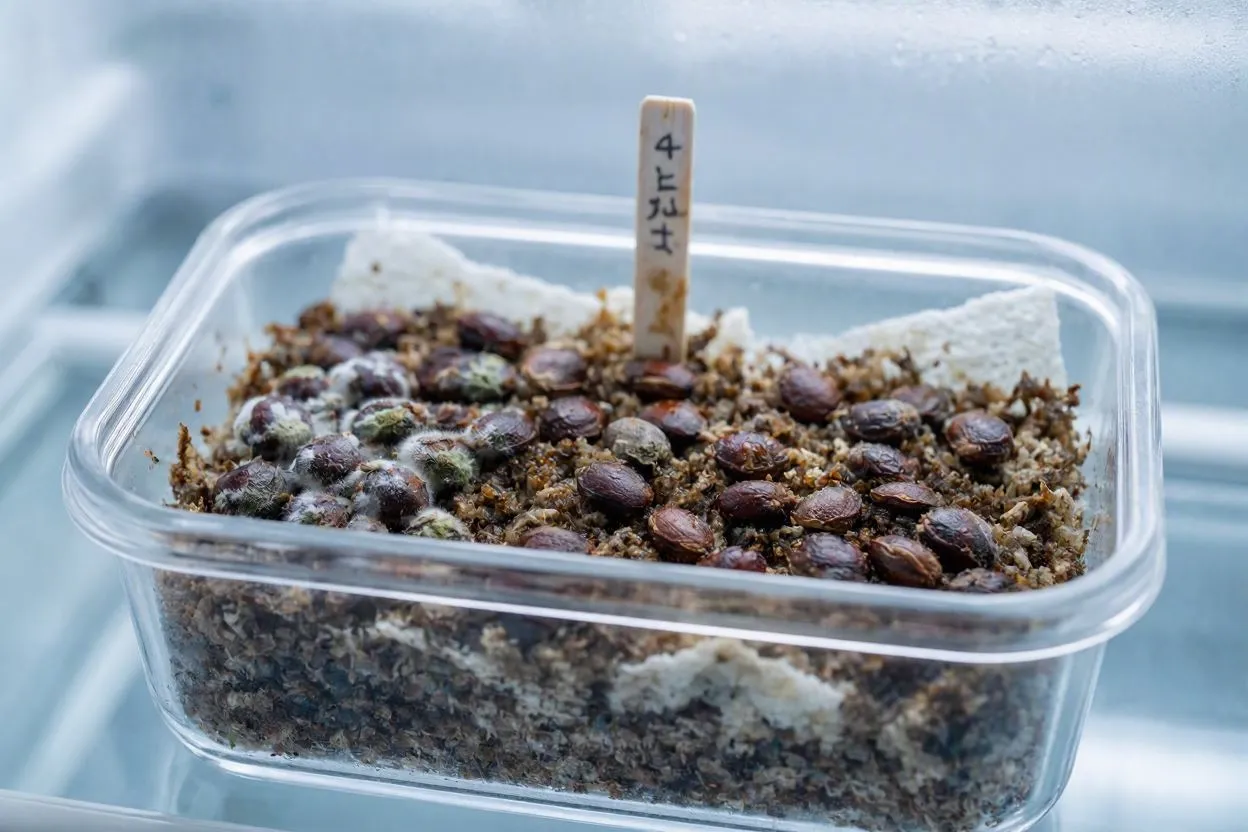
Four problems come up again and again: seed mold, poor germination, damping-off in young seedlings, and pest damage on newly transplanted trees. Each one has a specific, fixable cause.
| Problem | Cause | Fix |
| Seed mold during stratification | Storage medium stays too wet, or the bag isn’t checked often enough | Open the bag weekly and remove any affected pits immediately |
| Poor germination | Insufficient chilling time, often cut short at 6 or 7 weeks instead of 10 to 14 | Restart stratification and let it run the full 10 to 14 weeks |
| Damping-off | Overwatered, poorly ventilated seedling trays | Use a sterile seed-starting mix and add a small fan for airflow |
| Pest damage | Deer, rabbits, and squirrels targeting young transplants | Install a wire cage or tree shelter for the first 3 to 4 years |
Established trees face a different set of issues later on: brown rot, cherry leaf spot, and bacterial canker, three fungal and bacterial diseases common across humid regions of the eastern USA. Good airflow from proper pruning and prompt cleanup of fallen fruit go a long way toward keeping all three at bay.
Sweet Cherry vs. Sour Cherry Seeds: Which to Plant
Sour cherry seeds are the easier, more forgiving choice for most home gardeners. Sweet cherry seeds reward growers in mild, dry climates. Which one makes sense for you depends heavily on where you live and what you plan to do with the fruit.
| Factor | Sweet Cherry | Sour Cherry |
| Pollination | Needs a second compatible tree | Self-fertile, one tree is enough |
| Climate tolerance | Prefers dry, mild climates | Tolerates humid, continental climates |
| Disease resistance | More prone to brown rot and cracking | More resistant to common fungal disease |
| Time to first fruit | 5 to 7 years from seed | 3 to 5 years from seed |
| Best use | Fresh eating | Pies, jams, baking |
Sour cherries, sometimes called pie or tart cherries, are self-fertile, so a single tree can produce fruit without a second pollinator nearby. They also handle humid, continental climates better and resist common fungal diseases more consistently than sweet varieties do. Sweet cherries need cross-pollination from a second, genetically compatible tree, prefer a drier climate to avoid fruit cracking and rot, and generally take longer to reach fruiting age from seed.
If fresh eating is the goal and you live somewhere with hot, humid summers, sour cherry seeds are the more realistic project.
FAQs
Does a cherry pit need to be refrigerated to sprout?
Most do. Give it 10 to 14 weeks of cold, moist storage near 40°F (4.4°C) before expecting germination.
Can you grow a cherry tree from a store-bought cherry?
Yes, as long as the fruit was fully ripe when picked and the pit hasn’t dried out completely before stratification begins.
How deep should you plant a cherry seed?
About half an inch (1.3 cm) deep, in loose, well-draining soil, kept consistently moist at the surface.
Will a cherry tree grown from seed produce fruit identical to the parent?
No. Seed-grown cherry trees rarely match the parent tree’s exact fruit quality, size, or flavor, thanks to cross-pollination.
How many years does a seed-grown cherry tree take to mature?
Most reach full maturity and stable fruiting within 7 to 10 years, depending on species and climate.
Conclusion
Growing a cherry tree from seed rewards patience over speed. Every stage, from pit collection through cold stratification to that first true leaf, moves at nature’s pace, not a gardener’s calendar. Get the stratification window right, protect the seedling from deer and drying soil, and match the species to your USDA zone, and the odds tilt firmly in your favor. The tree you end up with won’t be a guaranteed copy of the fruit you started with. But it’ll be entirely yours, grown from a single pit that could just as easily have ended up in the compost bin instead.