To grow Brussels sprouts successfully, plant them in full sun 12 to 16 weeks before your first fall frost, space plants 18 to 24 inches (45 to 60 cm) apart in fertile, well-draining garden soil with a pH near 6.8, and harvest the sprouts from the bottom of the stalk upward once they reach 1 to 2 inches (2.5 to 5 cm) in diameter. Brussels sprouts take 80 to 110 days to mature and taste noticeably sweeter after one or two light frosts, making them a favorite cool-season crop for home vegetable gardens. Gardeners in the United States, Canada, the United Kingdom, and South Africa typically plant for a fall or winter harvest, while gardeners in Australia and New Zealand work backward from their own autumn frost dates on the opposite calendar. The sections below walk through garden bed prep, spacing, feeding, pest control, and storage in the order you’ll actually use them.
What Are Brussels Sprouts
Brussels sprouts are a cool-season vegetable in the Brassica oleracea species, the same cole crop family that produces cabbage, broccoli, kale, and cauliflower. The edible sprouts form as small, tightly packed buds along the plant’s main stem, growing just above each leaf joint. A single healthy plant can produce 50 to 100 sprouts over a season, with two to three pounds (0.9 to 1.4 kg) of harvestable yield being typical for a well-fed plant in a home vegetable garden.
The vegetable gets its name from Brussels, Belgium, where farmers first cultivated it commercially in the 1500s. Brussels sprouts occupy a garden bed for most of a growing season, unlike fast crops such as radishes or lettuce. That long timeline is the main reason some backyard gardeners skip them. It’s also why the flavor payoff feels earned. Sprouts left on the stalk through a couple of frosts convert starches into sugars, and that process softens the bitterness people associate with boiled, grocery-store sprouts. For gardeners planning a full kitchen garden layout, Brussels sprouts pair naturally with other brassicas and root vegetables that share the same soil and feeding needs.
When to Plant Brussels Sprouts
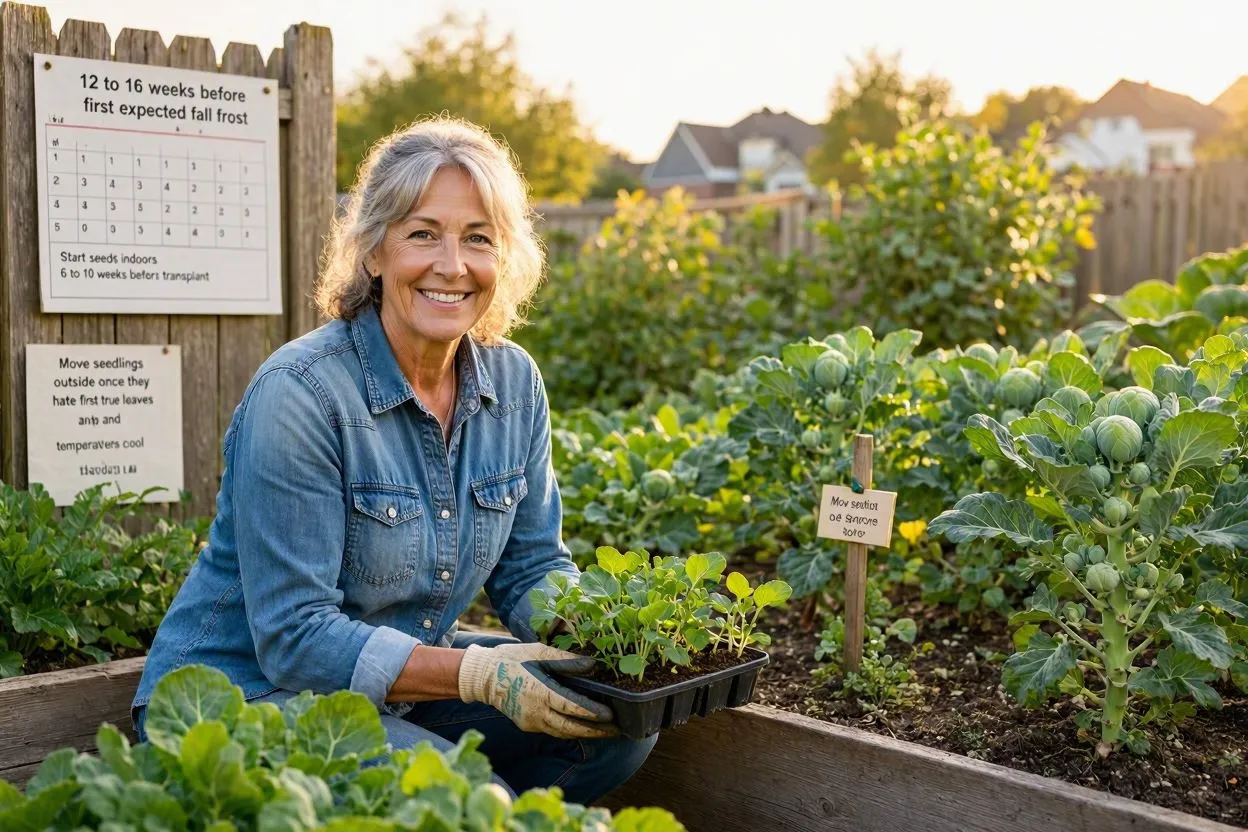
Plant Brussels sprouts 12 to 16 weeks before your area’s first expected fall frost, since the crop needs a long, cool stretch of weather to mature properly. If you’re starting seeds indoors rather than setting out transplants, begin 6 to 10 weeks before your planned transplant date, then move seedlings outside once they have their first true leaves and the weather has cooled from peak summer heat.
Timing splits by hemisphere and climate.
United States, Canada, and United Kingdom
Sow seeds indoors in late spring to early summer (May through June in most zones) for transplanting out in June or July, aiming for a harvest that runs from October through December.
South Africa
Plant from late summer into early autumn (January to March) in cooler regions for a winter harvest.
Australia and New Zealand
Reverse the calendar entirely. Sow from December through February for a harvest that runs through the southern hemisphere’s autumn and winter months, roughly April through August.
Mild-Winter Regions Worldwide
A second planting window opens in late winter or early spring for a late-spring harvest, though sprouts maturing in rising heat tend to turn loose and bitter.
Brussels sprouts tolerate light frost and even a hard freeze down to about 20°F (minus 6°C) once mature, so there’s no need to rush transplants out ahead of a mild frost date. Wait too long into summer, though, and the plant won’t have enough cool days left to size up its buds before winter shuts growth down.
How to Plant Brussels Sprouts
To plant Brussels sprouts, choose a garden bed with 6 to 8 hours of direct sun daily, work several inches of compost or aged manure into the soil with a garden fork, and space transplants 18 to 24 inches (45 to 60 cm) apart in rows set 24 to 30 inches (60 to 75 cm) apart. Soil should drain well and hold a pH between 6.5 and 7.2. A neutral-to-slightly-alkaline pH also discourages clubroot, a soil-borne disease that hits brassicas hard once established.
Set transplants at the same depth they sat in their nursery containers, firm the soil around the base with a trowel or your hands, and water thoroughly right after planting. Suttons horticulturist Lee Senior, who has grown sprouts on his UK allotment for more than three decades, treats firm planting as the single most important step for any brassica gardener: loose soil around the roots is the leading cause of “blown” sprouts, the loose, cabbage-like buds that never tighten into proper heads.
If you’re direct-sowing rather than transplanting, sow seeds a half inch (1.25 cm) deep and 2 to 3 inches (5 to 7.5 cm) apart, then thin seedlings to their final spacing once they reach about 6 inches (15 cm) tall. Direct-sown crops mature roughly three weeks slower than transplants, so factor that delay into your planting date.
Starting Brussels Sprouts From Seed vs Transplants
Growing Brussels sprouts from seed indoors gives you a head start and access to more varieties, while starting from nursery transplants saves six to ten weeks and reduces early losses to pests and weather. Seed packets typically list 80 to 110 days to maturity, but that figure counts from the transplant date, not the sowing date, so add roughly six weeks when calculating your total timeline from seed.
| Factor | Starting From Seed | Starting From Transplants |
| Timeline | Sow indoors 6 to 10 weeks before your transplant date; total time to harvest runs about six weeks longer than the seed packet’s stated days-to-maturity | Ready to plant right away; reaches harvest in the days-to-maturity listed on the plant tag |
| Process | Sow a half inch (1.25 cm) deep in seed-starting mix, keep the medium at 60°F to 65°F (15°C to 18°C), and expect germination in 7 to 10 days. Move seedlings to individual 3-inch (7.5 cm) pots once true leaves appear, then harden off outdoors over 7 to 10 days before transplanting | Buy from a nursery or farmers market and transplant directly into the garden after hardening off |
| Cost | A seed packet runs a few dollars and yields dozens of plants, though it requires trays, a heat mat, or grow lights | A six-pack of seedlings costs a few dollars at most garden centers, with no extra equipment needed |
| Best For | Gardeners who want access to more varieties and don’t mind the added lead time | First-time growers, or anyone short on time, indoor space, or seed-starting equipment |
First-time growers often start with transplants for this reason, then move to seed-starting in later seasons once they’ve settled on a favorite variety.
How to Care for Brussels Sprouts
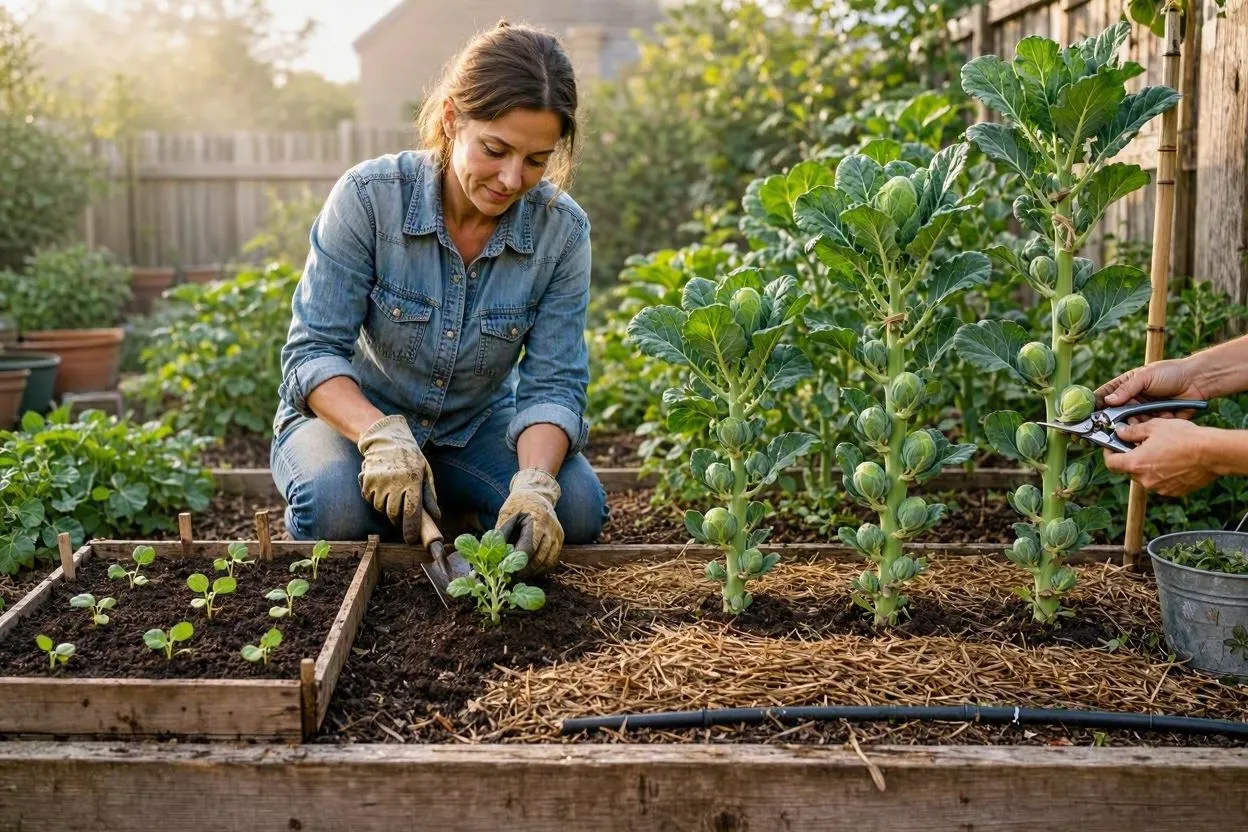
Brussels sprouts need consistent moisture of 1 to 1.5 inches (2.5 to 3.8 cm) of water per week, monthly feeding with a nitrogen-rich fertilizer, and a 2 to 3 inch (5 to 7.5 cm) layer of mulch to keep roots cool through summer heat. Because the plant’s roots sit shallow and spread wide, avoid deep cultivation near the base; pulling weeds by hand close to the stem works better than hoeing.
- Watering: Keep the soil consistently moist with 1 to 1.5 inches (2.5 to 3.8 cm) of water per week, and add a 2 to 3 inch (5 to 7.5 cm) layer of mulch to hold moisture and keep roots cool through summer heat.
- Feeding: Feed plants for the first time about a month after transplanting, then repeat every three to four weeks through the growing season with an organic fertilizer high in nitrogen, which supports the vigorous leaf growth Brussels sprouts need before they shift energy into forming buds.
- Boron deficiency: Watch for hollow stems or small, poorly formed sprouts. Correct it by dissolving one tablespoon of borax in five quarts (4.7 liters) of water and applying it evenly over 50 square feet (4.6 square meters) of bed, only if symptoms actually appear.
- Staking: As plants near their final height of 2 to 3 feet (60 to 90 cm), stake individual stems with a garden stake and soft twine if they start leaning, especially in windy, exposed garden plots.
- Tip pruning: Around four weeks before your planned harvest, some growers cut off the topmost leaves and growing tip with pruning shears, a technique that redirects the plant’s energy into plumping up existing sprouts rather than continuing upward growth. Results vary by variety and season, but many home gardeners find it worth the five minutes it takes.
Common Growing Problems and Fixes
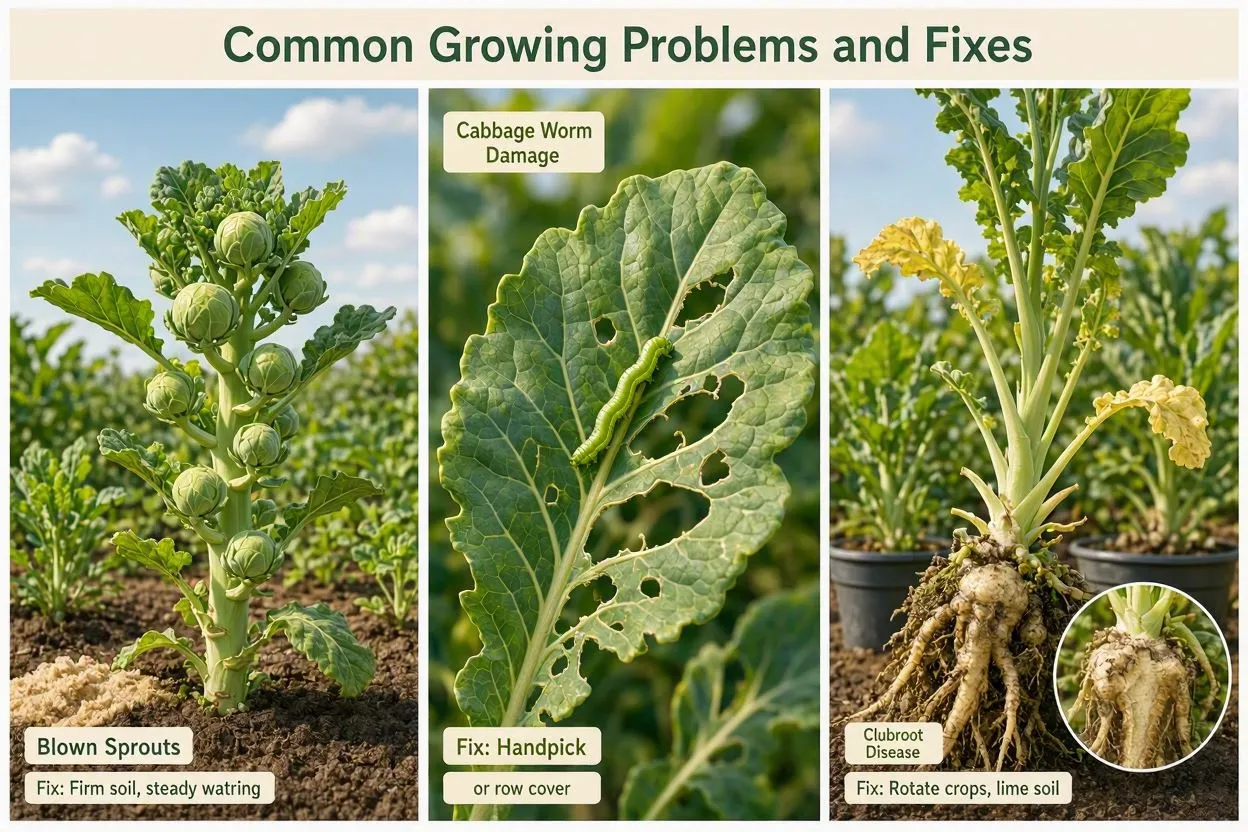
The most common Brussels sprouts problems are loose “blown” sprouts, cabbage worm damage, and clubroot disease, and each has a specific, preventable cause. Catching the cause early keeps a single issue from wiping out a season’s harvest.
Blown Sprouts
Blown sprouts form when the buds stay loose and open instead of tightening into firm heads. Three factors usually cause it: soil that wasn’t firmed enough at planting, inconsistent watering during summer heat, or nitrogen-poor soil. Firming the soil at planting and again in early autumn, along with steady watering, resolves most cases.
Cabbage Worms and Loopers
Cabbage worms and cabbage loopers chew large, ragged holes in leaves and can bore into developing sprouts. Row covers placed over plants right after transplanting block the adult moths and butterflies from laying eggs in the first place. If worms are already present, handpicking works for small gardens, and a Bacillus thuringiensis (Bt) spray, a naturally occurring soil bacterium that targets caterpillars without harming beneficial insects, handles larger infestations.
Clubroot Disease
Clubroot causes wilted, stunted plants with swollen, distorted roots, and it survives in soil for years once established. Rotating brassica crops onto a three- to four-year cycle, keeping soil pH above 6.8, and starting seedlings in pots rather than sowing directly into infected ground all reduce the risk. There’s no cure once a plant shows symptoms, so infected plants should come out of the garden entirely rather than staying in place.
Companion Planting for Brussels Sprouts
Nasturtiums, dill, thyme, and alliums such as onions and garlic make strong companion plants for Brussels sprouts, since they repel or distract common brassica pests. As a trap crop, nasturtiums lure aphids and cabbage worms away from the main crop. Thyme’s strong scent confuses egg-laying moths looking for brassica leaves. Onions and garlic planted in the same bed disrupt the scent cues cabbage root flies use to find host plants.
Avoid planting Brussels sprouts near strawberries or pole beans, both of which compete heavily for the same nutrients and can stunt a sprout plant’s growth in a shared bed. Radishes make a good short-term neighbor rather than a season-long one: a quick catch crop of radishes sown alongside newly transplanted sprouts matures in four to five weeks and comes out of the ground long before the sprouts need the space.
Growing Brussels Sprouts in Containers
Brussels sprouts grow well in containers at least 12 inches (30 cm) wide and 12 inches (30 cm) deep, one plant per pot, filled with a nutrient-rich potting mix rather than garden soil. Container-grown plants need more frequent watering than in-ground plants, since pots dry out faster, especially during warm summer stretches before the fall cooldown.
Choose a container with drainage holes, and set the pot where it gets 6 or more hours of direct sun. Feed container plants every two to three weeks rather than monthly, since regular watering leaches nutrients out of the potting mix faster than it does from garden beds. A half whiskey barrel or a 15-gallon (57-liter) grow bag both work well for gardeners without in-ground space, and either lets you move plants to a sheltered spot if an early hard freeze threatens before the sprouts finish sizing up.
When and How to Harvest Brussels Sprouts
Harvest Brussels sprouts from the bottom of the stalk upward once individual sprouts reach 1 to 2 inches (2.5 to 5 cm) in diameter and feel firm and dense to the touch. Sprouts mature from the base of the plant first, since that’s where growth began earliest, and continue ripening upward over several weeks.
Snap sprouts off by hand or cut them free with a sharp knife or pruning shears, working your way up the stalk as lower sprouts reach size. Pull off any yellowing leaves as you go, both to tidy the plant and to open up airflow and light around the remaining buds. Flavor peaks after one or two frosts, so many gardeners deliberately leave sprouts on the plant into late autumn rather than harvesting everything at first maturity. Plants tolerate temperatures down to about 20°F (minus 6°C) before sprouts start suffering cold damage, which gives a wide harvest window in most climates.
For a single, all-at-once harvest, such as before a holiday meal, cut the entire stalk at the base once most sprouts have sized up, strip the leaves, and hang the stalk upside down in a cool garage or cellar. Sprouts stored this way on the stalk hold their quality for two to four weeks longer than sprouts picked individually and refrigerated loose.
How to Store Brussels Sprouts
Store unwashed Brussels sprouts in a perforated plastic bag in the refrigerator, where they’ll stay fresh for one to two weeks. Wash sprouts only right before cooking, since moisture on the surface speeds up decay during storage.
For longer storage, blanch sprouts in boiling water for three to five minutes depending on size, cool them immediately in ice water, drain well, and freeze in airtight bags or containers. Frozen sprouts prepared this way keep for up to 12 months in a standard freezer. Whole stalks, if you’ve harvested the entire plant at once, keep in a cool basement, garage, or root cellar for three to four weeks, with sprouts pulled off as needed.
Best Brussels Sprouts Varieties to Grow
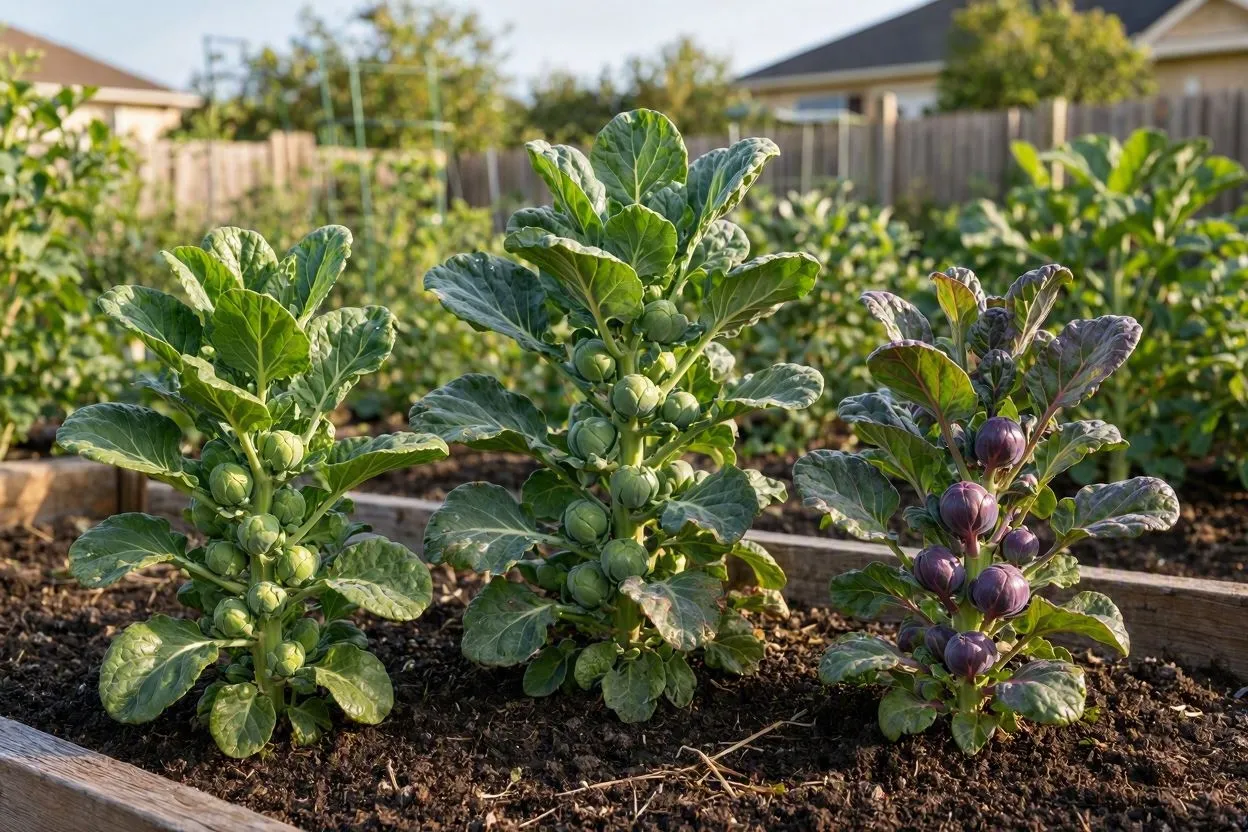
Reliable Brussels sprouts varieties include Long Island Improved for compact gardens, Diablo for cold-tolerant late harvests, and Red Rubine for a purple-red novelty crop with milder flavor. Choosing the right variety for your climate and timeline matters as much as any single care step.
Long Island Improved
A semi-dwarf heirloom reaching about 2 feet (60 cm) tall, well suited to smaller or windier gardens, maturing in roughly 90 days.
Diablo
A vigorous hybrid bred for cold tolerance and a long harvest window into winter, popular with UK and Canadian growers.
Red Rubine
An heirloom with striking purple-red sprouts and a milder, slightly sweeter flavor than standard green varieties, though yields tend to run lower.
Jade Cross
A compact, early-maturing hybrid that reaches harvest in about 80 days, a good pick for shorter growing seasons.
Bubbles
A widely available hybrid known for producing uniform, tightly closed sprouts across the full length of the stalk.
Growers who want sprouts ready before a holiday meal should check a variety’s specific days-to-maturity figure and count backward from the target date, since the difference between an 80-day and a 110-day variety can shift a harvest by a full month.
FAQs
Do Brussels sprouts come back every year?
No. Brussels sprouts are grown as annuals and complete their full life cycle in one season. Gardeners need to replant seeds or transplants each year to keep harvesting.
How much sun do Brussels sprouts need?
Brussels sprouts need 6 to 8 hours of direct sunlight daily. Less sun leads to leggy plants, weak stems, and smaller, looser sprouts.
Why are my Brussels sprouts small and loose?
Small, loose sprouts usually result from hot weather during maturation, inconsistent watering, or nitrogen-poor soil. Firm planting and steady feeding prevent most cases.
Can Brussels sprouts survive a hard frost?
Yes. Mature plants tolerate temperatures down to about 20°F (minus 6°C) and actually taste sweeter after light frost exposure converts starches to sugar.
How many Brussels sprouts does one plant produce?
One healthy plant typically yields 50 to 100 sprouts, totaling 2 to 3 pounds (0.9 to 1.4 kg), harvested gradually from bottom to top over several weeks.
Conclusion
Growing Brussels sprouts rewards patience more than skill. The plant asks for a long stretch of cool weather, firm garden soil, steady feeding, and a bit of pest vigilance, and in return it delivers a harvest that keeps producing for weeks rather than all at once. Gardeners in warmer southern-hemisphere regions and those working a northern fall calendar both follow the same core rules: count backward from your first frost date, plant firmly, feed on schedule, and let a frost or two finish the flavor before you pick. For any home gardener building out a fall vegetable patch, a Brussels sprout stalk left standing through December can still be feeding a household well into the new year.