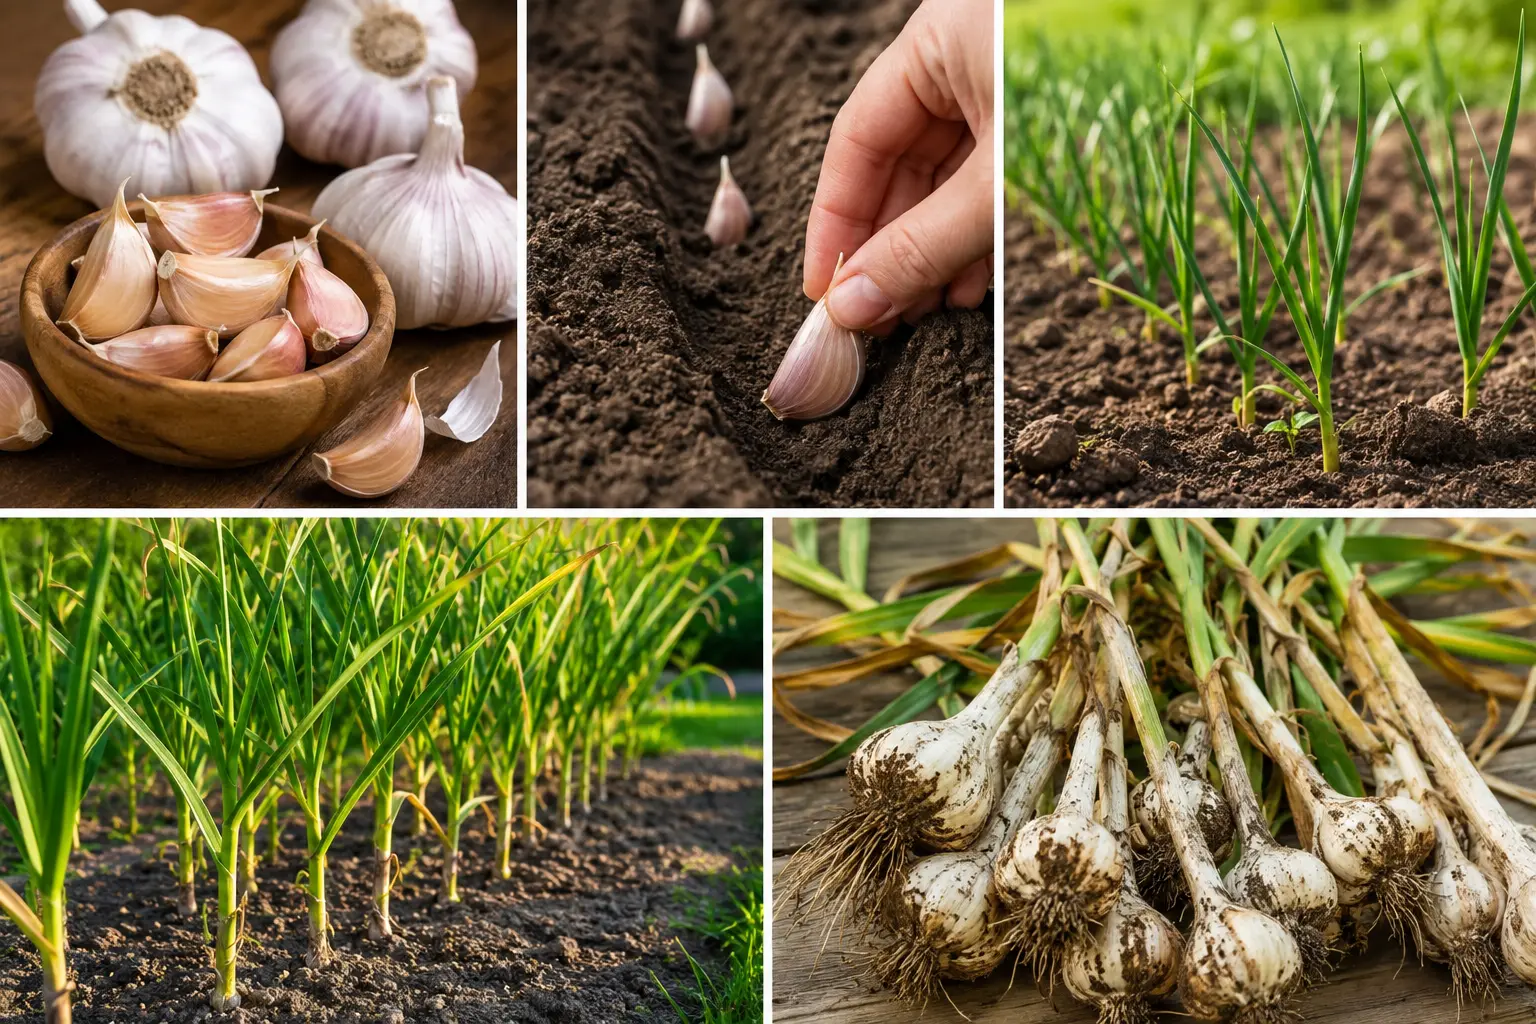
Garlic grows best from individual cloves planted in fall, 4 to 6 weeks before the ground freezes, and harvested the following summer after 240 to 270 days in the soil. The crop needs full sun, loose well-drained soil, and a cold period to form separate cloves inside the bulb. Gardeners who skip the cold requirement, common in warm climates without pre-chilling, end up with a single round bulb instead of a segmented head.
Garlic (Allium sativum) belongs to the same plant family as onions, leeks, and chives. Growers divide the crop into two main types, hardneck and softneck, and the choice between them depends more on regional winter temperatures than on personal preference.
Hardneck vs. Softneck Garlic
Hardneck garlic suits cold-winter regions and produces a flowering stalk called a scape, while softneck garlic suits mild climates and stores longer without a scape. Northern growers in USDA Zones 3 through 6 get better yields from hardneck varieties, and gardeners in Zones 7 through 10 typically see stronger results from softneck types.
| Trait | Hardneck Garlic | Softneck Garlic |
|---|---|---|
| Best climate | Cold winters (Zones 3–6) | Mild winters (Zones 7–10) |
| Central stalk | Rigid produces a scape | Flexible, no escape |
| Cloves per bulb | 4 to 12 large cloves, single row | 10 to 20 smaller cloves, multiple rows |
| Storage life | 4 to 6 months | 6 to 12 months |
| Flavor | Stronger, more complex | Milder |
| Common varieties | Music, German White, German Extra Hardy, Chesnok Red | California Early, California Late, Silverskin |
Home cooks who braid garlic for kitchen display need soft-neck varieties, since the pliable stem is what allows braiding. Hardneck stalks snap rather than bend.
When to Plant Garlic by Zone
Garlic cloves go into the ground in the fall across most of the United States, with exact timing shifting by roughly two to four weeks between zones.
| USDA Hardiness Zone | Planting Window | Notes |
|---|---|---|
| Zone 3–4 | Late September to early October | Plant early; ground freezes fastest here |
| Zone 5–6 | Early to late October | Most common planting window in the US |
| Zone 7 | Late October to mid-November | Wait for soil temperatures below 60°F (15.5°C) |
| Zone 8 | Mid-November to early December | Softneck varieties perform better |
| Zone 9–10 | Late November to December | Refrigerate seed cloves 6 to 8 weeks at 40°F (4.4°C) before planting to force dormancy |
Garlic planted too early develops excess top growth before winter, and that growth gets damaged by frost. Garlic planted too late fails to establish roots before the ground freezes, which reduces bulb size the following summer.
How to Prepare the Planting Bed
Garlic needs soil that drains freely and holds a pH between 6.0 and 7.0. Raised beds or wide beds, 3 to 4 feet (0.9 to 1.2 metres) across, use garden space more efficiently than single rows and make weeding easier from either side.
Follow these four steps to prepare a bed:
- Clear the planting area of weeds and residue from the previous crop.
- Work 2 to 3 inches (5 to 7.6 cm) of finished compost into the top 8 inches (20 cm) of soil.
- Add a nitrogen source such as blood meal, fish meal, or alfalfa meal at planting time to support fall root development.
- Test soil pH and add garden lime if the reading falls below 6.0.
Heavy clay soil benefits from added compost or coarse sand, since dense soil restricts bulb expansion and holds excess moisture around the cloves.
How to Plant Garlic Cloves
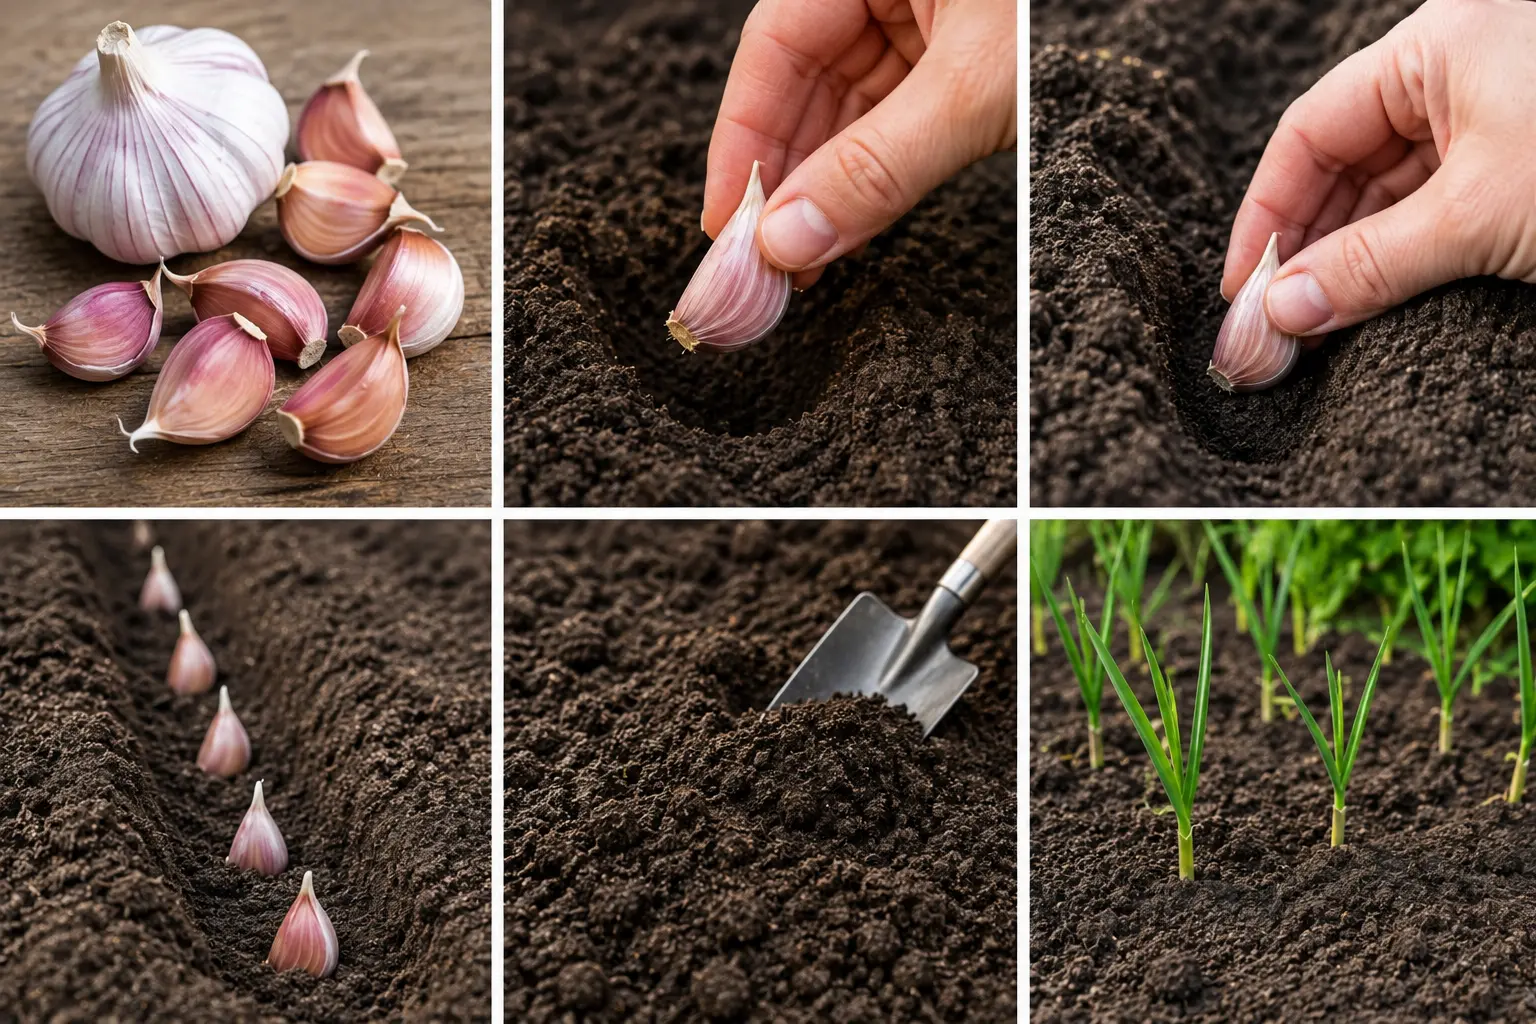
Plant individual garlic cloves 2 to 3 inches (5 to 7.6 cm) deep with the pointed end facing up, spaced 6 inches (15 cm) apart in rows set 8 to 10 inches (20 to 25 cm) apart. This spacing gives each clove enough room to form a full-size bulb without competing for nutrients.
The math behind spacing matters for yield planning. A 4-foot (1.2-metre) row planted at 6-inch spacing holds 9 cloves, and a 3-foot (0.9-metre) row holds 7 cloves. Each clove produces one full bulb, so a 100-square-foot (9.3-square-metre) bed planted at standard spacing yields between 150 and 200 bulbs under average growing conditions.
Break the garlic bulb into individual cloves within 24 hours of planting, and select the largest cloves for seed. Bulb size at harvest correlates directly with the size of the clove planted — small cloves consistently produce small bulbs.
Skip grocery store garlic for planting stock. Most grocery garlic gets treated with a sprout inhibitor and often carries varieties poorly suited to home climates. Certified nematode-free seed garlic from a local nursery or seed company costs more but reduces the risk of introducing soil-borne pests.
Watering and Fertilizing Schedule
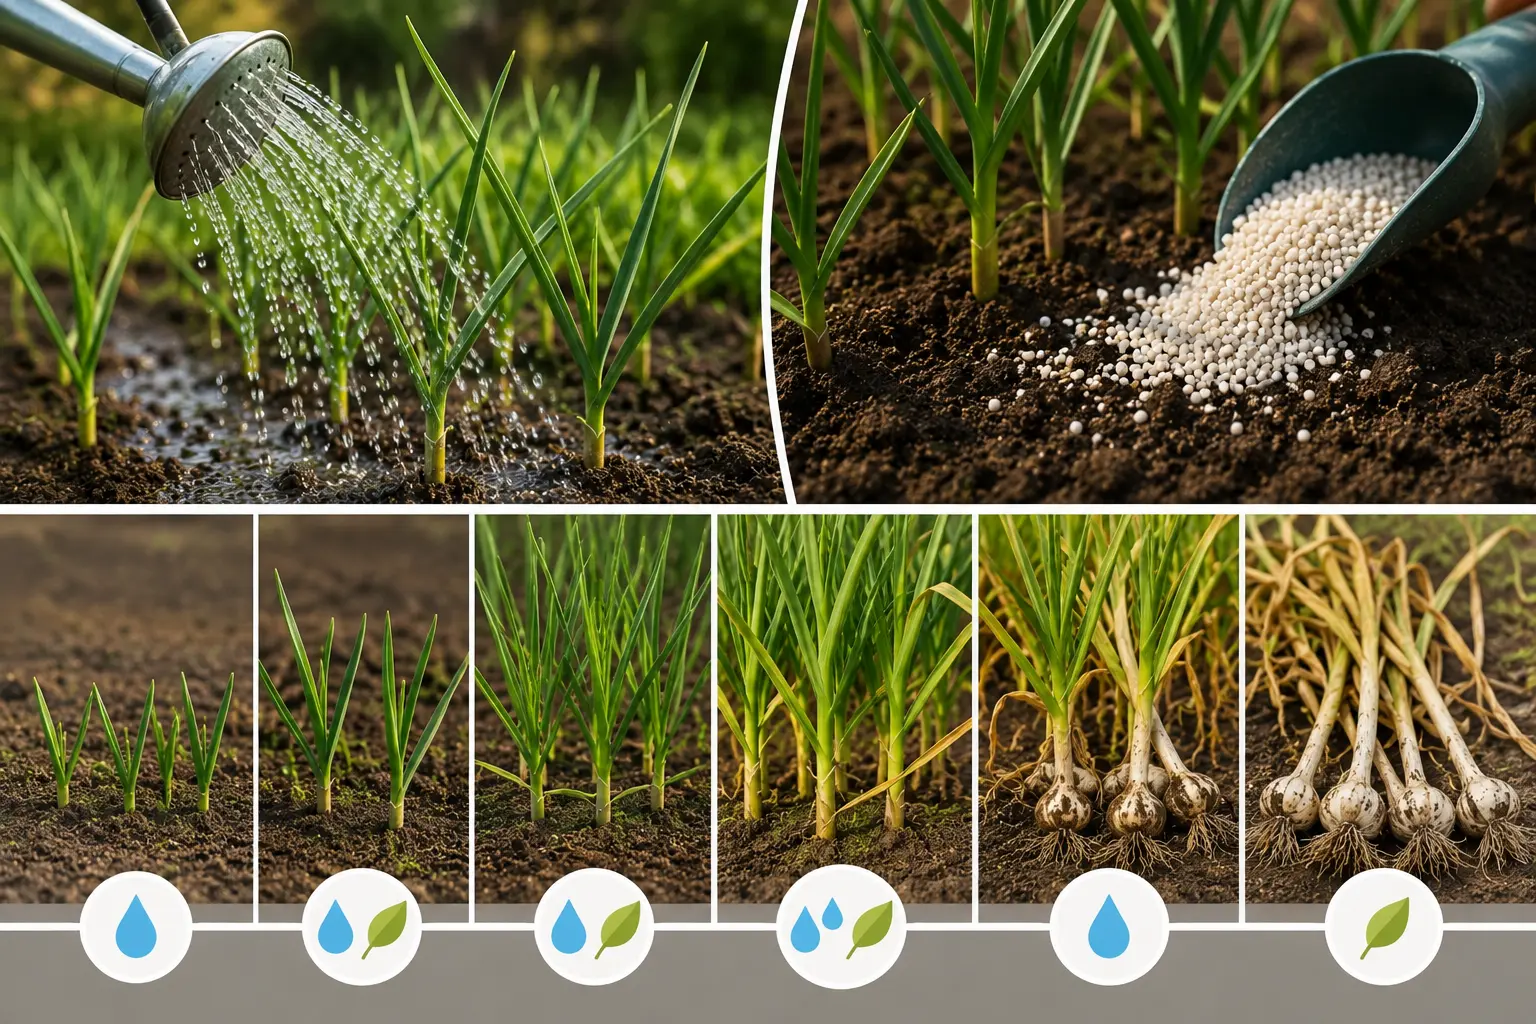
Garlic needs 1 inch (2.5 cm) of water per week during active spring growth, delivered through rainfall or irrigation combined. Reduce watering two weeks before harvest, since wet soil at harvest time promotes mould and shortens storage life.
Fertilise garlic on this three-stage schedule:
- At planting, mix compost and a nitrogen source into the bed.
- Early spring, when shoots reach 4 to 6 inches (10 to 15 cm) tall, side-dress with compost or a balanced organic fertiliser.
- Mid-spring, once scapes begin forming, apply a final light nitrogen feeding, then stop fertilising to let the plant redirect energy into bulb formation.
Growers using composted chicken manure report yield increases of 15 to 20 percent over compost alone, according to grower reports from Maine’s organic farming community. Excess nitrogen late in the season delays bulb maturity and produces oversized leaves at the expense of bulb size.
Mulching
Apply 3 to 4 inches (7.6 to 10 cm) of straw, shredded leaves, or grass clippings over the planting bed immediately after planting. Mulch insulates cloves against temperature swings, suppresses weeds through spring, and breaks down into additional organic matter by harvest time.
Pull mulch back from emerging shoots in early spring, once shoots reach the soil surface, so sunlight reaches the plants directly. Leave the remaining mulch in place between rows to control weeds through the growing season.
Garlic Scapes: What They Are and When to Cut Them
Garlic scapes are the curling flower stalks that hardneck varieties send up in late May or June, and cutting them redirects the plant’s energy from seed production into bulb growth. Removing scapes as soon as they curl into a loop increases final bulb size by 20 to 30 percent, based on university extension trial data.
Cut scapes with garden shears just above the topmost leaf. Scapes taste like a milder version of the mature bulb and work well in pesto, stir-fries, and grilled dishes. Softneck garlic does not produce scapes, since only hardneck varieties develop the rigid flowering stalk.
Companion Planting
Garlic repels several common garden pests through its sulphur compounds, which make it a useful companion for roses, tomatoes, and brassicas such as cabbage and broccoli. Avoid planting garlic near asparagus, beans, and peas, since garlic stunts growth in legumes through allelopathic root chemicals.
Fast-growing crops such as lettuce, spinach, or radishes fit well in the same bed as garlic, planted between rows in early spring before the garlic canopy fills in.
Pests and Diseases
Four problems account for most garlic crop losses in home gardens: bloat nematodes, garlic rust, white rot, and onion maggots.
Bloat nematodes cause swollen, distorted cloves and spread through infected seed stock, soil, or plant debris. Prevention matters more than treatment here plant only certified nematode-free seed garlic and rotate garlic beds on a 3- to 4-year cycle.
Garlic rust appears as orange-red pustules on leaves during cool, wet spring weather and reduces bulb size, if left untreated, by limiting the plant’s ability to photosynthesize. Improve air circulation between plants and remove infected foliage promptly to slow the spread.
White rot produces a white fungal growth at the base of the bulb and survives in soil for up to 20 years once established. No treatment cures white rot, so growers who find it should avoid planting alliums in that bed permanently.
Onion maggots tunnel into bulbs near the soil line, typically in cool, wet spring conditions. Floating row covers placed over beds during egg-laying season in April and May block adult flies from reaching the crop.
Growing Garlic in Containers
Garlic grows successfully in containers at least 8 inches (20 cm) deep and 12 inches (30 cm) wide, filled with well-draining potting mix amended with compost. Space cloves 4 inches (10 cm) apart in containers, slightly closer than the in-ground spacing, since container-grown garlic reaches a somewhat smaller final size regardless of spacing.
Move containers to a sheltered location during hard freezes in Zones 3 through 5, since container soil freezes faster than ground soil and can damage developing roots. Container-grown garlic still needs the same 240- to 270-day growing period as garlic planted directly in the ground.
When and How to Harvest Garlic
Harvest garlic when the bottom third to half of the leaves turn brown while the top leaves remain green, typically in July across most US growing zones. Each green leaf corresponds to one intact wrapper layer around the bulb, so harvesting too late causes the papery wrapper to degrade and shortens storage life significantly.
Dig bulbs with a garden fork rather than pulling by hand, since pulling risks snapping the stalk and separating it from the bulb underground. Lift each bulb carefully to avoid bruising, since bruised bulbs rot in storage within weeks rather than lasting through winter.
Curing and Storage
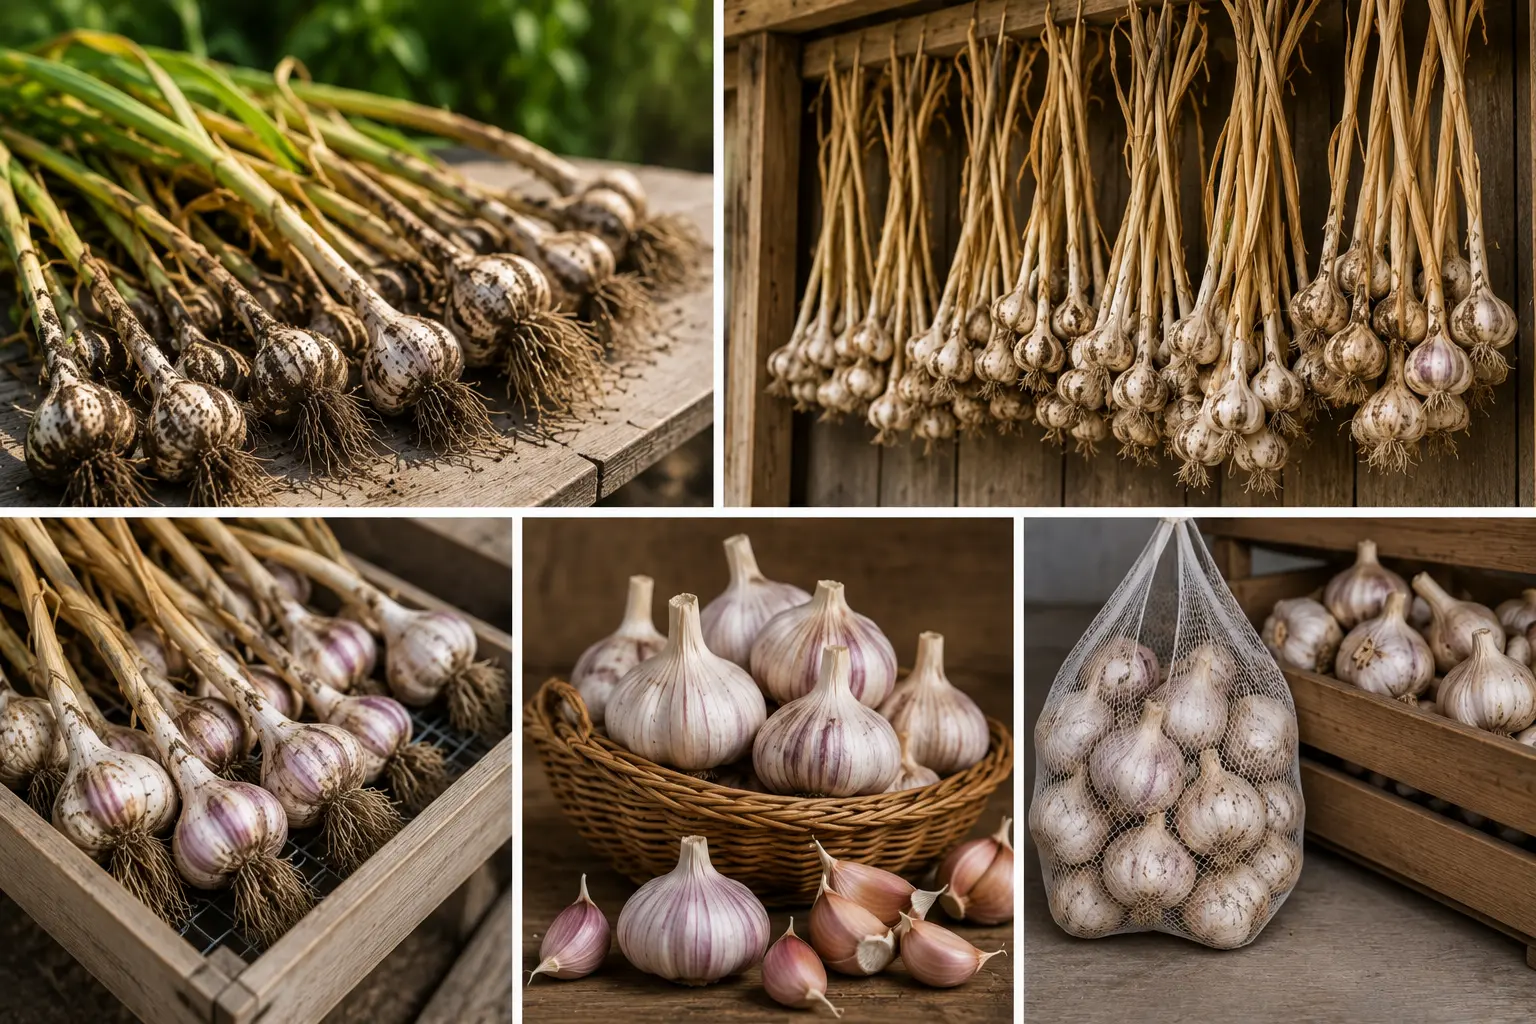
Cure harvested garlic in a single layer in a dry, shaded, well-ventilated space for 2 to 4 weeks before trimming roots and tops. Proper curing allows the outer wrapper to dry fully, which forms the protective layer that determines how long the bulb lasts in storage.
After curing, trim roots close to the base and cut stems to 1 inch (2.5 cm) above the bulb for hardneck varieties, or braid the flexible stems of softneck varieties for hanging storage. Store cured bulbs at 45 to 55°F (7 to 13°C) with 45 to 55 percent humidity conditions found in most basements, root cellars, or unheated garages.
Hardneck garlic keeps for 4 to 6 months under these conditions, and softneck garlic keeps for 6 to 12 months. Reserve 10 to 15 percent of the largest, healthiest bulbs from each harvest as seed stock for next season’s planting.
Troubleshooting Common Problems
- Small bulbs at harvest usually trace back to small seed cloves, late planting, or insufficient nitrogen during spring growth. Plant larger cloves and fertilize on schedule to correct this the following season.
- No bulb formation, just green tops happens when garlic gets planted in spring instead of fall, skipping the cold period bulbs need to divide into cloves. Gardeners in warm climates who missed fall planting should refrigerate cloves for 6 to 8 weeks before spring planting to simulate winter dormancy.
- Premature sprouting in storage results from curing bulbs incompletely or storing them above 55°F (13°C). Move stored garlic to a cooler location and use sprouting bulbs first, since they decline in quality quickly once green shoots emerge.
- Yellowing leaves in early spring typically signal nitrogen deficiency rather than disease. Side-dress with compost or a nitrogen-rich amendment and monitor for improvement within one to two weeks.
FAQs
Does garlic need full sun to grow well?
Yes. Garlic needs 6 to 8 hours of direct sunlight daily to form full-size bulbs. Partial shade reduces bulb size and slows maturity, particularly during the bulbing stage in late spring.
Can gardeners plant garlic in spring instead of fall? Yes, spring planting works if cloves are pre-chilled for 6 to 8 weeks at 40°F (4.4°C) first. Skipping this step usually produces green tops without divided bulbs.
How many garlic bulbs grow from one clove?
One clove produces exactly one bulb containing multiple new cloves. A single planted bulb, broken into 8 to 10 cloves, yields 8 to 10 bulbs at harvest.
Is garlic toxic to dogs or cats?
Yes. Garlic contains thiosulphate compounds toxic to dogs and cats in sufficient quantity, causing damage to red blood cells. Keep planting areas and harvested bulbs away from pets.
Does garlic need to be replanted every year?
Yes, garlic is replanted annually from saved cloves, since existing plants die back completely after harvest. Growers reserve 10 to 15 percent of each harvest as seed stock.
Conclusion
Growing garlic successfully comes down to four decisions: choosing hardneck or softneck varieties suited to the local climate, planting at the correct depth and spacing for the growing zone, managing water and nitrogen on a fixed schedule rather than guesswork, and curing bulbs fully before storage. Gardeners who plant certified disease-free seed cloves in fall, mulch consistently, and harvest at the right leaf-colour stage typically see bulb size and storage life improve within the first season. The crop rewards patience over effort, since most of the work happens underground during the eight months between planting and harvest.