Mushroom gardening turns a cardboard box of sawdust, or a shady corner of the yard, into a repeat harvest of shiitake, oyster, or lion’s mane in four to eight weeks. It’s one of the few gardening projects that works whether you’ve got raised beds and a full patio setup or just counter space, a spray bottle, and a room that stays between 55°F and 75°F (13°C to 24°C).
This guide covers four ways gardeners grow mushrooms at home: indoor grow kits, monotubs, outdoor garden beds, and log gardens, along with the substrate, humidity, and contamination basics that separate a full harvest from a moldy bag. Several of these methods slot directly into an existing vegetable garden, and the harvest itself keeps and cooks a lot like the fruits and vegetables you’re probably already growing alongside it.
What Do You Need to Grow Mushrooms at Home?
Four things: spawn, a growing medium called substrate, a container that holds humidity, and a spray bottle or humidifier. Spawn is mycelium, the vegetative thread network of a fungus, grown onto grain, sawdust, or wooden plugs so it can be transferred into fresh material. Substrate is what the mycelium actually eats, and the right choice depends on the species. Hardwood sawdust and straw work for wood-loving mushrooms like oyster and shiitake. Composted horse manure or a coco coir blend suits manure-loving species like button mushrooms.
A humidity tent (a plastic bag with holes, or a dedicated grow chamber) keeps moisture between 80% and 95% during fruiting. Grab a cheap thermometer/hygrometer combo too. Most hardware stores sell them for under $15.
Sterilization matters most for grain spawn, which contaminates fast without a pressure cooker or autoclave. That’s why most first-time growers skip that step entirely and buy pre-colonized spawn or a ready-to-fruit block instead.
Which Mushroom Species Should Beginners Grow First?
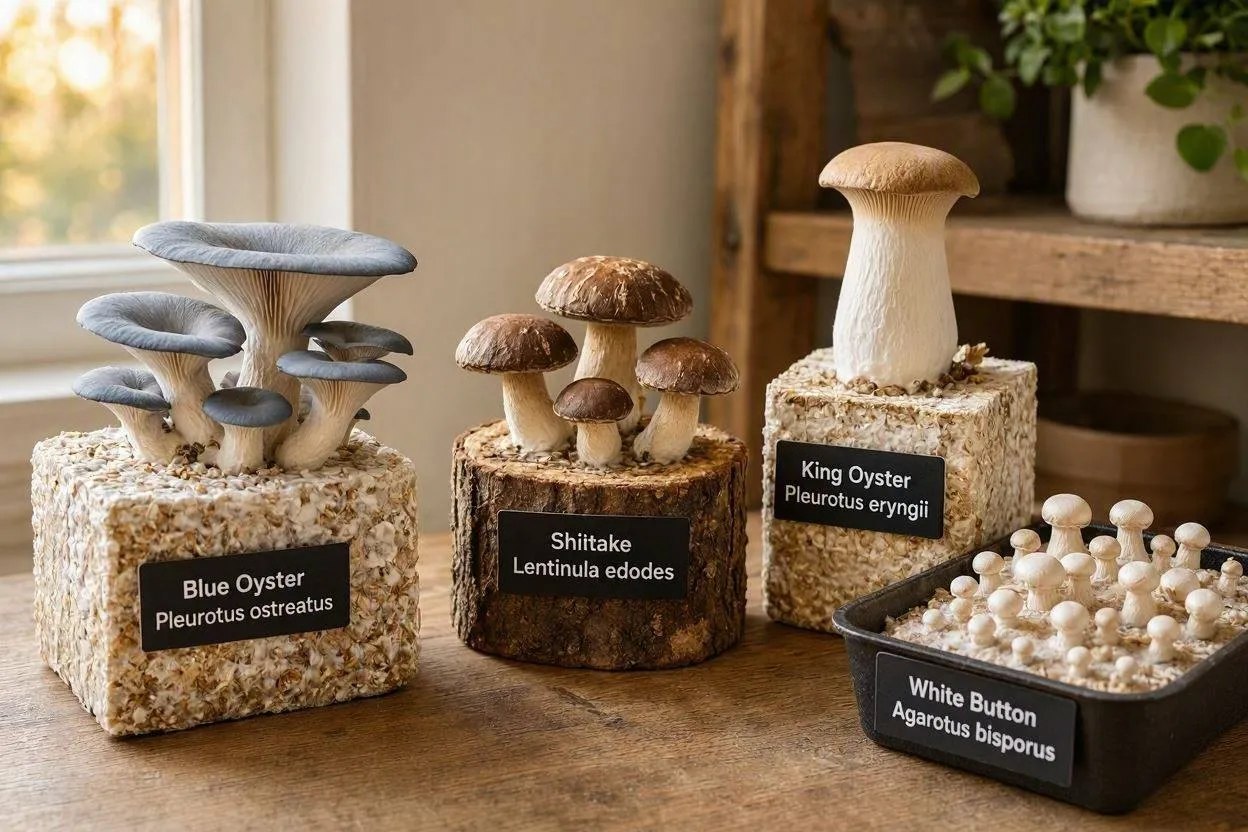
Blue oyster mushrooms (Pleurotus ostreatus) are the easiest species to start with. They colonize substrate in 10 to 14 days and tolerate a wider temperature swing than most gourmet varieties. Oyster mycelium also outcompetes airborne contaminants faster than almost any other cultivated species, so it tends to forgive the small mistakes new growers make with sterile technique.
Three other species work well for a first attempt:
Lion’s Mane (Hericium erinaceus)
Fruits in 10 to 12 days on hardwood sawdust, and tastes surprisingly close to crab or lobster when sautéed.
Shiitake (Lentinula edodes)
Slower, often 6 to 12 months on logs, but only 4 to 6 weeks on sawdust blocks.
Wine Cap (Stropharia rugosoannulata)
Grows outdoors in wood chip beds and shrugs off more neglect than any indoor species.
Morels and porcini are a different story. They need a living relationship with a tree’s roots (mycorrhizal association), so they can’t be reliably grown in a container. Order a morel grow kit hoping for a harvest and you’ll almost certainly be disappointed. Both stay in the “forage, don’t farm” category for home growers.
How Long Does It Take to Grow Mushrooms?
Most species take four to eight weeks from inoculation to first harvest. Colonization, the phase where mycelium spreads through the substrate, eats up two to three weeks of that window. Fruiting, the visible mushroom-growing stage, adds another one to two weeks once humidity and fresh air trigger pinning.
Oyster mushrooms move fastest, sometimes fruiting within three weeks of inoculation. Shiitake logs sit at the other extreme: a freshly cut oak or maple log needs 6 to 18 months of outdoor colonization before its first flush, though it then keeps producing for three to four years. Starting with a pre-colonized block instead of raw logs cuts that wait to under a month, since someone else already handled the slow part.
How to Grow Mushrooms at Home Using a Grow Kit
Five steps: soak the block, cut or open the bag, mist twice daily, wait for pins, then harvest before the caps flatten. Kits arrive pre-colonized, so the sterilization and inoculation work is already done for you.
- Remove the block or bag from its box and check for pins that may have already formed.
- Soak dense blocks (like portabella substrate) in water for 3 to 12 hours, following the label. Bag-style kits usually skip this step entirely.
- Cut small X-shaped slits into the bag surface, or fold back the plastic collar, to expose the substrate to air.
- Mist the exposed surface two to three times a day and keep the kit out of direct sunlight, somewhere between 65°F and 75°F (18°C to 24°C).
- Harvest once the caps begin to flatten or curl upward, usually 7 to 14 days after pins appear.
A Back to the Roots oyster kit, probably the most common starter product on US grocery shelves, produces a first flush of 4 to 6 ounces within two weeks and can flush again two or three more times before the substrate runs out of nutrients. Let the block rest 7 to 10 days after harvest before re-soaking to trigger the next flush.
How to Grow Mushrooms in a Monotub
A monotub is a large plastic bin, usually around 64 quarts, drilled with air holes and packed with sterilized bulk substrate. It produces far more per cycle than a single grow bag, which is why it’s the natural next step for anyone who wants to scale past one kit without building out a full grow room.
Building one yourself is cheaper than buying a pre-made unit: a clear 64-quart tote, a drill with 1-inch and 2-inch hole saw bits, self-adhesive filter patches, and a black contractor bag to line the interior and block light. Drill six 2-inch holes around the perimeter, add smaller 1-inch holes just above the substrate line, and cover every hole with a filter patch so gas can exchange without letting contaminants in.
Once the spawn and substrate (often a coco coir, vermiculite, and gypsum blend abbreviated CVG) fully colonize over two to three weeks, the tub moves into fruiting conditions: 65°F to 75°F (18°C to 24°C), 85% to 95% humidity, and daily fresh air exchange by fanning the lid or cracking it briefly. A single monotub can yield several pounds per flush, compared with a few ounces from a grow bag. That gap is basically the whole reason serious home cultivators upgrade after their first successful kit.
How to Grow Mushrooms in a Garden Bed
For gardeners with existing raised beds or a patch of yard to spare, wine cap mushrooms are the easiest species to fold straight into a working garden. Spread a 4-to-6-inch layer of fresh hardwood wood chip mulch along garden paths, around fruit trees, or between rows in a vegetable bed, then scatter sawdust spawn through the top few inches and water it in well. Keep the bed shaded and consistently moist, the way you would any garden mulch, and mushrooms typically start showing within four to six weeks in the right season (spring or fall in most climates).
This method doubles as a soil-building technique many gardeners already use. As the mycelium breaks the wood chips down over a season or two, it leaves behind a rich, dark compost that improves drainage and adds organic matter to the surrounding garden soil, so the bed keeps working for the garden even after the mushroom flushes taper off. Wine caps also tolerate part-sun spots that are too shady for most vegetables. That makes them a good fit for the awkward corners of a yard, under a deck, or along a north-facing fence, that would otherwise sit unused.
How to Grow Mushrooms on Logs Outdoors in the Garden
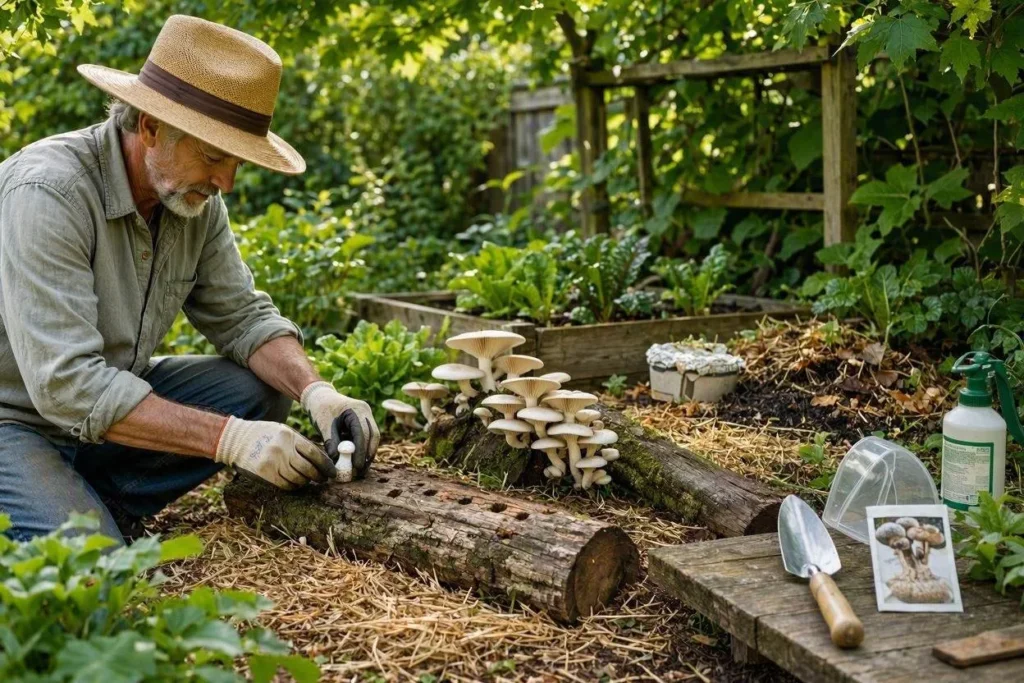
For gardeners who’d rather work outside than run an indoor grow setup, log cultivation turns a shaded patio corner or garden bed into a low-maintenance mushroom patch. Freshly cut oak or maple works best, inoculated with plug or sawdust spawn within two weeks of the tree being felled. Shiitake and wine cap are the two species most commonly grown this way in home gardens across the US, often tucked along a fence line or leaned up against a garden shed where they won’t compete with other plantings.
- Drill diamond-pattern holes across the log’s surface, roughly 6 inches apart.
- Hammer wax-sealed wooden dowel plugs, or pack sawdust spawn, into each hole.
- Seal each plug with a layer of beeswax to lock in moisture and keep competing fungi out.
- Let the log rest in a shaded, humid spot (under tree cover or leaning against a north-facing wall) for 6 to 18 months while mycelium colonizes the wood.
- Force fruiting once colonization is complete by soaking the log in cold water for 24 hours; that cold shock kicks the mycelium into producing mushrooms within one to two weeks.
A single 3-to-4-foot oak log can keep producing for three to four years, with each flush yielding anywhere from half a pound to two pounds depending on log diameter and species. Log growing needs almost no daily attention beyond the occasional watering during dry spells, which makes it one of the lowest-maintenance additions any home garden can take on. Wine cap mushrooms go a step further and pair naturally with an existing vegetable garden: spawn spread through wood chip paths between raised beds will colonize the mulch and fruit right alongside the vegetables, breaking down the wood chips into rich compost as it goes.
What Temperature and Humidity Do Mushrooms Need?
Most cultivated mushrooms fruit between 55°F and 75°F (13°C to 24°C) with humidity held between 85% and 95%. Colonization tolerates warmer conditions, often up to 80°F (27°C), while fruiting needs a cooler, wetter environment to trigger pin formation.
Species vary within that range:
| Species | Fruiting Temperature Range | Notes |
| Oyster | 65°F to 75°F (18°C to 24°C) | Comfortable across the full standard range |
| Lion’s mane | 65°F to 70°F (18°C to 21°C) | Narrower band; largely stops producing usable fruiting bodies above 75°F |
| Reishi | Up to 85°F (29°C) | Tolerates the warmest conditions of the three |
Growers in wetter climates like the Pacific Northwest often time outdoor inoculation for October; growers somewhere colder, like Minnesota, target April or May instead, matching inoculation to the region’s natural humidity cycle rather than fighting it with equipment.
Fresh air matters too. Swapping out stale, carbon-dioxide-heavy air for fresh oxygen prevents the long, thin “fingers” that form when CO2 builds up inside a sealed container. Fanning a monotub lid for 30 seconds twice a day, or leaving a bag’s filter patch uncovered, solves this without dropping humidity.
How to Prevent Contamination When Growing Mushrooms
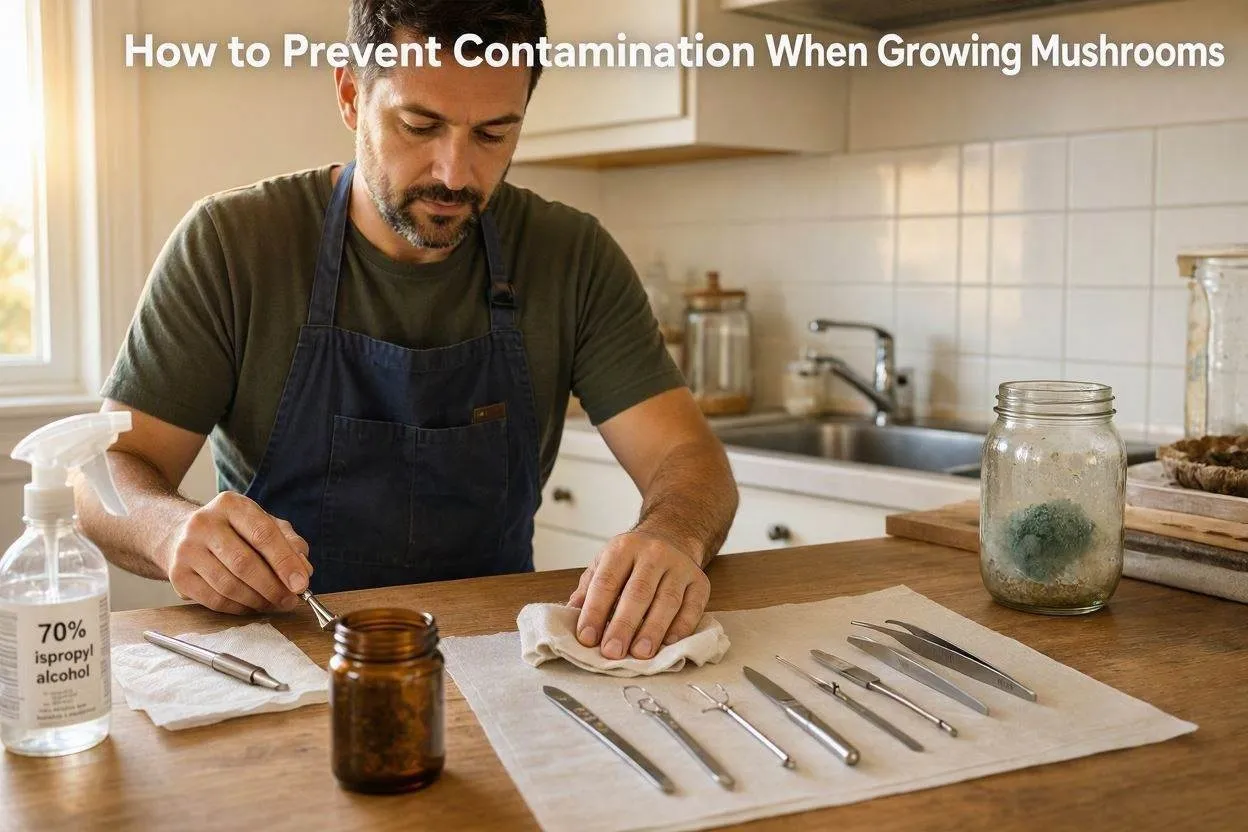
Sanitize every surface and tool that touches the substrate. Airborne mold spores compete directly with mushroom mycelium for the same nutrients, and green mold (Trichoderma) is the most common home-grow contaminant, showing up as fuzzy green or blue-green patches within the first week after inoculation.
A few habits cut that risk substantially:
- Wipe work surfaces and tools with 70% isopropyl alcohol before handling spawn or substrate.
- Work near a still-air box or laminar flow hood for agar or liquid culture work, since even light air currents carry mold spores.
- Toss any bag or block showing green, black, or pink patches right away. Don’t try to cut around the contamination. Mold spreads through the substrate faster than it shows on the surface.
Cobweb mold, a gray, thread-like growth that’s easy to mistake for healthy white mycelium at first glance, sometimes responds to a light dusting of cinnamon or a hydrogen peroxide spray if you catch it early. A heavily contaminated block should go straight into an outdoor compost pile, not the kitchen trash, so you’re not spreading spores indoors.
Losing one in five blocks to contamination during your first few attempts is normal. That failure rate usually drops below one in ten once sanitation becomes routine.
How Much Does It Cost to Grow Mushrooms at Home?
A single grow kit costs between $20 and $35 and yields roughly 1 to 1.5 pounds across two or three flushes. A reusable monotub setup costs more upfront but ends up cheaper per pound over time. Garden beds and logs cost the least to maintain long-term, since wood chips and fallen branches are often free or nearly free for anyone already doing yard work.
| Method | Upfront Cost | Yield per Cycle | Reusable? |
| Grow kit or bag | $20–$35 | 4–12 oz per flush | No, single-use substrate |
| DIY monotub | $50–$100 (bin, drill bits, filters) | 2–5 lbs per flush | Yes, bin reused indefinitely |
| Shiitake log kit | $30–$60 per log | 1–2 lbs over 3–4 years | Yes, log lasts multiple seasons |
| Garden bed (wood chips + spawn) | $10–$20 | 2–5 lbs per season | Bed can be reused and re-spawned |
Three monotubs a year, at roughly $15 per batch in spawn and substrate, can produce over 15 pounds of gourmet mushrooms annually for under $50 in recurring costs.
How to Harvest Homegrown Mushrooms
Twist the whole cluster off at its base rather than cutting individual caps, the same way you’d pull a head of lettuce rather than shear it. Twisting removes the mushroom cleanly, without leaving a stump behind that rots into the substrate or bed. The right window to harvest is just before the cap edges flatten out or curl upward.
Oyster and lion’s mane clusters come away cleanly with a firm twist. Shiitake caps, whether grown on logs or in a garden bed, do better with a clean cut at the stem base, since twisting can dislodge nearby pins that haven’t matured yet. Garden bed harvests, like wine caps, can keep producing flush after flush through the growing season as long as the mulch stays moist, much like a perennial herb bed that comes back on its own.
Storing and Cooking Your Harvest
Fresh mushrooms behave more like tender garden produce than like pantry staples, so treat them the way you’d treat a basket of just-picked greens or squash. Skip washing them under running water right after harvest; a soft brush or a damp paper towel gets the substrate off without waterlogging the caps. Store them loose in a paper bag in the crisper drawer, the same drawer where you’d keep lettuce, herbs, or other fresh vegetables, and most gourmet varieties hold up well for 5 to 10 days.
Oyster and lion’s mane both sauté quickly in butter or olive oil and pair naturally with other vegetable-garden staples: onions, garlic, tomatoes, peppers, and leafy greens all show up in the same skillet without much fuss. Shiitake caps hold their texture well in soups, stir-fries, and grain bowls alongside carrots, squash, and other root vegetables. Wine caps, picked straight from a garden bed, taste mild and slightly nutty and work well roasted alongside potatoes or other root vegetables from the same bed.
For a longer harvest window, mushrooms freeze and dehydrate well, much like surplus tomatoes or peppers from a vegetable garden. Sauté and freeze in an airtight container for up to six months, or slice thin and dehydrate for a shelf-stable ingredient that rehydrates in soups and sauces later in the year.
Which Method Is Best for You?
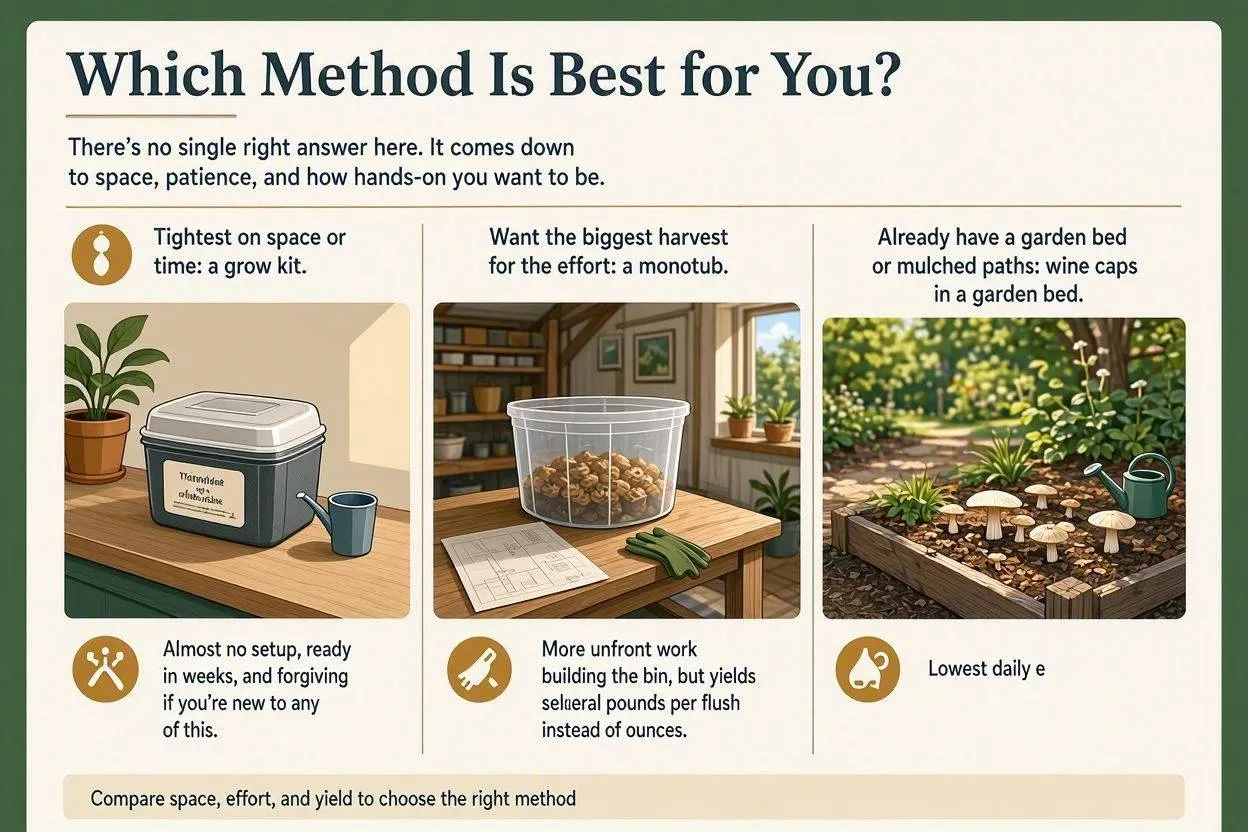
There’s no single right answer here. It comes down to space, patience, and how hands-on you want to be.
- Tightest on space or time: a grow kit. Almost no setup, ready in weeks, and forgiving if you’re new to any of this.
- Want the biggest harvest for the effort: a monotub. More upfront work building the bin, but yields several pounds per flush instead of ounces.
- Already have a garden bed or mulched paths: wine caps in a garden bed. Lowest daily effort of any method and doubles as free compost for the surrounding soil.
- Willing to wait a season for years of harvests: an outdoor shiitake log. Slowest to start, but a single log keeps fruiting for three to four years with almost no attention in between.
A lot of gardeners end up doing more than one: a kit on the counter for a quick first harvest, and a log or garden bed started at the same time for the years-long payoff once it catches up.
Watering and Daily Care
Mushroom care follows a different rhythm than the rest of the garden, and getting the watering schedule wrong is the single most common beginner mistake. During colonization, before any mushrooms are visible, skip watering altogether. The sealed bag, tub, or wrapped log already holds enough moisture, and misting too early just invites the same mold that ruins a waterlogged seed tray.
Once white pins appear, switch to daily attention the way you would for any newly planted seedling bed: mist the exposed surface two to three times a day with a spray bottle, enough to keep it visibly damp without pooling water, and give the container fresh air for a minute or two by cracking the lid or fanning the bag. Skipping the air exchange is just as common a mistake as overwatering, and it shows up as the same kind of stunted, misshapen growth that comes from planting seedlings too close together.
Outdoor mushroom gardens need far less hands-on care than indoor setups. A wine cap bed or shiitake log planted in mulch or wood chips only needs a deep watering during dry spells, roughly weekly in hot weather, so the wood stays damp the way any garden mulch does. In a normal rainy stretch, an outdoor bed needs no watering at all. That’s part of why gardeners who already maintain wood chip paths or a mulched border find mushrooms such an easy addition to their existing routine.
FAQs
Is it hard to grow mushrooms at home for the first time?
Not really. A pre-colonized grow kit needs only misting and airflow, so first-time cultivation is manageable even without any gardening experience.
Do homegrown mushrooms need soil?
Not usually. Mushrooms grow on substrate like sawdust, straw, or logs rather than garden soil, though wine cap beds are the exception since they colonize wood chip mulch laid directly over the ground.
Can I grow mushrooms alongside my vegetable garden?
Yes. Wine cap mushrooms are the most garden-friendly species since they grow in wood chip mulch and tolerate the partial shade found around most vegetable beds, fruit trees, and garden paths.
How many times can one mushroom kit be harvested?
Most kits produce two to three flushes before the substrate runs out of nutrients, with each flush a bit smaller than the last.
What’s the easiest mushroom to grow for a first garden bed?
Wine cap mushrooms. They tolerate the widest range of outdoor conditions and neglect of any species, and settle right into a mulched bed the way ground cover would.
Conclusion
Pick your method based on what you’ve actually got: a counter and a spray bottle gets you a grow kit harvest in under a month, a spare afternoon and a plastic tote gets you a monotub pulling pounds instead of ounces, and a shaded corner of the yard turns into a wine cap bed or a shiitake log that keeps feeding you for years with barely any upkeep. The fundamentals don’t change no matter which one you choose — clean hands and tools, humidity in the 85–95% range, and temperatures between 55°F and 75°F — and however you grow them, mushrooms end up doing the same job as everything else in the garden: sliced into a skillet with your tomatoes, roasted next to your root vegetables, or tossed into whatever salad you’re building that week.