Onions are about as forgiving as vegetables get. A single 10-foot row can turn out 60 to 100 bulbs if you get the timing and spacing right. Here’s everything from choosing seeds or sets through curing bulbs for winter storage.
When to Plant Onions
Start onion seeds indoors 10 to 12 weeks before your last expected frost, then move seedlings outside about 4 weeks before that date. If starting seeds indoors sounds like more than you want to deal with, onion sets or transplants can go straight into the ground 2 to 4 weeks before the last frost. Both tolerate a light frost just fine.
Timing depends heavily on your USDA hardiness zone. In Zone 5, where the last frost lands around April 15, you’d start seeds indoors between February 1 and February 15, then transplant outdoors in mid-March. Zone 9 gardeners, whose last frost falls in January, can plant seedlings outside as early as mid-January. Check a local frost date calendar before you lock in a schedule. Get it wrong by even two weeks and you’ll notice the difference in bulb size at harvest.
Onion Seeds vs. Onion Sets vs. Onion Transplants
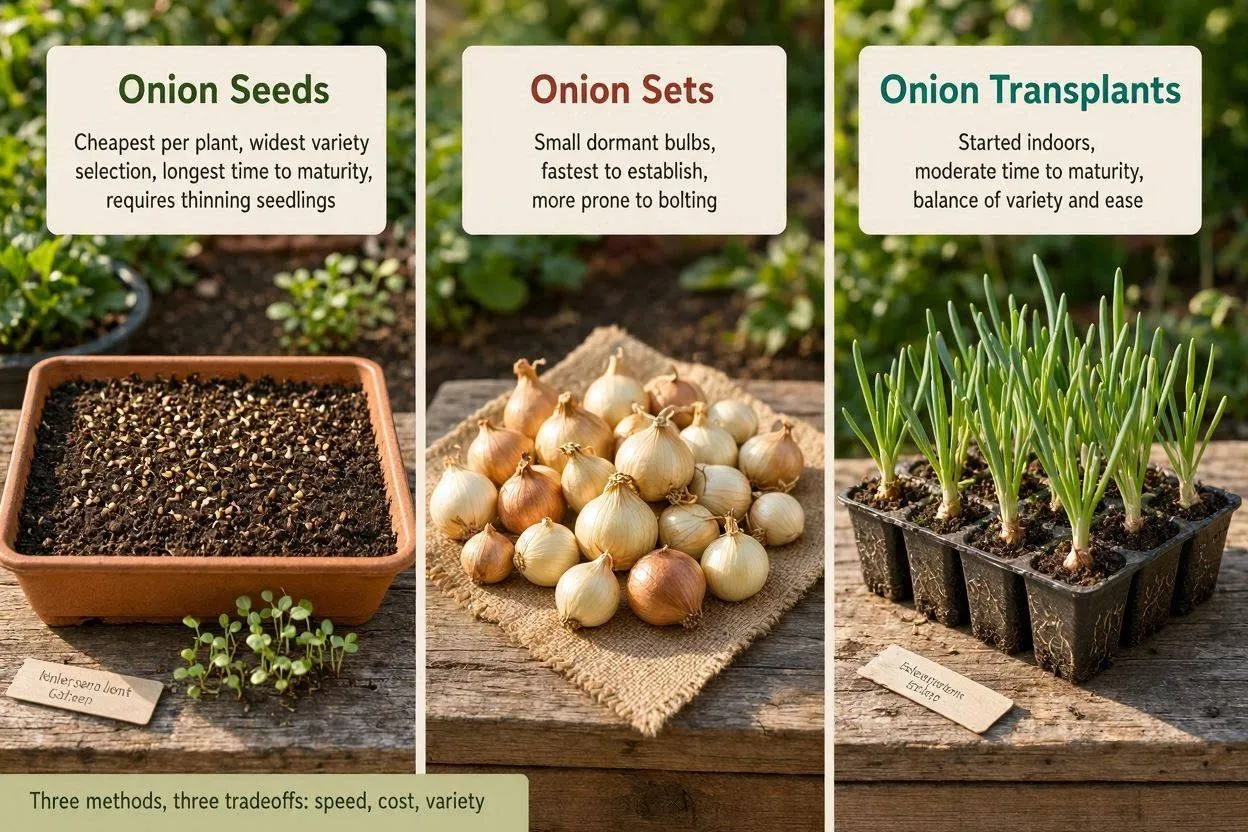
Sets grow fastest and take the least skill. Seeds cost less and open up far more variety. Three methods, three different tradeoffs:
- Onion seeds: Cheapest per plant, widest variety selection, longest time to maturity, and you’ll need to thin seedlings after they germinate.
- Onion sets: Small dormant bulbs from last season’s growth. They establish fast, but they’re more prone to bolting (flowering early instead of forming a bulb).
- Onion transplants: Young plants started from seed earlier in the year. Moderate cost, less bolting risk than sets, though the variety selection is narrower than what you’d get from a seed packet.
Someone growing ‘Walla Walla’ onions for fresh summer eating might start seeds indoors in February just to get the widest genetic diversity. Someone who wants a reliable fall harvest without much fuss often just buys bare-root transplants in bundles of 50 and skips the indoor-growing stage entirely.
Short-Day, Intermediate-Day, and Long-Day Onions Explained
Bulb formation depends on day length, not temperature. This is called photoperiodism: the onion detects how many hours of daylight it’s getting and only starts swelling a bulb once it hits a certain threshold. Pick the wrong type for your latitude and you’ll end up with small bulbs, or none at all.
| Onion Type | Daylight Trigger | Best Latitude Range | Example Varieties |
| Short-day | 10–12 hours | 25°N–35°N (southern states) | 1015Y, Georgia Sweet, Texas Sweet |
| Intermediate-day | 12–14 hours | 32°N–42°N (mid-latitude states) | Candy, Yellow of Parma |
| Long-day | 14–16 hours | 37°N–47°N (northern states) | Walla Walla, Yellow Spanish, Copra |
A gardener in Georgia growing long-day onions will watch the plants put out leafy tops all season and never form a usable bulb, because Georgia’s daylight hours never reach the 14-to-16-hour trigger long-day types need. Matching onion type to latitude is probably the single most important decision you’ll make before anything even goes in the ground.
Choosing an Onion Variety
Storage life swings wildly by variety, anywhere from one month to eight, so pick based on how you actually plan to use the harvest. Yellow onions like ‘Yellow of Parma’ keep for 6 to 8 months in a root cellar and are your best bet for cooking and caramelizing. Sweet onions like ‘Walla Walla’ and ‘Georgia Sweet’ only last 1 to 2 months but taste noticeably milder raw. Red onions like ‘Ruby Red’ and ‘Long Red Florence’ land in between on storage life, with a sharper flavor that holds up well in pickles and salsas.
Bunching onions (Allium fistulosum), also known as scallions or green onions, never bulb up much and are ready in 30 to 40 days. Shallots (Allium cepa var. aggregatum) grow in small clusters like garlic and bring a sweeter, more concentrated flavor than standard bulb onions.
Soil Preparation and Planting Steps
Onions want well-drained soil with a pH between 6.0 and 6.8, mixed with 2 to 3 inches (5 to 7.6 cm) of compost before planting. If you’re working with heavy clay, build raised beds or mounded rows instead of fighting it. Standing water around onion roots leads straight to bulb rot.
To prepare a bed and get plants or sets in the ground:
- Test soil pH and adjust with sulfur or lime if it falls outside 6.0 to 6.8.
- Work 2 to 3 inches of compost or aged manure into the top 6 inches of soil.
- Create a furrow 2 inches deep and 2 inches wide.
- Water the furrow before placing plants; this softens the soil and cuts down on transplant shock.
- Set each plant or bulb root-end down, spaced according to the guidelines below.
- Cover the roots completely, but leave the neck and green top above the soil line.
Someone dealing with heavy Midwest clay might build a raised bed 8 inches tall and fill it with a 50/50 mix of topsoil and compost. That combination drains fast enough to head off the fungal rot that thrives in wet clay.
Spacing and Planting Depth
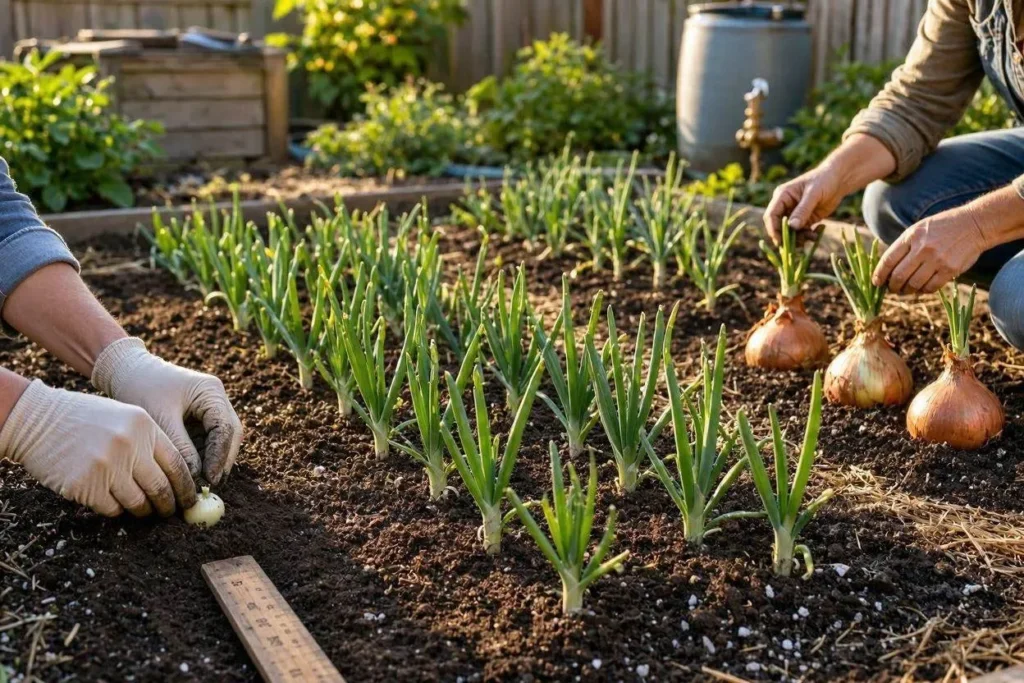
Space plants 4 to 6 inches (10 to 15 cm) apart, in rows 12 to 18 inches (30 to 46 cm) apart, at a depth of 1 to 2 inches (2.5 to 5 cm). Planning to harvest young as green onions instead of full bulbs? Tighten that up to 2 to 3 inches.
- Seeds: Sow ¼ inch deep, then thin seedlings to 3 to 4 inches apart after they germinate.
- Sets: Plant 1 to 2 inches deep, pointed tip facing up.
- Transplants: Set roots 1 to 2 inches deep, neck above the soil surface.
Overcrowded onions fight each other for nutrients and end up smaller. Thinning on schedule matters just as much as getting the initial spacing right.
Watering, Feeding, and Weeding
Onions need about 1 inch (2.5 cm) of water a week, whether from rain or irrigation, since their shallow roots can’t reach moisture stored deeper in the soil. Water at the base rather than overhead. Wet foliage invites fungal disease.
Nitrogen helps early leaf growth, but stop feeding once the bulbs start swelling. Keep pushing nitrogen after that point and you’ll get delayed maturity plus thick, soft necks that rot in storage. A balanced fertilizer every 3 to 4 weeks through early summer, withheld once bulbs visibly swell, gets you firmer bulbs that store longer.
Weeds compete hard against onions because of that shallow root system, so weeding weekly protects your yield. Mulch with straw or untreated grass clippings to suppress weeds without the compaction risk that comes from hoeing too close to fragile onion roots.
Common Onion Pests and Diseases
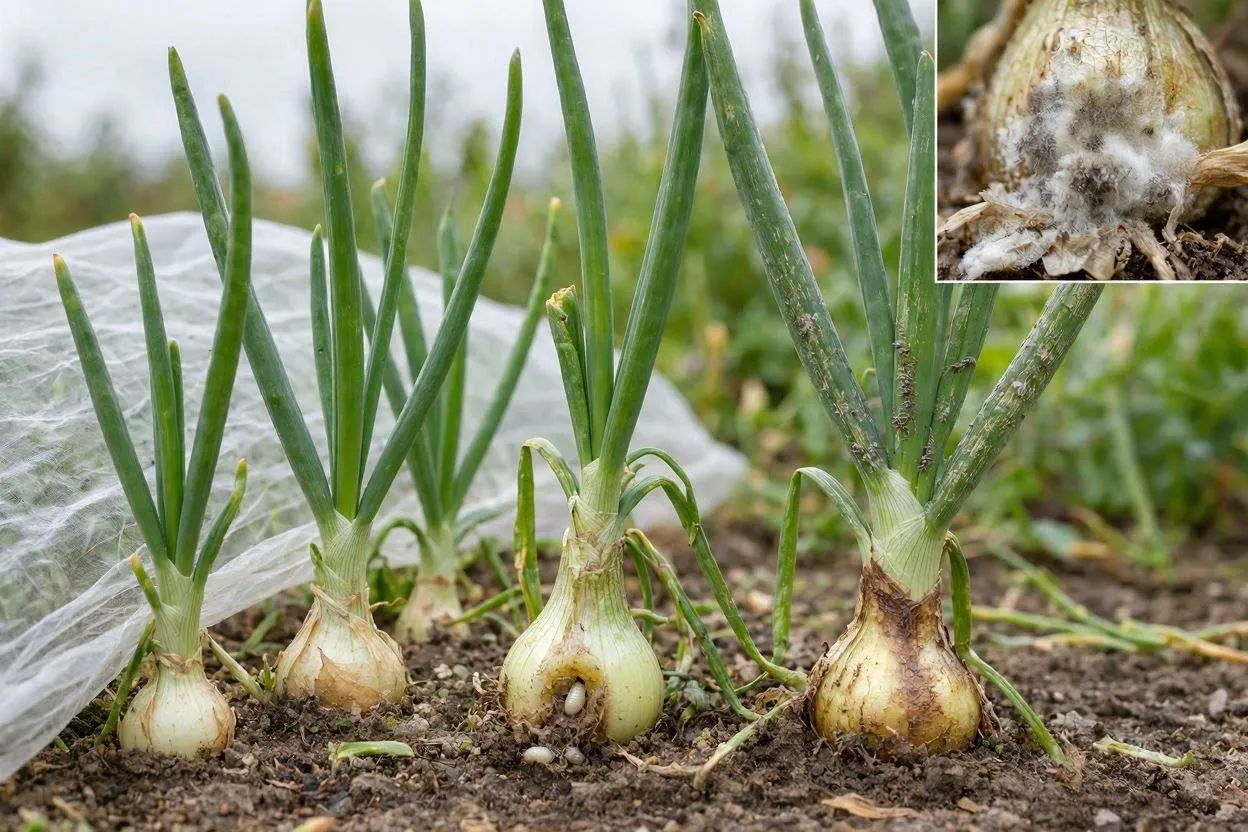
Onion maggots, thrips, and fungal rot cause most of the crop loss home gardeners deal with, and floating row cover heads off most insect damage before it starts. Onion maggots are fly larvae that burrow into leaves and tunnel down into the bulb, leaving a mushy, rotted neck behind. Thrips scar leaf surfaces and stunt growth, showing up as silvery streaking on the foliage.
Fungal diseases, including Fusarium basal rot, white rot, and Botrytis neck rot, spread through wet soil and infected plant debris. Rotating crops on a 3-to-4-year cycle cuts down on fungal buildup, since these pathogens linger in soil where onions or other alliums grew recently.
If you spot scarred, silvery leaves in early summer, check the neck of several plants right away. Thrips damage often sets up a secondary bacterial infection that ruins storage quality even when the bulb still looks fine at harvest.
Companion Planting for Onions
Onions repel aphids, cabbage worms, and carrot flies through their sulfur scent, which makes them handy border plants for brassicas and carrots. Good neighbors include carrots, beets, lettuce, tomatoes, peppers, and cabbage-family crops like broccoli and kale.
Keep onions away from peas, beans, asparagus, and sage. These crops stunt or change flavor when grown too close to alliums. Other onion-family crops, garlic, leeks, shallots, should also stay separated from onions, since shared pests like onion maggot spread faster between plants in the same family.
Growing Onions in Containers
Onions do fine in containers at least 8 inches (20 cm) deep with drainage holes, using a potting mix blended with compost. Container plantings need more frequent watering than in-ground beds, since soil in pots dries out much faster.
Got a small balcony? Try scallions in a window box just 6 inches deep, and harvest them continuously as cut-and-come-again greens instead of waiting on full bulbs. Full-sized bulb onions need a deeper, wider container to give each plant its 4-to-6-inch spacing.
When and How to Harvest Onions
Harvest once the tops fall over naturally on their own and about 50% of the plants in a row show this, usually 90 to 120 days after transplanting. Pull bulbs before the tops fall and you’ll cut into storage life, since the neck hasn’t started the drying process yet that seals the bulb against rot.
Pick a dry, sunny day if you can. Loosen compacted soil around each bulb with a garden fork, then lift by hand rather than yanking on the leaves, which can tear away and bruise the bulb. Leave the tops attached for curing.
Green onions and scallions can come out any time after 30 days. They never form a real storage bulb, and they taste best pulled young anyway.
Curing and Storing Onions
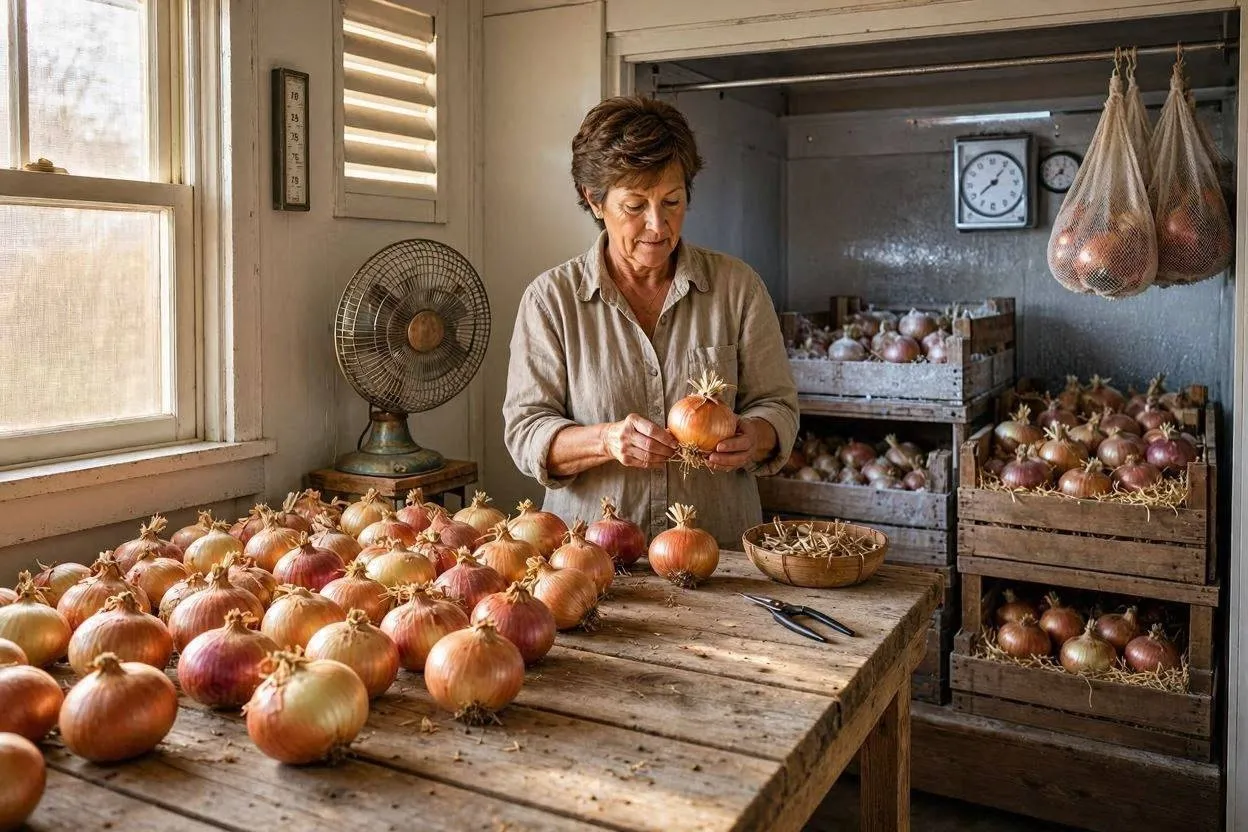
Cure onions for 2 to 3 weeks in a warm, dry, well-ventilated space, ideally 75 to 85°F (24 to 29°C). Lay them in a single layer out of direct sunlight, and run a fan if the curing spot feels humid.
Onions are ready for storage once the outer skin turns papery and the neck feels dry and wiry instead of soft. Clip roots and tops down to 1 to 2 inches, then store in mesh bags or open crates at 32 to 40°F (0 to 4°C) with 60 to 70% relative humidity. Properly cured storage onions, ‘Yellow of Parma’ and other long-storage varieties among them, will last 6 to 8 months under those conditions. Sweeter varieties like ‘Walla Walla’ only keep for 1 to 2 months no matter how well you cure them, so eat or freeze those first.
One more thing: never store onions next to potatoes. The ethylene gas potatoes give off speeds up sprouting and rot in both vegetables.
FAQs
How long does it take to grow onions from seed to harvest?
100 to 175 days, depending on variety and day-length type. Green onions mature much faster, in 30 to 40 days.
Do onions need full sun to grow?
Yes, at least 6 to 8 hours of direct sunlight a day to form bulbs properly. Shaded plantings turn out thin, undersized bulbs no matter how good the soil is.
Can onions grow back after harvesting?
No. Pulling the bulb removes the whole plant. Bunching onions are the exception; they can regrow from cut stems left in the soil.
What is the best month to plant onions?
Depends on your USDA zone: February for Zones 5–7, January for Zones 8–9, and December for Zones 9b–11 with fall planting.
Why are my onion bulbs small?
Usually overcrowded spacing, the wrong day-length variety for your latitude, or nitrogen fertilizer applied too late and delaying bulb swell.
Conclusion
Growing onions well comes down to three decisions: matching onion type to latitude, spacing plants correctly, and curing bulbs fully before storage. Skip any one of these and you’ll end up with smaller bulbs or a shorter storage window, even if everything else goes right.
Pick the planting method that fits your time and budget, seeds, sets, or transplants. Double-check that the day-length type matches your latitude before buying anything. And follow through on curing and storage temperature, since that last stage decides whether your harvest lasts through winter or spoils within weeks. Get through one full season doing it right, and you’ll have the instincts to grow an even better crop next year.