Prune crape myrtles once a year in late winter — between late January and early March — before new growth begins. Remove dead wood, water sprouts, crossing branches, and weak interior growth. Never cut the main trunks. That single rule prevents the most widespread pruning mistake in American landscaping: crape murder.
Every spring, thousands of crape myrtles get topped into flat, knobby stumps. Homeowners copy neighbors, landscapers follow bad habits, and the trees suffer for it. This guide explains exactly what to cut, what to leave, and how to fix a tree that has already been topped.
What Is Crape Murder — and Why Does It Happen?
Crape murder is the practice of topping crape myrtles by cutting all major branches back to thick stubs. Topped trees grow back with a cluster of weak, whippy shoots that cannot hold blooms upright. The ornamental bark never matures. The tree looks disfigured for years.
3 reasons crape murder spreads so fast:
- Neighbor effect: most homeowners prune what they see. If every tree on the street is topped, it looks normal.
- Wrong belief: many people think heavy cutting produces more flowers. It does not. Crape myrtles bloom on current-season new growth — light pruning produces the same flower count with a better structure.
- Size mismatch: a large-growing cultivar planted under a power line needs constant cutting. The real fix is planting the right size cultivar from the start.
The solution to all 3 is the same: prune lightly, prune correctly, and match the cultivar to the available space. If you already grow crape myrtles or are choosing a variety, the crape myrtle collection covers mature sizes for every popular cultivar.
When to Prune Crape Myrtle Trees
The best time to prune crape myrtle is late winter, between late January and mid-March, before the first buds swell. Pruning during dormancy lets you see the branch structure clearly, and the tree heals fast once spring growth begins.
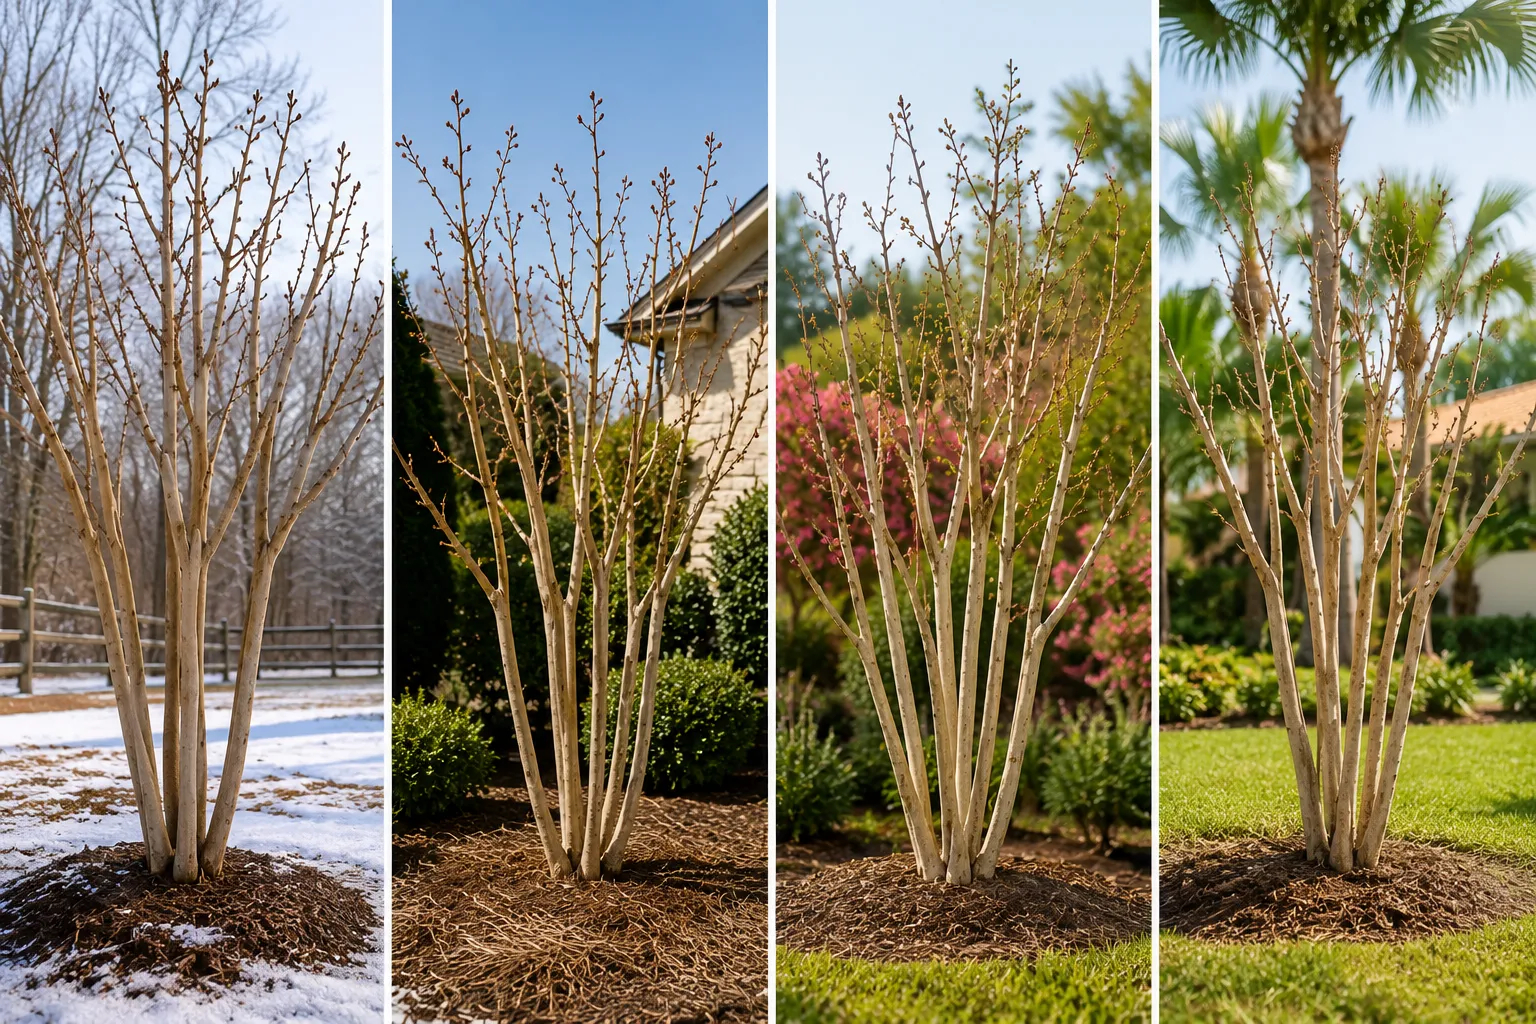
Timing by USDA hardiness zone:
- Zones 7–8 (South Carolina, Georgia, Alabama, Mississippi): late January to mid-February.
- Zone 9 (Texas, Louisiana, coastal California): mid-January to early February.
- Zone 10 (South Florida, Hawaii): December to January during the brief dormant period.
- Zones 6–7 (Virginia, North Carolina, Tennessee): late February to mid-March, after the coldest nights pass.
Never prune in fall. Fall pruning triggers tender new growth that winter temperatures kill. Never prune after April in zones 7 and above — cutting active growth delays blooms by 6 to 8 weeks.
Dead, damaged, or diseased branches are the 1 exception. Remove those any time of year without waiting for the winter window.
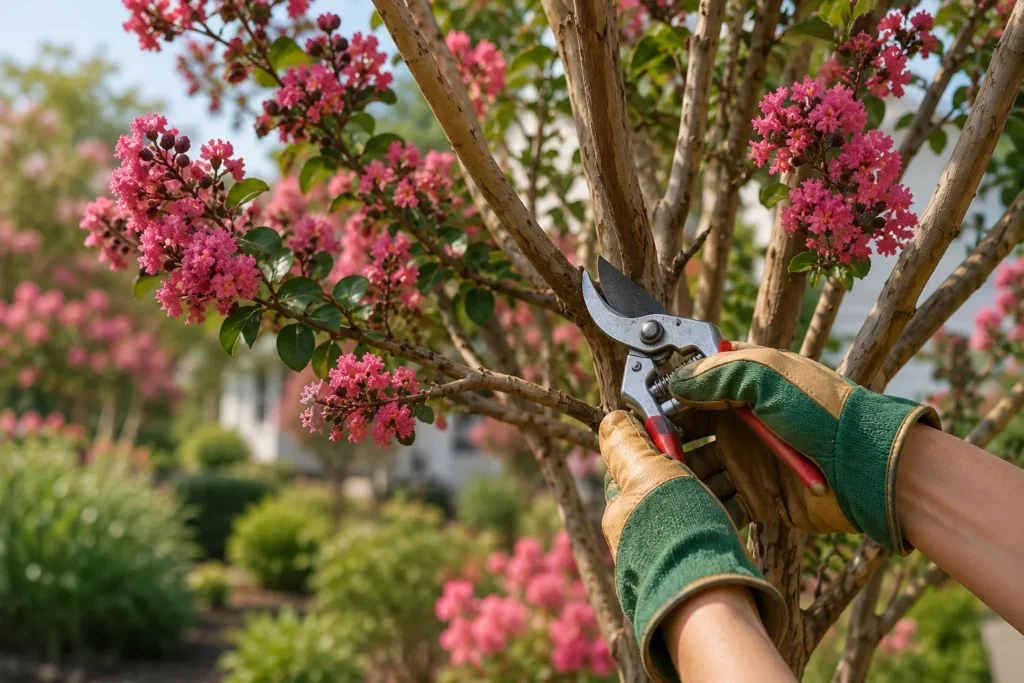
5 Pruning Tools You Need — and the Right Size for Each Cut
Using the wrong tool tears bark and leaves ragged cuts that invite disease. Match the tool to the branch diameter every time.

- Hand pruners (bypass type): branches under 1/2 inch (12mm) thick. Use for tip pruning, sucker removal, and spent seed capsules.
- Loppers: branches 1/2 inch to 2 inches (12–50mm) thick. Use for interior thinning and canopy work.
- Pruning saw or pole saw: branches over 2 inches (50mm) thick. Use for removing major limbs on established trees.
- Heavy work gloves: protect hands from wood splinters and tool grip fatigue.
- Goggles: required when cutting overhead branches.
Keep all blades sharp and clean. Dull blades crush bark instead of cutting it. Wipe blades with a 10% bleach solution between trees to stop disease spreading from one plant to another.
How to Prune Crape Myrtle: Step-by-Step
Follow these 6 steps in order. Each step builds on the last — skipping ahead creates more work and a worse result.
Step 1: Remove Water Sprouts and Suckers
Water sprouts are fast-growing, vertical shoots that grow from trunk crotches or along major limbs. Suckers grow from the root zone at the base of the tree. Both divert energy from flowering growth and clutter the branch structure.
Cut water sprouts flush to the branch they grow from. Cut suckers flush to the soil or root. Do not leave stubs — stubs regrow faster than clean cuts. Remove suckers any time they appear, not just during the winter pruning session.
Step 2: Remove Dead, Damaged, and Crossing Branches
Dead branches are dry, brittle, and show no buds or green tissue under the bark. Cut each dead branch back to the nearest healthy branch junction — not to an arbitrary point. Crossing branches rub together and wound the bark, opening entry points for disease. Remove the weaker of the 2 crossing branches at its base.
Step 3: Raise the Canopy on Young Trees
On trees pruned for the first 3 to 5 years, remove the lowest branches progressively to raise the canopy to the desired height. A good target is branches starting at 6 feet (1.8m) above grade for a standard multi-trunk tree form.
Never remove more than 1/3 of the live canopy in a single pruning. Remove too much in one session and the tree responds with a surge of weak water sprouts the following spring.
Step 4: Thin the Interior Canopy
A dense interior prevents air circulation and creates humid conditions where powdery mildew thrives. Remove branches that grow inward toward the center of the tree. Thin clusters of small branches back to a single well-placed stem.
The goal is an open canopy where sunlight reaches the interior and air moves freely through the branch structure. Well-grown crape myrtles in the South achieve this naturally — the tree shape does most of the work.
Step 5: Tip Back Branch Ends
Tip pruning means cutting the ends of branches back by 6 to 18 inches (15–45cm) to a point 1/4 inch (6mm) above an outward-facing bud. This redirects growth outward, widens the canopy, and stimulates the flush of new growth that produces summer flowers.
Cut each branch to a bud that faces away from the center of the tree. Growth follows the direction the bud points. Inward-facing buds create crossing branches the following season.
Step 6: Remove Spent Seed Capsules
Seed capsules are the round, dark brown clusters left at branch tips after summer flowering. Removing them in late winter prevents self-seeding and keeps the tree’s energy focused on new growth. Snip each cluster at its base with hand pruners.
Tip for a second bloom: on smaller crape myrtles, remove spent flower clusters immediately after the first summer bloom fades. This technique, called deadheading, triggers a second flush of flowers on the same season’s new growth.
Crape Myrtle Pruning Quick Reference
| Pruning Task | Best Time | Tool Needed | Difficulty |
| Remove dead/crossing branches | Any time | Hand pruners or loppers | Easy |
| Remove water sprouts & suckers | Any time | Hand pruners | Easy |
| Raise the canopy (lower limbs) | Late winter | Loppers or hand saw | Moderate |
| Thin the canopy (interior branches) | Late winter | Hand pruners or loppers | Moderate |
| Tip back branch ends | Late winter | Hand pruners | Easy |
| Remove spent seed capsules | After bloom or late winter | Hand pruners | Easy |
Choosing the Right Cultivar Eliminates Most Pruning Problems
The most effective crape myrtle pruning strategy is planting a cultivar that fits the space without heavy cutting. A tree mature at 8 feet (2.4m) planted under a 10-foot (3m) clearance never needs its canopy topped. A 30-foot (9m) cultivar in the same spot needs cutting every season.
Crape myrtle cultivars by mature height:
- Dwarf — under 5 feet (1.5m): Chickasaw (2 ft), Pocomoke (3 ft), Centennial (4 ft). Ideal for containers, borders, and low foundation plantings.
- Semi-dwarf — 5 to 12 feet (1.5–3.7m): Acoma, Hopi, Zuni. Good for small yards and under utility lines.
- Medium — 12 to 20 feet (3.7–6m): Catawba, Tuskegee, Yuma. Standard garden tree sizes.
- Large — over 20 feet (6m): Natchez (30 ft), Muskogee (25 ft), Tuscarora (20 ft). Specimen trees for open lawns and parks.
For small gardens and patio spaces, dwarf crape myrtle varieties deliver the same summer blooms and ornamental bark at a fraction of the height — with zero topping required.
How to Fix a Crape Myrtle That Has Already Been Topped
Yes, a previously topped crape myrtle recovers — but full recovery takes 3 to 5 years of corrective pruning. The goal is to gradually rebuild a natural branch structure from the water sprouts that grow from old topping cuts.
Follow this 3-year corrective pruning plan:
- Year 1 (late winter): from the cluster of sprouts growing from each topping stub, select 1 or 2 of the strongest and best-positioned. Remove all others flush to the stub. Do not top these selected shoots.
- Year 2 (late winter): the selected shoots have thickened into proper branches. Thin any new water sprouts. Tip back the selected branches to outward-facing buds to build a wider, more natural form.
- Year 3 (late winter): continue thinning water sprouts and interior growth. The tree should now have a recognizable natural structure. Maintain with light annual pruning going forward.
Do not cut the topping stubs off at the trunk. The stubs are already wounds. Cutting them flush creates larger wounds that the tree struggles to compartmentalize. Work with the growth emerging from the stubs instead.
3 Pruning Mistakes That Damage Crape Myrtles
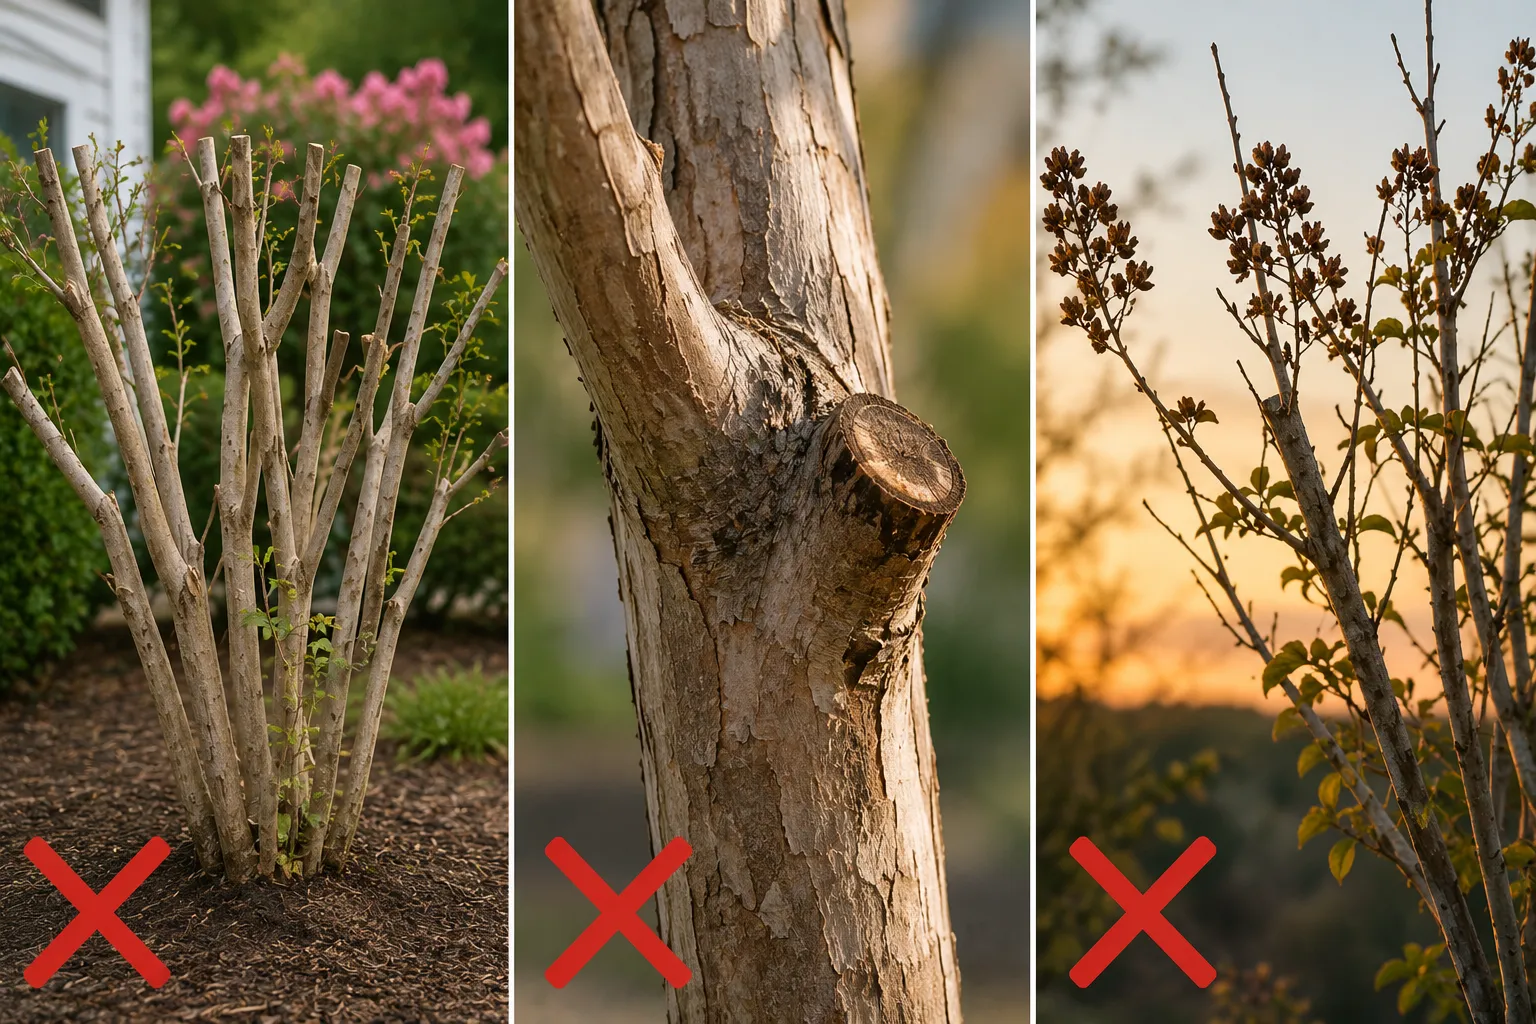
Mistake 1: Pruning More Than 25% of the Live Canopy
Removing more than 25% of live branches in one session stresses the tree and triggers a defensive flush of water sprouts. Those sprouts grow fast, crowd the canopy, and need removal the following year — creating a cycle of more work, not less.
Mistake 2: Leaving Stubs on the Trunk
Trunk stubs do not heal. The tree cannot grow callus tissue over a large stub the way it closes a proper collar cut. Stubs rot from the inside and create entry points for wood-boring insects. Always cut back to the branch collar — the slight swelling at the branch base — not to an arbitrary length.
Mistake 3: Pruning in Late Summer or Fall
Late summer pruning removes the flower buds forming for the current season and sacrifices the bloom display. Fall pruning triggers new growth that has no time to harden before the first frost, causing dieback that worsens the following spring structure. Prune once, in late winter, and leave the tree alone through the growing season.
Crape Myrtle Pruning by Tree Size
Pruning approach differs depending on whether the tree is a young plant, an established specimen, or a shrub form. Apply the matching method from the start to avoid corrective work later.
Young Trees (Years 1–3)
Select 3 to 5 of the strongest trunks from the base and remove all others at ground level. This establishes the multi-trunk form that defines the classic crape myrtle silhouette. Remove lower branches progressively each winter to raise the canopy as the tree grows.
Established Trees (Years 4 and Beyond)
Established trees need minimal intervention. Remove dead wood, water sprouts, suckers, and crossing branches annually. Tip back branch ends lightly if the canopy becomes too dense. A healthy, correctly sited crape myrtle needs less than 30 minutes of pruning per year.
Shrub and Dwarf Forms
Dwarf and shrub crape myrtles need even less pruning than tree forms. Remove dead stems and crossing branches in late winter. Tip back the outer stems lightly to shape the plant. Never cut dwarf forms to the ground — this eliminates the current season’s blooms and destroys the natural mounding form.
For a full guide on growing, selecting, and caring for crape myrtles beyond just pruning, the complete crape myrtle growing guide covers zones, soil, fertilizing, disease prevention, and cultivar selection in one place.
Frequently Asked Questions
When is the best time to prune crape myrtles?
Late January to mid-March, during dormancy, before new buds swell. The exact window shifts by 2 to 4 weeks depending on USDA zone — earlier in zones 9–10, later in zones 6–7.
How much should I cut off a crape myrtle?
Remove no more than 25% of the live canopy in one session. On a mature tree, that means light tip pruning, sucker removal, and selective interior thinning — not cutting back to thick stubs. Less is almost always better.
Can I prune crape myrtle in summer?
No — summer pruning removes active growth and delays or eliminates the current season’s blooms. The 1 exception is deadheading spent flower clusters immediately after blooming to encourage a second flush of flowers.
Will a crape myrtle grow back after being topped?
Yes, but full structural recovery takes 3 to 5 years of corrective pruning. Select the best water sprouts from each stub, remove the rest, and rebuild the canopy gradually each winter.
Do crape myrtles need pruning every year?
Not always. A correctly sited cultivar with a good natural structure may need only dead wood removal and sucker cleanup each winter. Annual tip pruning and canopy thinning improve flower production but are not essential for tree health.
Conclusion
Crape myrtle pruning comes down to 1 principle: work with the tree’s natural form, not against it. Remove dead wood, suckers, water sprouts, and crossing branches each late winter. Tip back branch ends to direct new growth outward. Leave the main trunks and structural branches untouched.
The trees that look best year after year are almost always the least-pruned ones. A crape myrtle planted in the right space, matched to its mature size, and given a light annual tidy grows into an elegant multi-trunk specimen with exfoliating bark, 90 to 120 days of summer blooms, and brilliant fall color — no topping required.