Growing peanuts at home takes 100 to 160 frost-free days, full sun, sandy, well-drained soil, and a soil temperature of at least 65°F (18°C) at planting. Do all that right and a single plant will hand you 30 to 50 pods by the end of the season, whether it’s in a garden bed in Georgia or a five-gallon bucket on a balcony in Minnesota. Peanuts (Arachis hypogaea) aren’t nuts at all. They’re legumes, related to peas and beans, and that one fact explains almost everything odd about how they grow: the nitrogen-fixing roots, and their strange habit of burying their own fruit underground.
This guide walks through the whole process: soil prep, planting method, watering and fertilizing, pest and disease identification, harvest timing, and curing. Whether you’re growing in containers, in the Deep South, or pushing a short season up north, you’ll find what applies to your setup.
What Is a Peanut, Botanically Speaking?
Peanuts are legumes, not tree nuts, and they form their pods underground instead of on a vine or branch. A flower blooms above the soil and self-pollinates. Then a stalk called a “peg” pushes down from the base of the flower into the ground, 1 to 2 inches (2.5 to 5 cm) deep, and the tip swells into the pod you eventually dig up. The crop traces back to South America, and Georgia alone grows about half the U.S. supply today, which is why most guides assume a long, hot southern season. A short-season variety, though, puts a real harvest within reach even well north of Georgia.
What Conditions Do Peanuts Need to Grow?
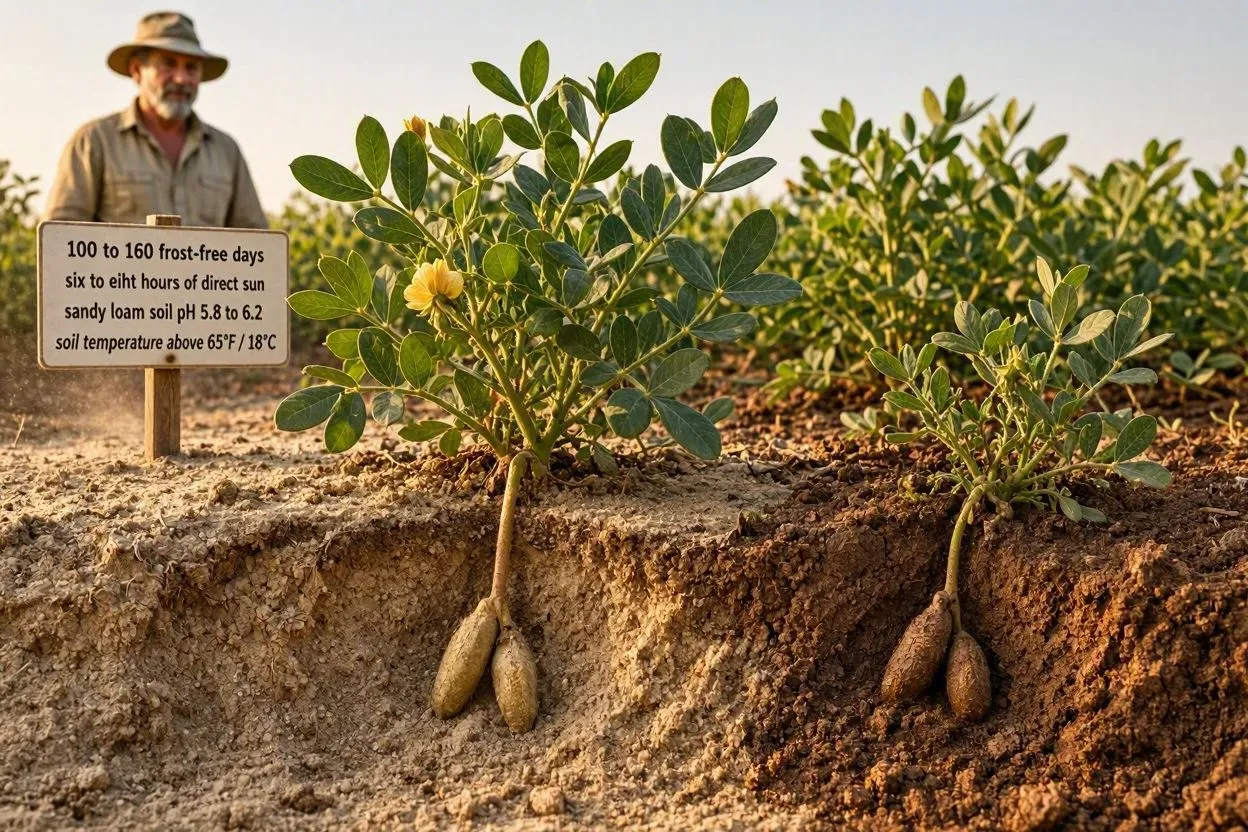
Four things, really: 100 to 160 frost-free days, six to eight hours of direct sun, sandy loam soil with a pH between 5.8 and 6.2, and consistent warmth above 65°F (18°C) at the soil level. Skip any one of them and yield drops sharply, even if the plant technically survives.
Soil and pH
Loose, well-drained, sandy soil works best because the pegs need to push through it easily on their way to forming pods. Heavy clay compacts around them and blocks pod formation outright. Test your soil’s pH before planting; 5.8 to 6.2 keeps nutrients available without inviting the leaf diseases that thrive in overly acidic beds. If your soil’s heavier, work in 2 to 3 inches (5 to 7.5 cm) of compost before planting, or just build a raised bed and skip the drainage problem entirely.
Sunlight and Temperature
Full sun isn’t optional here. Six to eight hours a day is what drives the flowering and pegging that lead to a full harvest. Soil temperature matters more than air temperature at planting time: seeds sown into soil colder than 65°F (18°C) will rot before they ever sprout. An $8 soil thermometer, the same one you’d use for starting vegetables, takes the guesswork out of it.
USDA Hardiness Zones
Peanuts grow reliably in Zones 7 through 10, where the frost-free window naturally runs past 140 days. Zones 5 and 6 can still produce a harvest, but it takes some work: start seeds indoors four to five weeks before the last frost and pick a short-season variety rated at 110 days or fewer. One Minnesota gardener in Zone 6B has documented full harvests doing exactly this, using PVC hoops for extra heat retention through cooler summers.
How to Plant Peanuts Step by Step
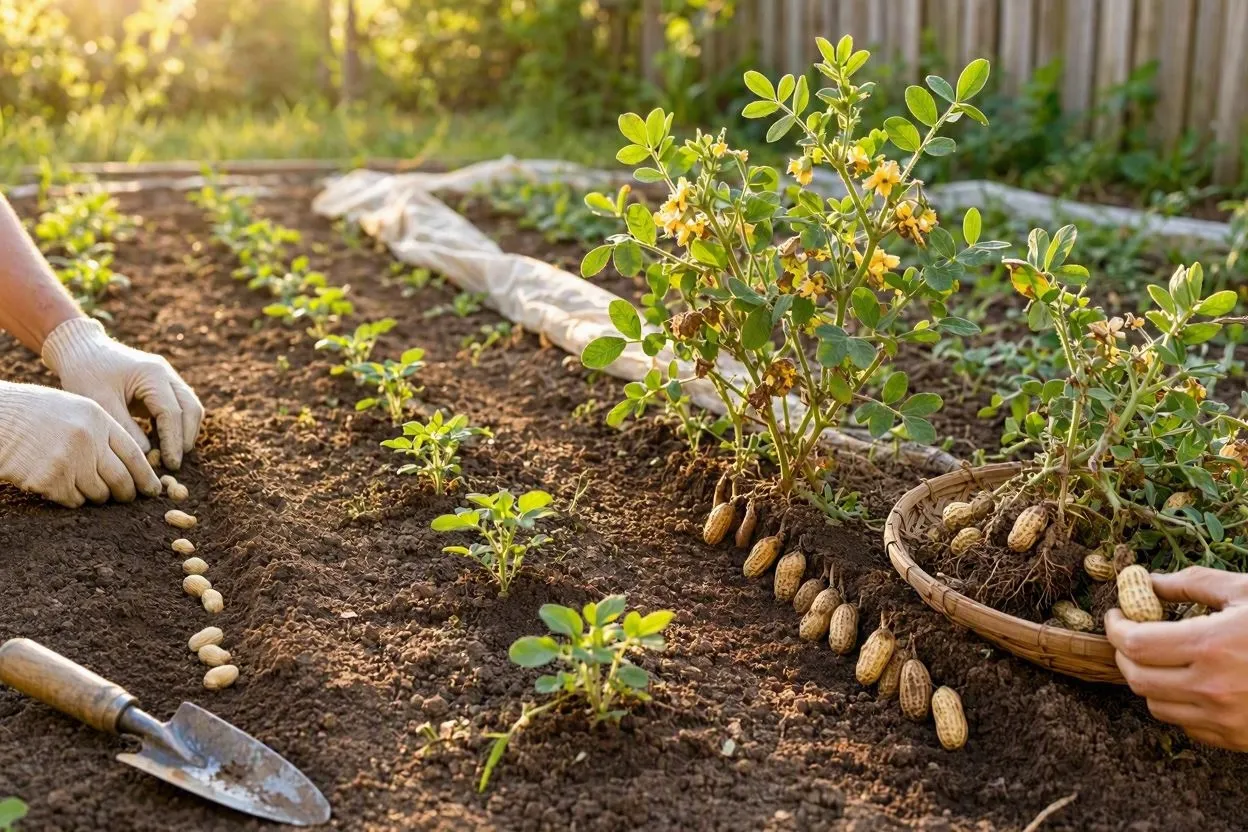
Plant seeds 1 to 2 inches (2.5 to 5 cm) deep and 6 to 10 inches (15 to 25 cm) apart, using raw, shelled seed peanuts rather than roasted grocery-store ones. Roasting kills the embryo, so your seed needs to come from a seed company, or at least be raw and unroasted. The setup shifts a bit depending on whether you’re planting in open ground, in a container, or pushing a short northern season.
| Method | Spacing | Depth/Container Size | Timing |
| In-ground | Rows 24–36 in (60–90 cm) apart; thin to 1 plant every 9–10 in (23–25 cm) | Loosen soil to 5 in (12.7 cm) deep | Direct sow once soil holds above 65°F (18°C) |
| Container | One plant per pot | Pot at least 18–20 in (46–51 cm) wide and 18 in (46 cm) deep, sandy potting mix | Same soil-temperature rule as in-ground |
| Northern climates | Transplants 9 in (23 cm) apart, rows 24 in (60 cm) apart | Start in 3 in (7.6 cm) pots, 2 seeds per pot | Start indoors 4–5 weeks before last frost; transplant after soil hits 65°F (18°C) |
In-Ground Planting
Loosen the soil to a depth of 5 inches (12.7 cm) before planting so roots and pegs have room to establish. Space rows 24 to 36 inches (60 to 90 cm) apart, and drop two to three seeds per spot to hedge against uneven germination. Once seedlings sprout, thin them to one plant every 9 to 10 inches (23 to 25 cm); crowded plants end up competing for the same underground space their pegs need.
Container Planting
A pot at least 18 to 20 inches (46 to 51 cm) wide and 18 inches (46 cm) deep will support one healthy plant through a full season. Fill it with a sandy, well-draining potting mix rather than dense garden soil, since compacted soil in a container blocks peg penetration the same way clay does in the ground. Water more often than you would in-ground; pots dry out fast, sometimes in a single hot afternoon at the height of summer.
Growing Peanuts in Northern Climates
Start seeds indoors in 3-inch (7.6 cm) pots, two seeds per pot, four to five weeks before your last expected frost. Transplant once soil temperatures hold above 65°F (18°C), which in Zone 6 usually means Memorial Day through early June. Space transplants 9 inches (23 cm) apart in rows 24 inches (60 cm) apart, and keep row cover or PVC hoops on hand in case a cold snap threatens the plants mid-season.
How to Care for Peanut Plants
Peanuts want moderate, consistent watering, a two-stage fertilizer schedule, regular hilling, and mulch to keep weeds off their shallow roots. Care changes once flowering starts, since that’s when pegs begin forming underground.
Watering
Water about once a week during the vegetative stage, then step it up slightly once flowering begins and pegs start pushing into the soil. Stop watering entirely around two weeks before harvest. That dry spell signals the plant to finish maturing its pods and keeps the peanuts from rotting in overly moist ground.
Fertilizing
Use a low-nitrogen fertilizer at planting; too much nitrogen just produces leafy growth at the expense of pods. Once flowering starts, switch to a calcium-rich fertilizer, sometimes sold as gypsum or “landplaster” at agricultural supply stores. This step supports pod fill, and it’s one a lot of home-gardening guides skip, even though commercial growers treat it as standard.
Mulching and Hilling
Once yellow flowers appear, usually 30 to 40 days after planting, mound soil gently around the base of each plant. This hilling gives the pegs a shorter, easier path into loose soil. Follow it with 2 inches (5 cm) of straw or leaf mulch to hold moisture and block weeds, which compete hard against peanuts’ shallow, sensitive roots.
Companion Planting
Corn, squash, and cucumbers all grow well next to peanuts, since their roots occupy different soil depths and don’t compete with the pegs. Skip planting peanuts near other legumes like beans or peas in the same bed year after year. Repeating legume families in one spot lets soil-borne diseases build up and affects the whole group.
Common Pests and Diseases in Peanut Plants
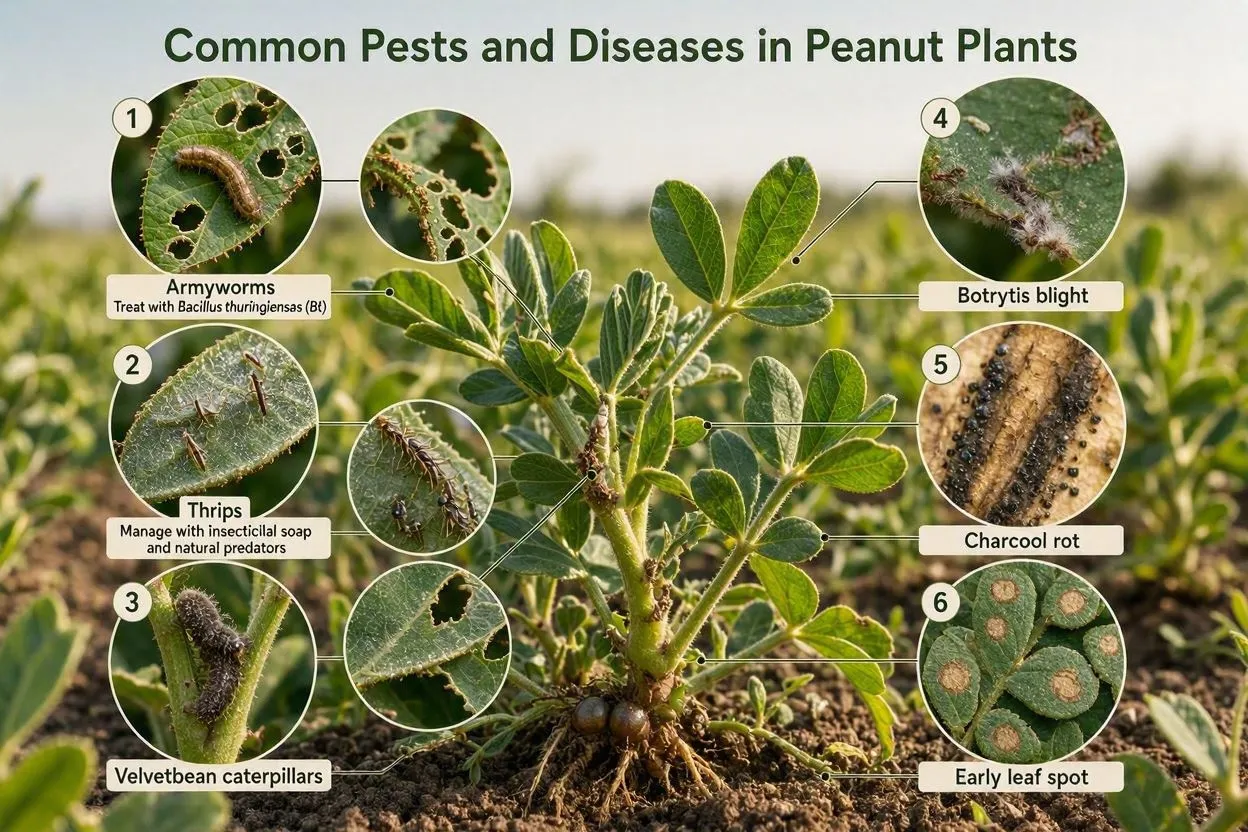
Watch for three common pests, armyworms, thrips, and velvetbean caterpillars, plus three diseases: Botrytis blight, charcoal rot, and early leaf spot. Catch any of these early and it stays a minor problem instead of spreading through the bed.
Pests:
- Armyworms chew closely grouped holes in foliage. Treat with Bacillus thuringiensis (Bt) and encourage natural predators like birds and beneficial wasps.
- Thrips leave leaves silvery and scarred. Keep peanuts away from grain fields and apply insecticide once you spot damage.
- Velvetbean caterpillars skeletonize leaves as they mature. Shifting your planting timing earlier or later in the season can disrupt their egg-laying cycle.
Diseases:
- Botrytis blight shows up as dark spots and fungal growth on stems and pods during wet, warm weather. Plant early to outrun frost, and apply fungicide preventively.
- Charcoal rot causes water-soaked lesions near the soil line that girdle and kill seedlings. Crop rotation and steady, moderate watering help prevent it.
- Early leaf spot appears as small dark flecks on leaves during humid stretches. Plow crop debris into the soil after harvest to cut down next season’s spore count.
When and How to Harvest Peanuts
Harvest 100 to 160 days after planting, once the foliage yellows and starts drooping rather than waiting for a hard frost. Wait too long and pods risk rotting underground or sprouting again in warm soil.
Loosen the soil around each plant with a spading fork, then lift the whole plant by hand so the pods stay attached to the roots. Shake off loose soil gently. Peanut roots and young pods bruise easily under rough handling. A single healthy plant yields 30 to 50 pods, roughly enough for two to three servings of roasted peanuts from one square foot of garden.
How to Cure and Store Homegrown Peanuts
Cure freshly harvested peanuts by drying the whole plant in the sun for about a week, then pulling the pods off and drying them further in a cool, dry space for two to three more weeks. Skip the cure and you’ll end up with peanuts that taste starchy and raw instead of developing that roasted flavor everyone expects.
Hang the whole plant upside down in a garage, shed, or covered porch for the first drying stage; this keeps the pods off damp ground and lets air move around them. Once the pods separate from the plant, spread them in a single layer on a screen or shallow tray, away from humidity, for the second stage. Store finished peanuts in a loosely woven bag or breathable container somewhere cool, dry, and rodent-free, and they’ll keep for months. Roasted, boiled, or raw, homegrown peanuts just taste fresher and nuttier than anything from a grocery store bag.
Best Peanut Varieties for Home Gardens
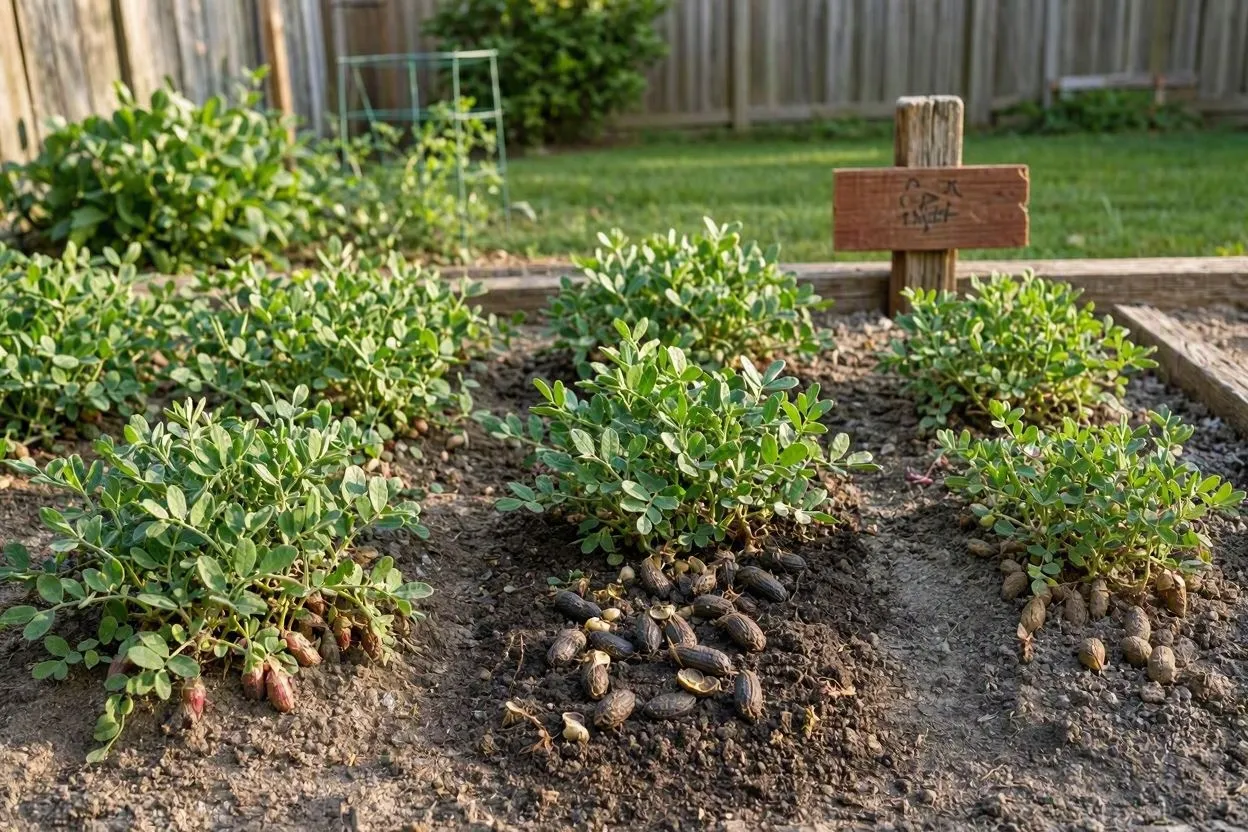
Tennessee Red Valencia and Schronce’s Deep Black are two of the fastest-maturing varieties, both ready in about 110 days, which makes them the go-to picks for northern or short-season gardens. Gardeners in the Deep South, with a longer frost-free window to work with, have more room to choose from Virginia, Runner, or Spanish types.
- Spanish peanuts mature quickly and handle cooler soil better than other types, which makes them a common pick for northern gardens and container growing.
- Valencia peanuts, including the Tennessee Red Valencia cultivar, produce three to six seeds per pod and are the type most often roasted and sold in the shell at fairs and ballparks.
- Runner peanuts dominate U.S. commercial production and give uniform, medium-size kernels, though their longer maturity window fits southern gardens better than northern ones.
- Virginia peanuts produce the largest kernels of the four types and are the ones most often sold as whole roasted peanuts, but they need close to 150 days to mature.
Seed companies like Southern Exposure Seed Exchange and Fruition Seeds carry several short-season varieties labeled specifically for northern gardens, which takes the guesswork out of matching a cultivar to your local frost date.
FAQs
Can peanuts grow in containers?
Yes. A container at least 18 to 20 inches (46 to 51 cm) wide and 18 inches (46 cm) deep, filled with sandy potting mix, will support one full-size plant through an entire season.
How long does it take to grow peanuts?
Anywhere from 100 to 160 days from planting to harvest, depending on variety. Short-season types like Tennessee Red Valencia mature in about 110 days.
Do peanuts need full sun?
Yes, six to eight hours of direct sunlight a day to flower, peg, and form pods normally.
Can peanuts grow in a northern climate?
Yes. Gardeners in Zones 5 and 6 can grow peanuts by starting seeds indoors four to five weeks before the last frost and choosing a 110-day variety.
Why aren’t my peanut plants producing pods?
The three usual culprits are cold soil below 65°F (18°C), heavy clay soil, and too much nitrogen fertilizer.
Conclusion
Growing peanuts at home comes down to four fixed requirements: warm soil, full sun, well-drained ground, and a growing season long enough to match the variety you’ve chosen. A gardener in Georgia can put a 150-day Virginia type straight in the ground with little fuss, while a gardener in Minnesota needs a 110-day Spanish or Valencia variety started indoors weeks ahead of transplant. Either way, the payoff’s the same: a plant that flowers above ground, buries its own fruit below it, and rewards a season’s patience with 30 to 50 fresh, homegrown pods.